Along with offering a vast library of themes to choose from, WordPress also provides you with the option to further customize the theme you selected. Although the stock appearance of your chosen theme might well be just fine, it is worth knowing how to customize it.
How to Customize Your WordPress Theme?
As with all other WordPress functions, the customization process is easy to learn and offers numerous layers of adding a touch of uniqueness to your site. Also, you can decide how many components you want to customize.
In this section, we will show you how to access the customization menu and access all the options it contains. Also, as we progress with this guide, we will learn how to use every single option in the Customization tab.
Step 1: To open the customization tab, simply enter the WordPress admin panel and head to the Sidebar. From there locate the Appearance button and hover your mouse over it. This will open a new menu. From there click on Customize:
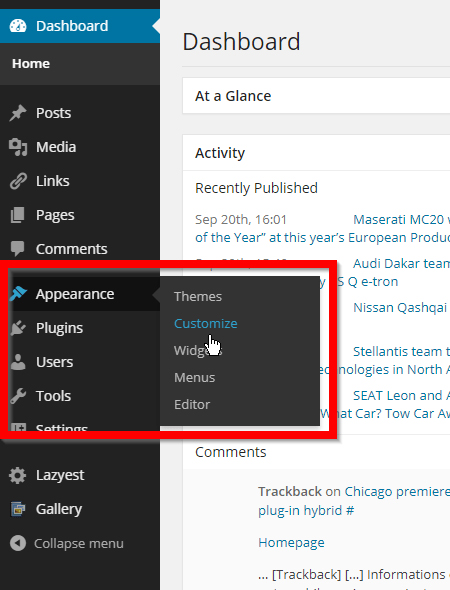
A new menu will appear:
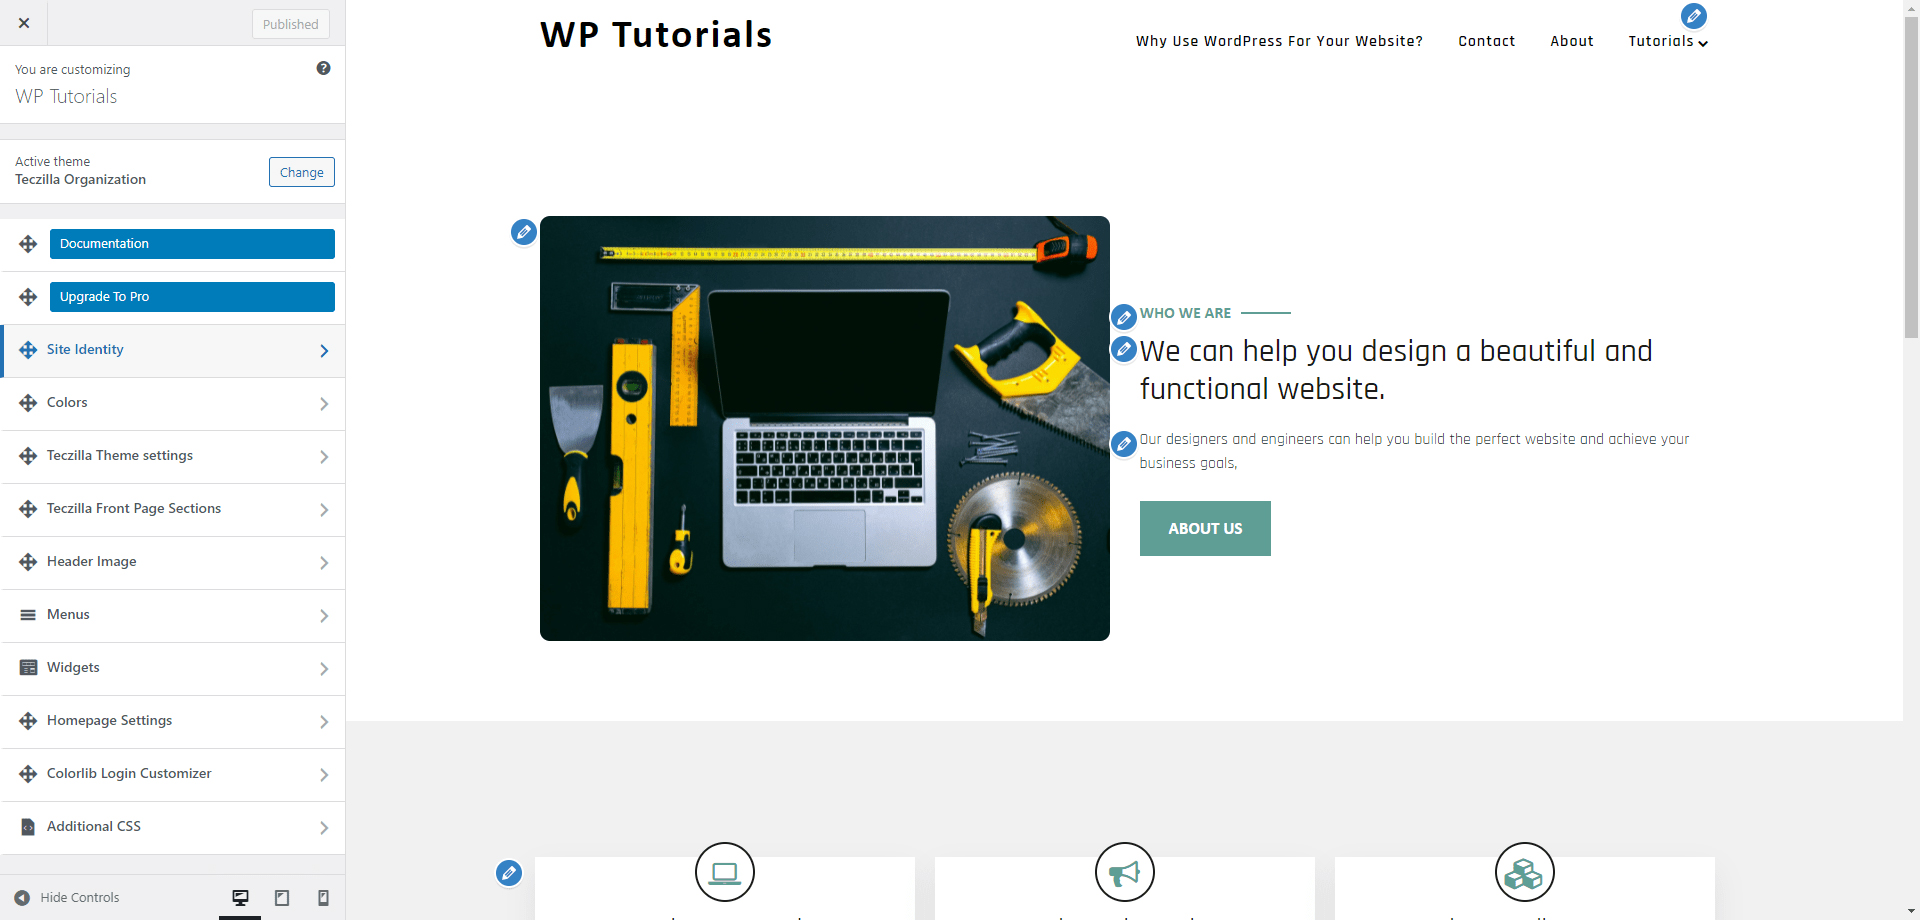
From here, you can change the theme’s images, texts, fonts, menus, and buttons. You can also change their places and overall layout.
The first thing we will do is to change the site’s main title and then we will add a subtitle.
Change the Headline of the Main Page
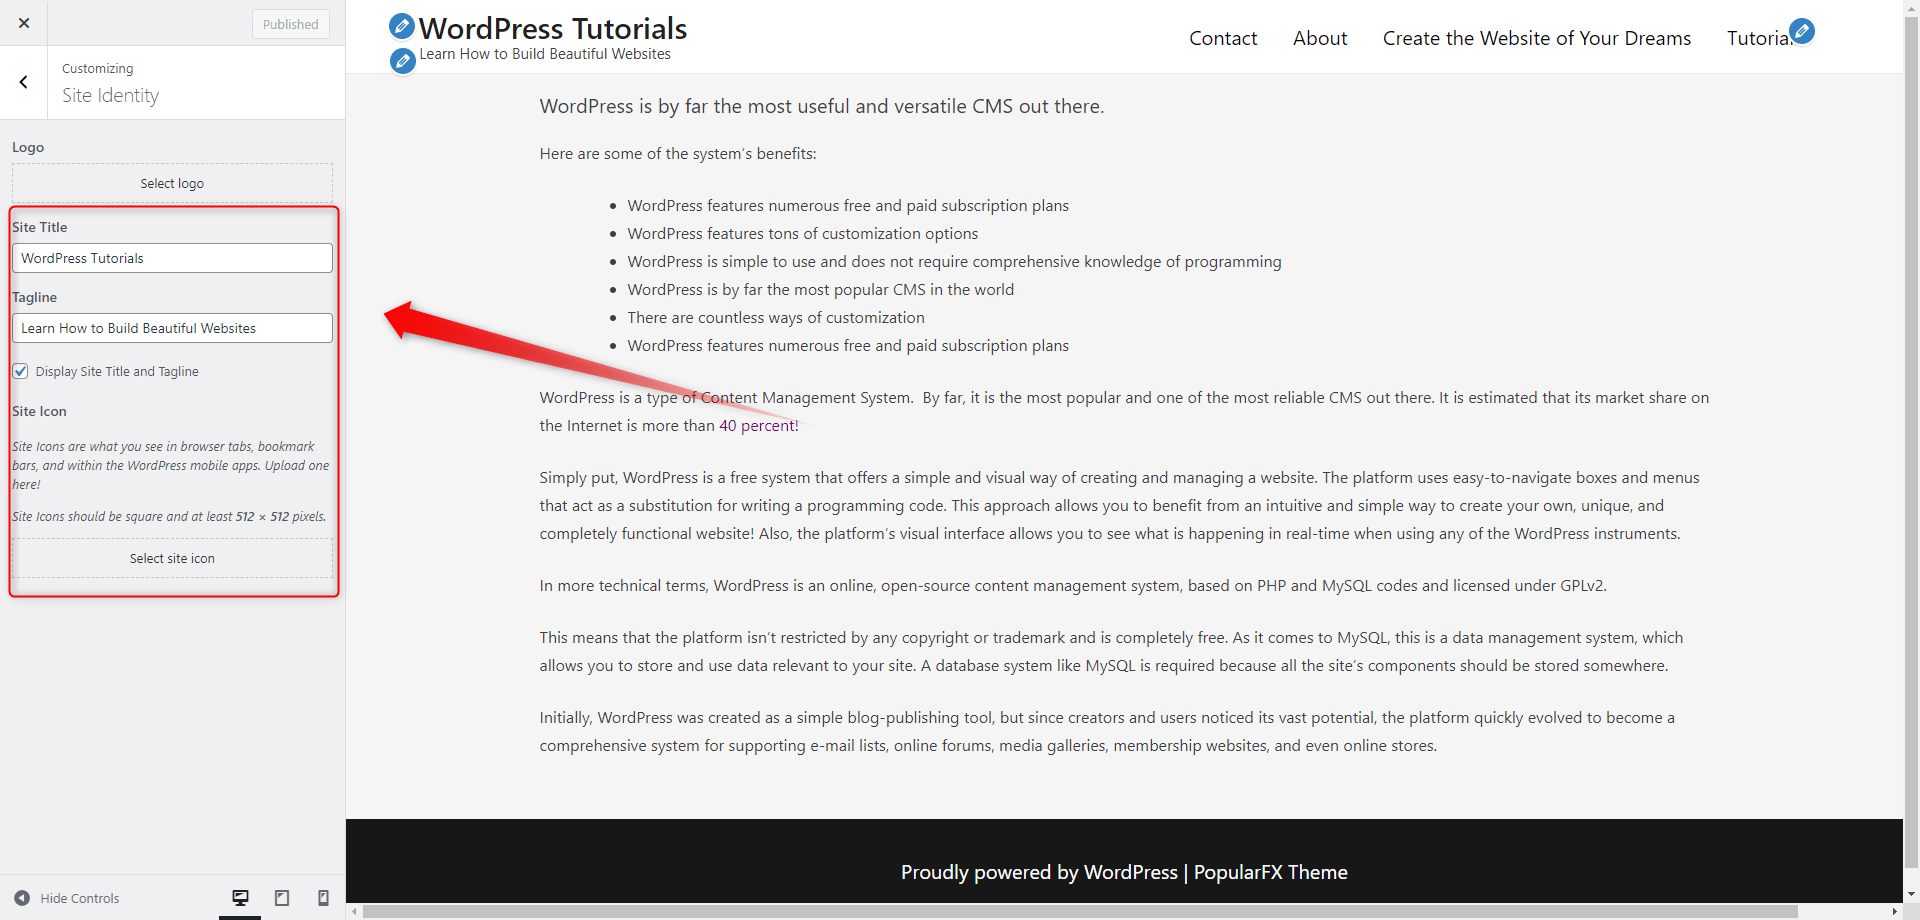
While you are in the customization menu, head towards General Settings and then click on Site Identity. This will open the customization options for the Headline.
When you come up with a Site Title and Tagline that you like, type them down and click on the blue Publish button at the top of the page:
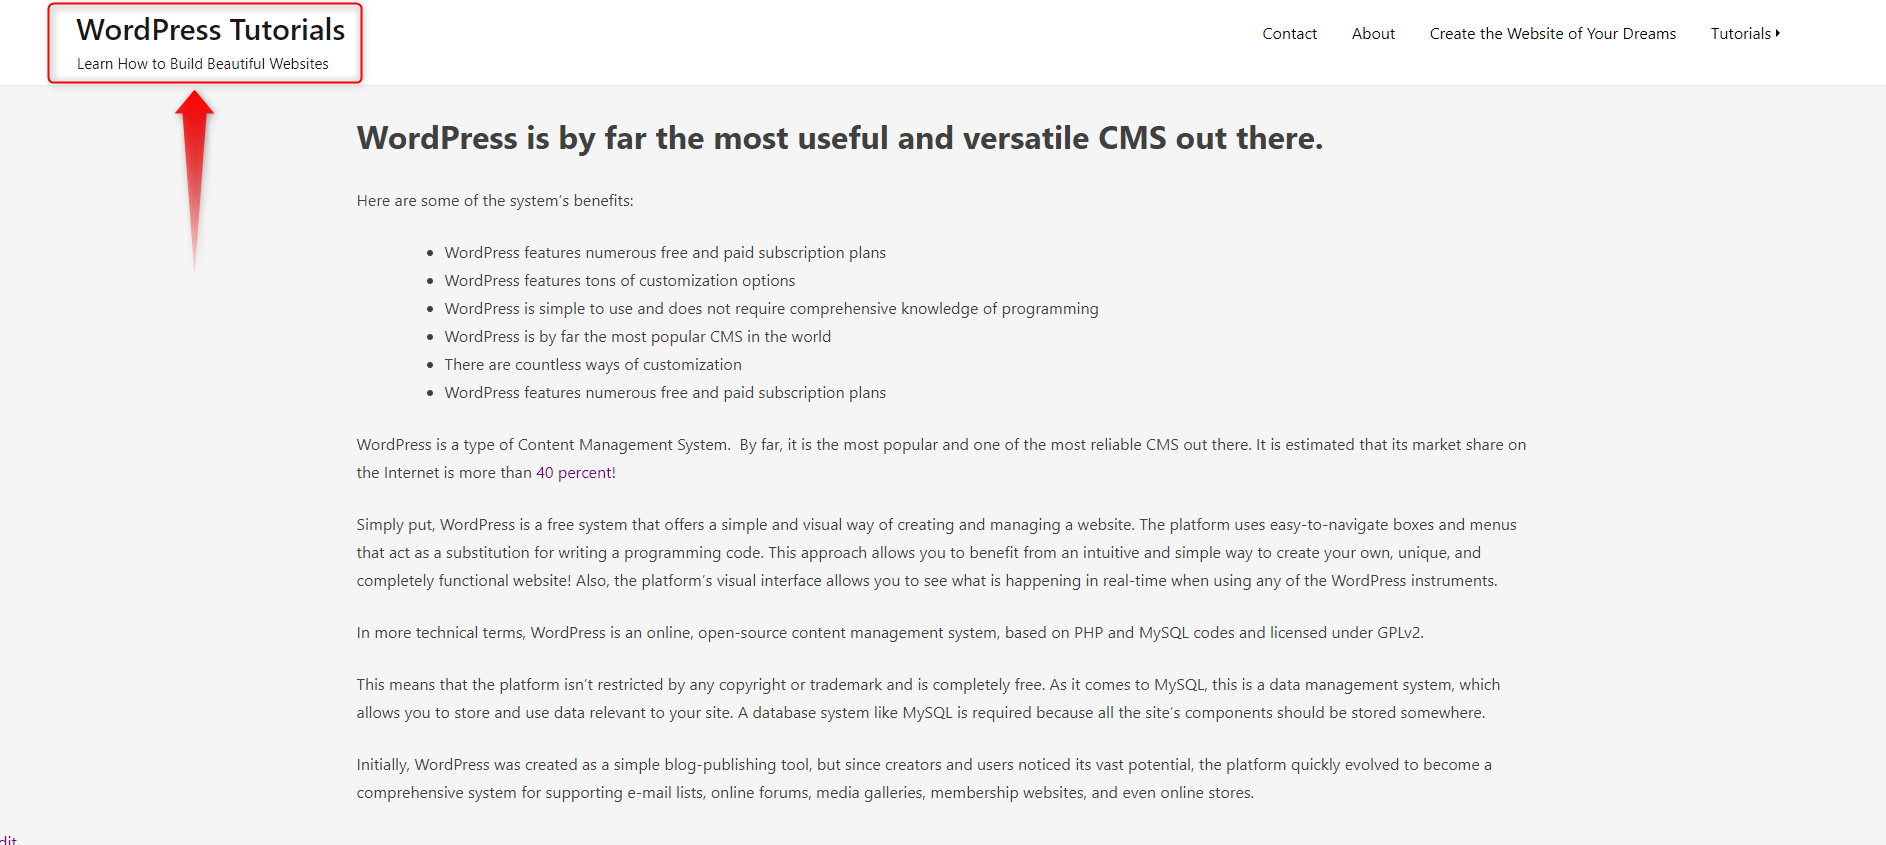
When you do so, the Title and Tagline will change to your preferences:
Change the Background of Your Site
Adding an image to your site is a quick and effective way to improve the overall aesthetics of your pages. Here’s how you can do so.
Step 1: First, go to the Customization menu and then enter once again click on Background Image:
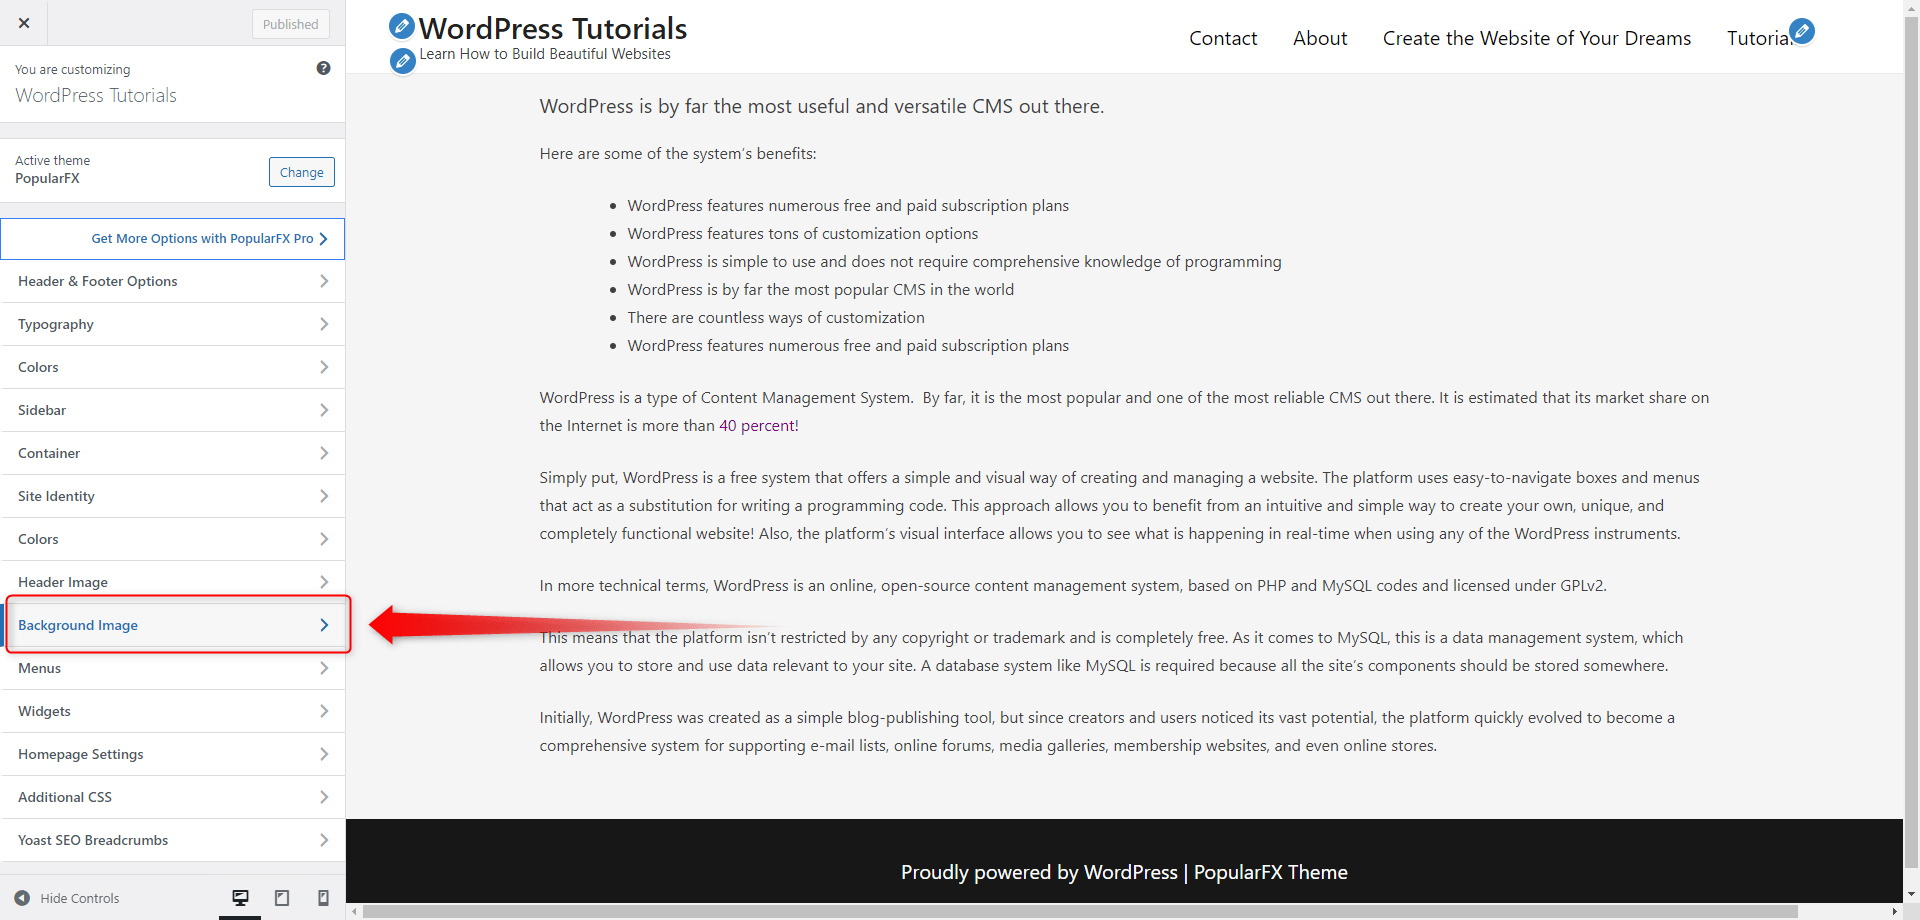
This will open the Gallery menu from where you will be able to select and upload images that you can use on your website:

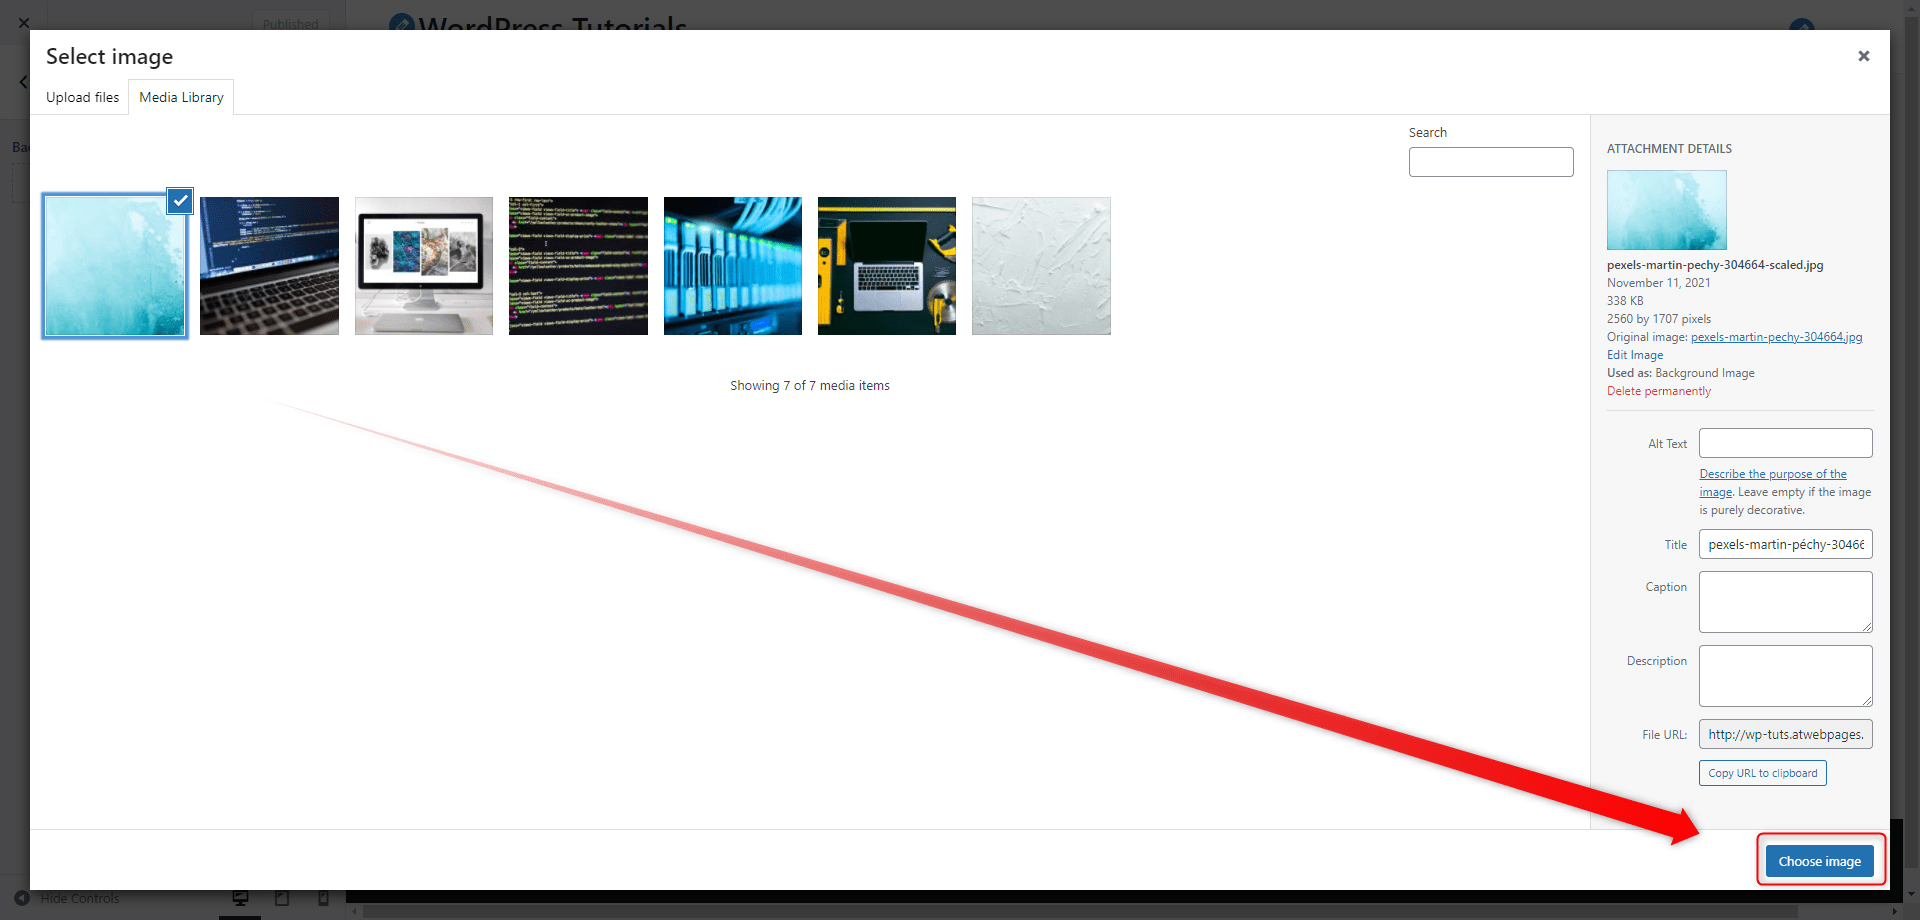
You can upload an image from your computer by going to the Upload Files -> Select Files -> Choose Image. The uploaded image will then appear in the Media Library section.
For this demonstration, we chose a quite neutral and light-colored image. As always, you can select any image of your liking.
Step 2: Select the image you’ve uploaded and click on the blue Choose Image button at the corner right of the screen:
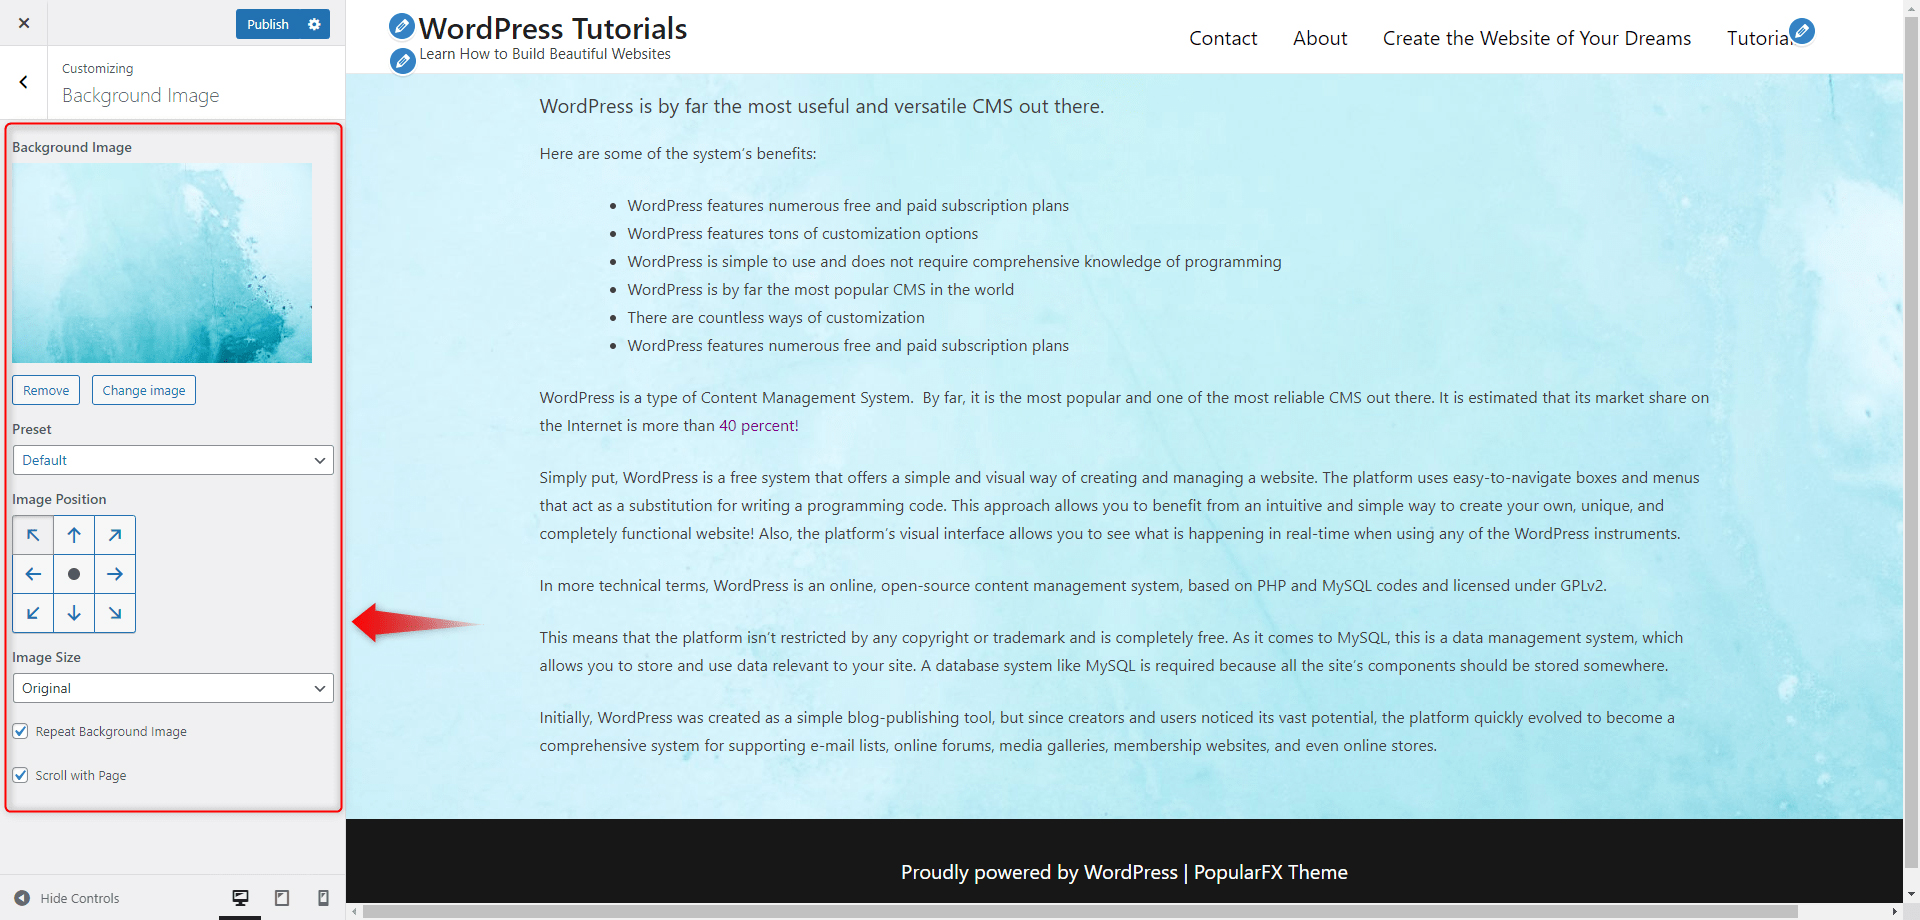
This will immediately apply the image as a background to all of your web pages. You can adjust it with the menu on the left:
Once you have adjusted the image to your liking, click on the blue Publish button at the top left of the screen:
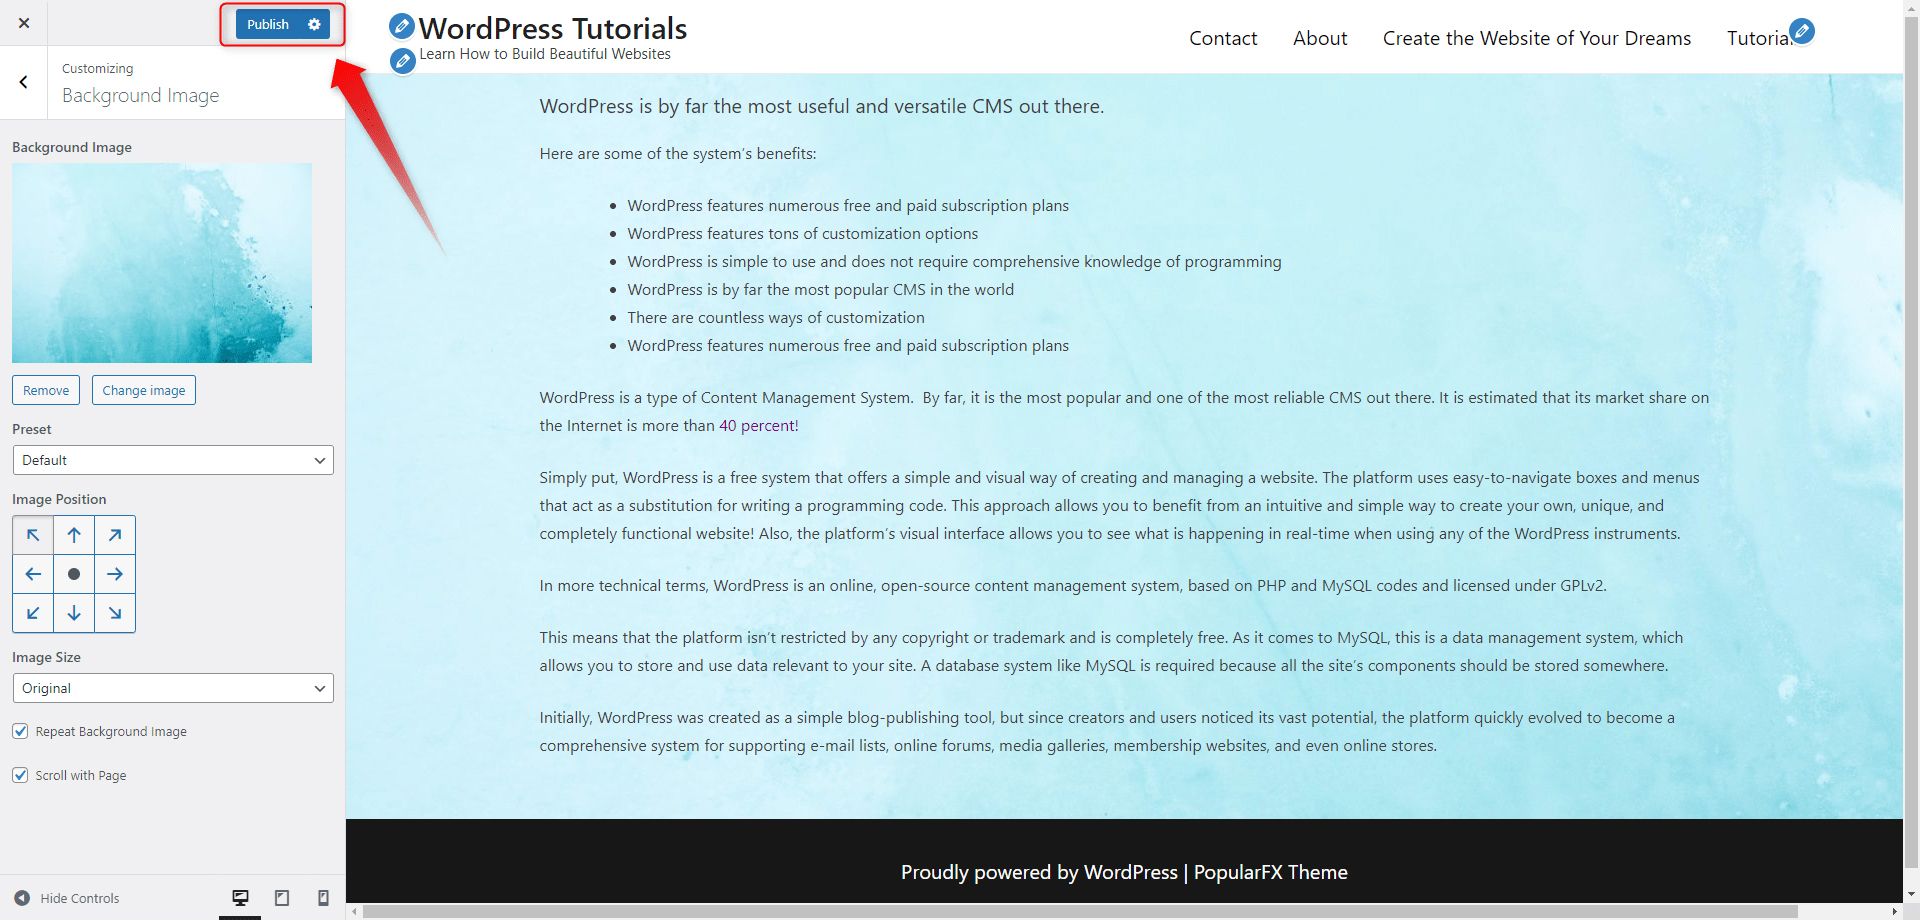
Now, let’s enter the website and see how it looks!
Spend some time and browse all the settings on the Customize page. Experiment with different approaches and try out different things – this is a fun and effective way to see what works for you and what – does not!
With some more tweaks we achieved this result:
See also: How to Use the WordPress Media Library
Conclusion
WordPress themes are an essential component of any website and allow you to modify all aspects of your site’s style and many functional elements. With WordPress themes, you can create anything from a minimalistic blog to a fully operational e-commerce website.
Learn the WordPress fundamentals and start crafting beautiful and fully functional websites with our new and easy-to-follow guide! Also, check out our hosting services and build your site today!