What you need to know:
One of the more underappreciated features of the WordPress Block Editor is the ability to create reusable blocks. These are blocks that are already prefilled with your desired content. Reusable blocks are managed in a post-like fashion through the WordPress Reusable Blocks Manager. You can access the WordPress Reusable Blocks Manager via the three-dot button at the end of Gutenberg’s Top Toolbar.
Have you ever found yourself typing the same text in every post that you create? Or are all of your pages containing the same elements in the same order? If you answered “yes” to at least one of those questions and you are still manually recreating this content, then this tutorial is for you. Here, we’ll go over what reusable blocks are and how they can improve your productivity.
Table of Contents:
- What Is Gutenberg?
- What Are WordPress Reusable Blocks?
- How Can I Access the Reusable Blocks Manager in WordPress?
- How to Create a Reusable Block
- How to Edit a Reusable Block
- How to Delete a Reusable Block
- How to Insert a Reusable Block
- How to Publish a Reusable Block
- How to Unpublish a Reusable Block
- How to Export or Import a Reusable Block
- Conclusion
What Is Gutenberg?
Gutenberg, also known as the WordPress Block Editor, is the default way of creating new content in WordPress and is the successor to the classic post editor. You can access Gutenberg by creating or editing a post, page, or a widget. If you have not used Gutenberg in the past, we recommend familiarizing yourself with the document editor by learning its basics as well as its interface.
Tip:
Don’t have your own website yet? Consider taking advantage of our free hosting plan or one of our premium WordPress hosting packages and installing WordPress in just a few minutes.
What Are WordPress Reusable Blocks?
WordPress uses blocks to encapsulate each piece of content that appears on your posts and pages. There are different block types available such as paragraphs, headings, images, quotes, code, etc, and all of them are stored in the WordPress Block Library.
The great thing when it comes to blocks is that you can mark any of them as reusable. When a block is marked as reusable, the reusable version of the block will store the original block’s content. This allows you to easily and quickly insert elements that you wish to have present on every page.
Tip:
The thing that makes reusable blocks truly powerful is the fact that you can mark an entire block pattern or any group of blocks as reusable. As a result, it is possible to insert entire page sections with a single click.
How Can I Access the Reusable Blocks Manager in WordPress?
The WordPress Reusable Blocks Manager is the spot where you can manage your reusable blocks, just like you would your pages or posts. In fact, the Reusable Blocks Manager is based on the post/page manager. To access the Reusable Blocks Manager, follow the steps below:
- Open Gutenberg by creating a post or a page or editing an existing one.
- Click on the three-dot icon at the end of the Top Toolbar
- Choose the Manage Reusable blocks option.
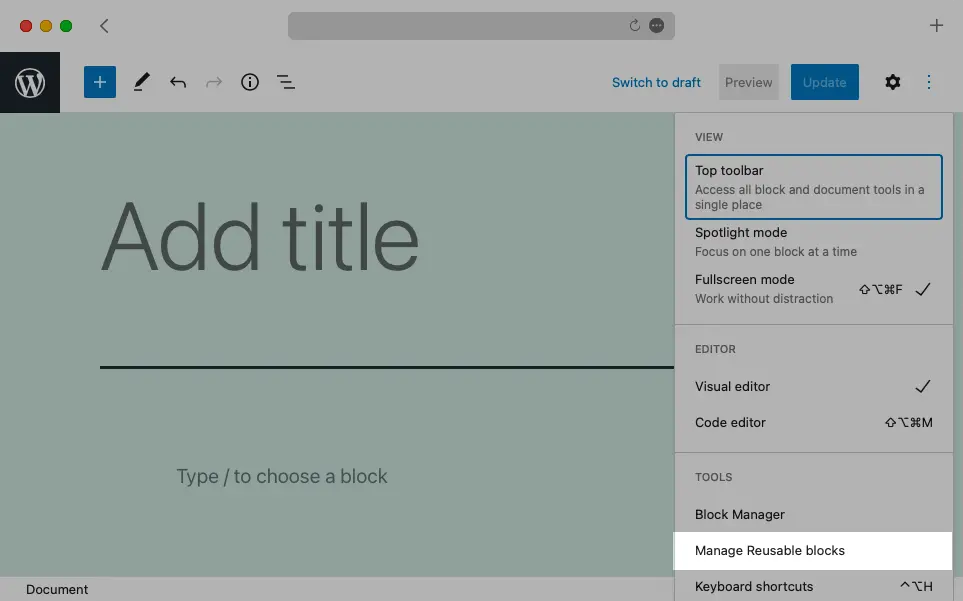
The WordPress Reusable Blocks Manager can be accessed through Gutenberg.
Tip:
A less elegant but faster way of accessing the WordPress Reusable Blocks Manager is to enter the following address after your domain name:
/wp-admin/edit.php?post_type=wp_block
How to Create a Reusable Block
There are two ways to create a reusable block in WordPress. You can either create a reusable block from scratch from the WordPress Reusable Blocks Manager or by marking an existing block as reusable inside one of your documents. We’ll explore both approaches below.
Via the WordPress Reusable Blocks Manager
You can create a new reusable block through the Reusable Blocks Manager in WordPress by following these steps:
- Open the Reusable Blocks Manager.
- Click on the Add New button.
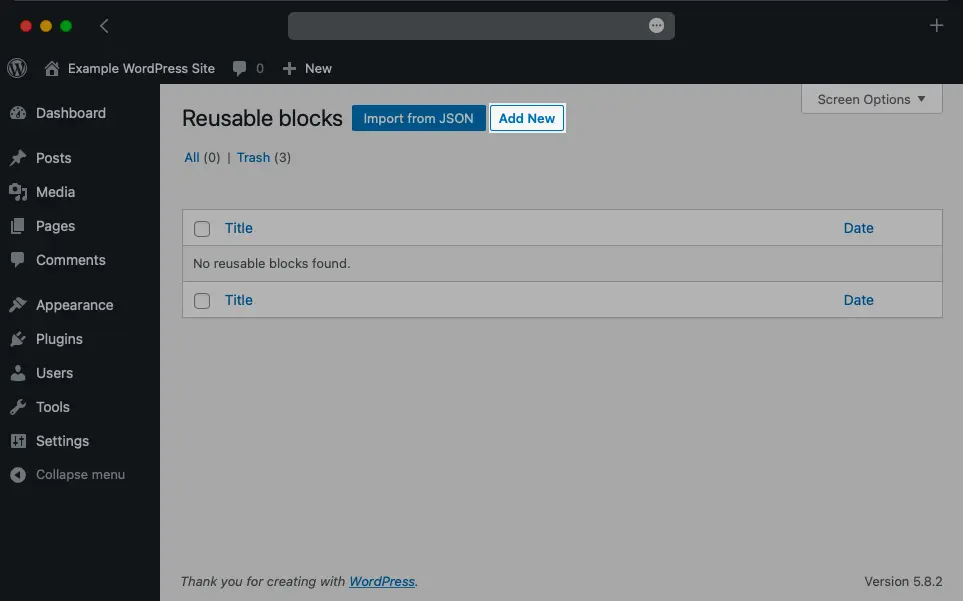
You can create a new reusable block from the Reusable Blocks Manager in WordPress by pressing the Add New button.
- You will be taken to the Gutenberg interface. However, this interface is dedicated to the creation of your reusable block.
- Give a name to your reusable block in the Title field.
- Use the document body to construct your reusable block. Use as many blocks or block patterns from the Block Library as you need.
- When you are happy with the results, press the Publish button to create your reusable block. If asked for confirmation, press the Publish button a second time.
By Marking a Block as Reusable
The other more intuitive way of creating a reusable block is to simply mark a block as reusable as soon as you create it while working on a post or a page. To mark a block as reusable, follow the steps below:
- Select the block that you wish to mark as reusable.
- Click on the three-dot button at the end of the Contextual Toolbar.
- Choose the option called Add to Reusable blocks.
- Give a name to your reusable block and press the Save button.
Gutenberg allows you to mark a block as reusable right as you are creating it.
Tip:
You are allowed to mark multiple blocks as reusable at the same time. Just make sure to select all of them before using the Add to Reusable blocks option from the Contextual Toolbar.
How to Edit a Reusable Block
It is possible to edit a reusable block in two ways: either through the WordPress Reusable Blocks Manager or inline while creating a post or a page in Gutenberg. We’ll cover both approaches.
Important:
Editing a reusable block will affect all instances of that reusable block across all of your documents! This includes your published posts and pages.
Using the WordPress Reusable Blocks Manager
To edit a reusable block using the Reusable Blocks Manager in WordPress, follow these steps:
- Open the Reusable Blocks Manager.
- Hover your mouse cursor over the reusable block that you wish to alter and choose the Edit option.
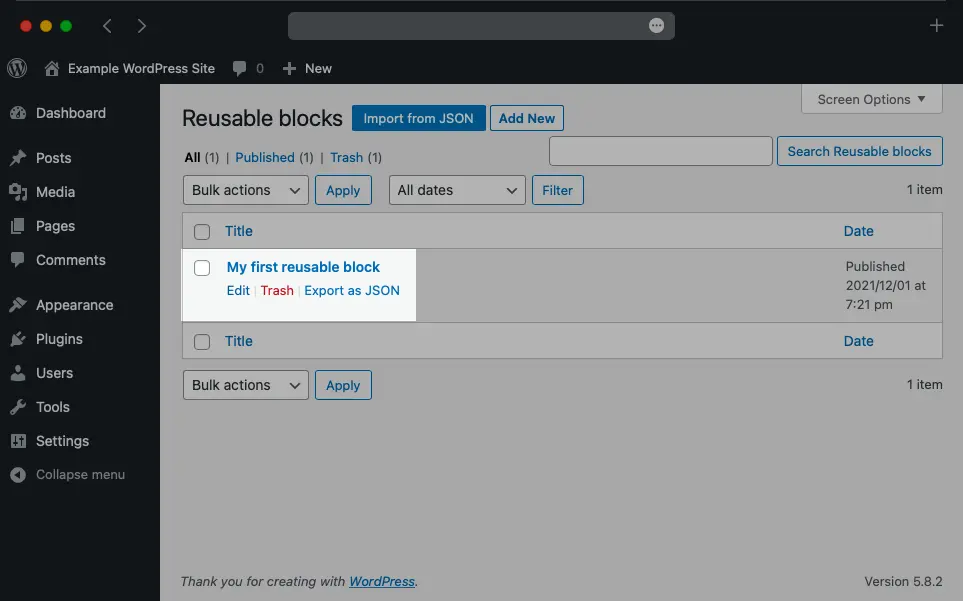
You can choose to edit a reusable block through the Reusable Blocks Manager.
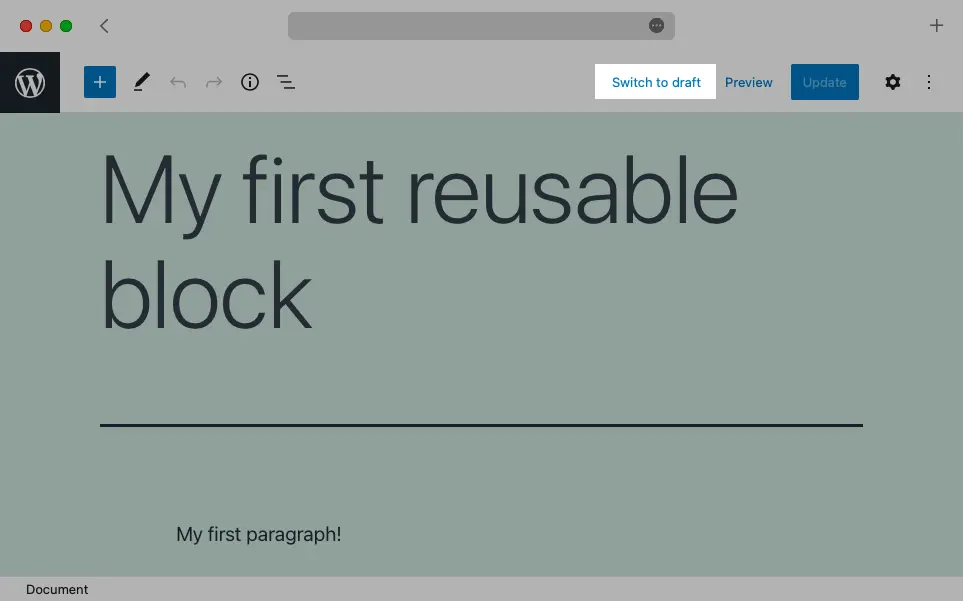
- You will be taken to Gutenberg. Make your changes and press the Update button to save them.
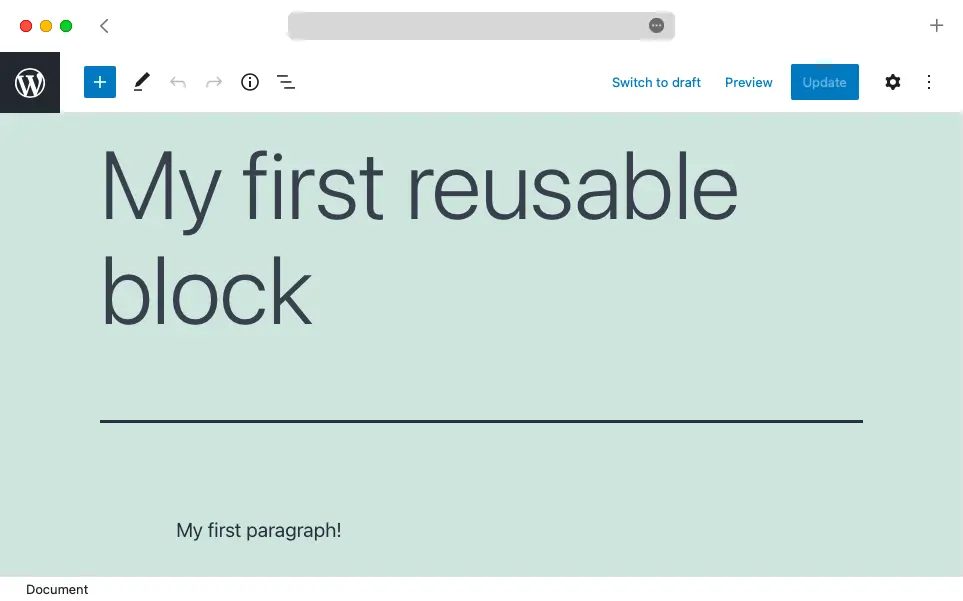
WordPress allows you to edit your reusable blocks through the Gutenberg editor.
Inline in Gutenberg
If your document contains a reusable block, you can edit it in the same way you would edit a regular block. Simply select it and make your changes.
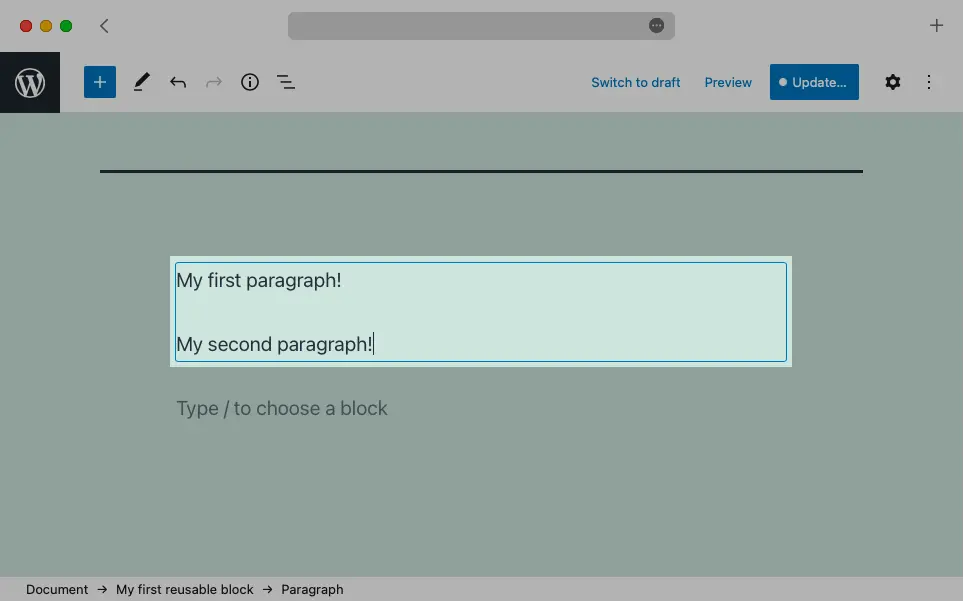
Gutenberg allows you to edit your reusable blocks right alongside your regular ones in a document.
You will also notice a blue outline that shows you the reusable block scope. You can expand it by inserting new blocks within this blue outline.
Warning:
Although you are editing the reusable block in one specific document, the changes will be applied to all documents where this same reusable block is present.
How to Delete a Reusable Block
You can delete a reusable block in WordPress using the Reusable Blocks Manager. To perform the deletion, follow the steps below:
- Open the Reusable Blocks Manager.
- Hover your mouse cursor over the reusable block that you wish to delete and choose the Trash option.
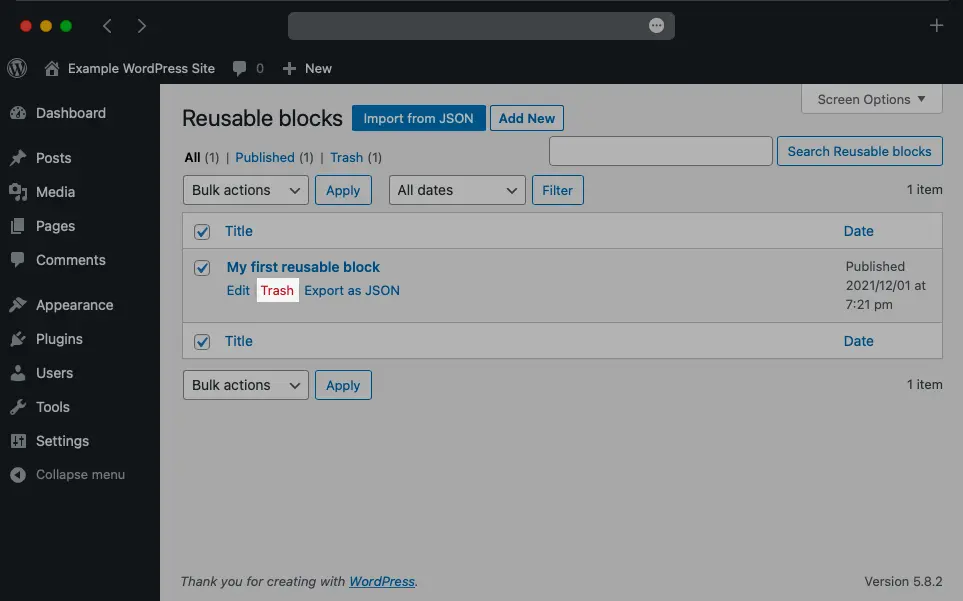
WordPress allows you to delete reusable blocks in the same manner as posts and pages.
How to Insert a Reusable Block
It is possible to insert a reusable block in your document either through the Block Library or through a keyboard shortcut. Continue reading to find out about both methods.
Via the WordPress Block Library
Inserting a reusable block through the Block Library in WordPress is a straightforward process:
- Open the document where you wish to insert a reusable block.
- Press the “+” button from the Top Toolbar to access the WordPress Block Library.
- From there, switch to the Reusable tab.
- And finally, drag a reusable block out of the library and place it in your document.
You can insert reusable blocks through the Block Library in Gutenberg.
Tip:
You can also click on the reusable block and it will be inserted where your text cursor is positioned.
Via a Keyboard Shortcut
Another way of inserting reusable blocks in your documents is via a Gutenberg keyboard shortcut. Here are the steps to perform this shortcut:
- Start with an empty paragraph block.
- Press
/. - Start typing the name of the reusable block.
- As soon as the reusable block gets highlighted, press the
Enterkey.
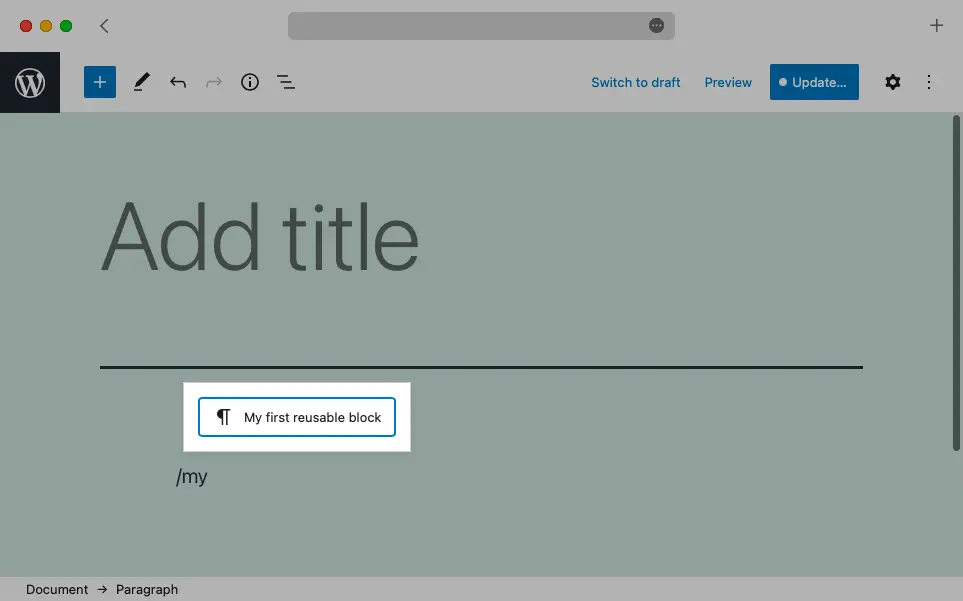
You can insert reusable blocks via a keyboard shortcut.
How to Publish a Reusable Block
If you have a reusable block saved as a draft, you will not be able to use it in your documents. To fix this, you would need to publish it by following the steps below:
- Open the Reusable Blocks Manager.
- Click on the reusable block that you wish to publish.
- Once the Gutenberg interface loads, press the Publish button. If asked for confirmation, press the Publish button a second time.

Reusable blocks are published in the same way as posts and pages.
How to Unpublish a Reusable Block
Unpublishing reusable blocks can be helpful when you haven’t finished constructing a reusable block and you don’t want it to show up in the Block Library. To unpublish a block, perform the steps below:
- Open the Reusable Blocks Manager.
- Click on the reusable block that you wish to unpublish.
- Once the Gutenberg interface loads, press the Switch to draft button.
Reusable blocks are unpublished in the same way as posts and pages.
How to Export or Import a Reusable Block
All reusable blocks allow you to import and export them as JSON files. This can be handy for backup purposes and also if you wish to copy a reusable block from one WordPress site to another.
To export a reusable block in WordPress, follow these steps:
- Open the Reusable Blocks Manager.
- Hover your mouse cursor over the reusable block that you wish to export and choose the Export as JSON option.
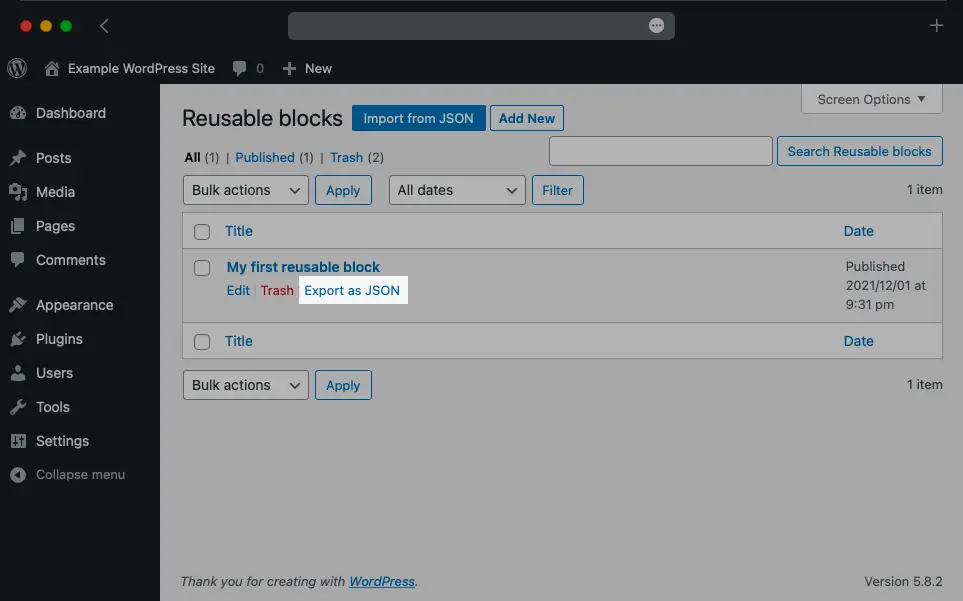
You can export a reusable block with a single click from the Reusable Blocks Manager.
To import a reusable block in WordPress, follow these steps:
- Open the Reusable Blocks Manager.
- Click on the button named Import from JSON.
- Choose the file that you wish to import.
- Press the Import button.
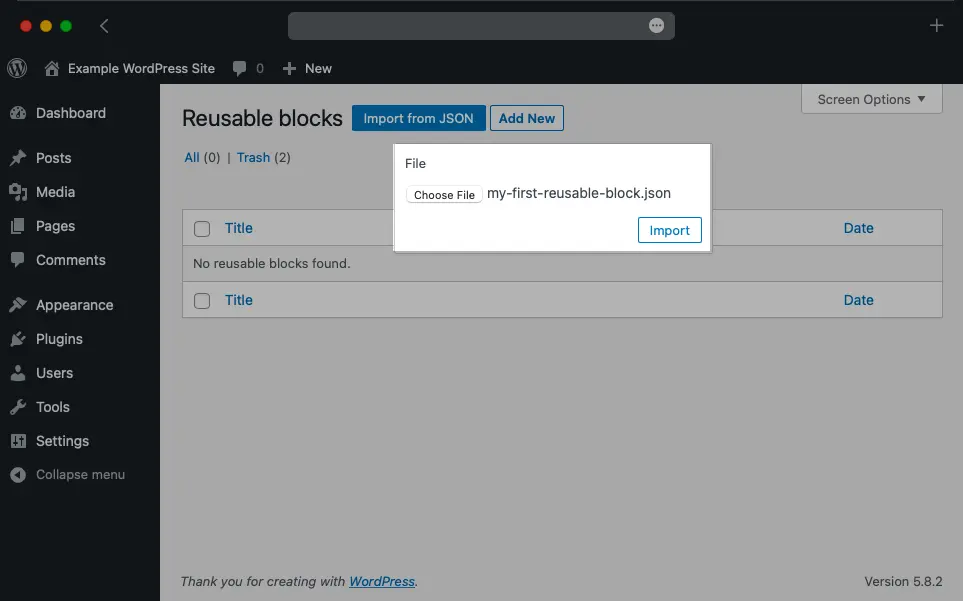
You can import a reusable block with just a few clicks from the Reusable Blocks Manager.
Tip:
Did you know that you can import additional Gutenberg blocks via third-party plugins? You can learn more on the subject by reading our article on the best plugins for WordPress that add new blocks.
Conclusion
Reusable blocks are a great way to optimize and streamline your content creation workflow. Once you mark the various elements that you use regularly as reusable blocks, you will be able to insert them into new documents with just a click. What is more, if you ever need to make a change to a reusable block, you can do so from a single place and this change will take effect across all of your pages and posts.
If you like this type of workflow optimization, we recommend checking our guide on how to customize the Gutenberg interface and also our list of the best plugins for the WordPress Block Editor.