Tabs are quite useful in numerous situations and can be a fresh addition to your WordPress websites.
Massively used to showcase content categories, news, and various other types of posts in a very structured manner, tabs contribute to making your site content more easily readable and user-friendly to interact with.
Because of how useful tabs can be, in the following paragraphs, you will read how to use them on your website via Gutenberg Block Editor.
How to Add Tabs to Your WordPress Site with Gutenberg
The first thing you should do is to make sure that Gutenberg is set as your default editor. To do so, enter your WordPress admin dashboard.
Once you have entered the admin panel, head to Settings->Writing:
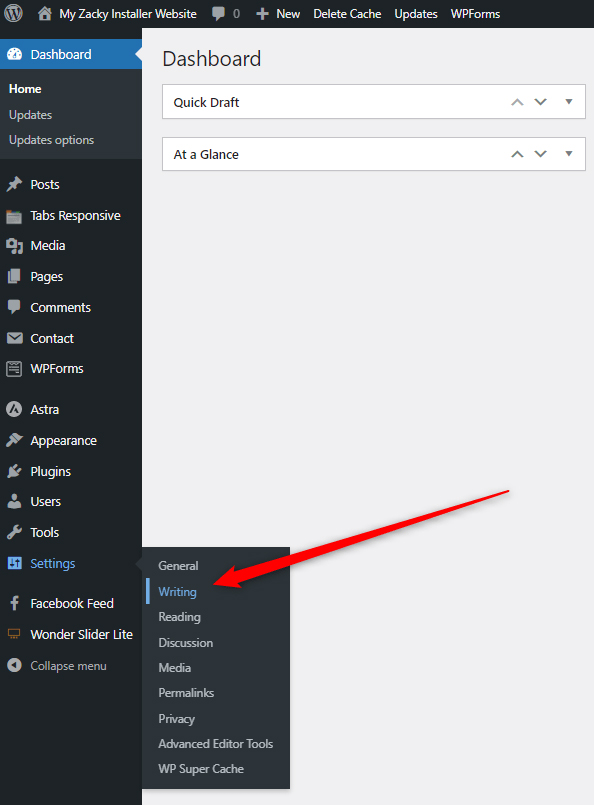
Clicking on Writing will prompt WordPress to open a page such as this:
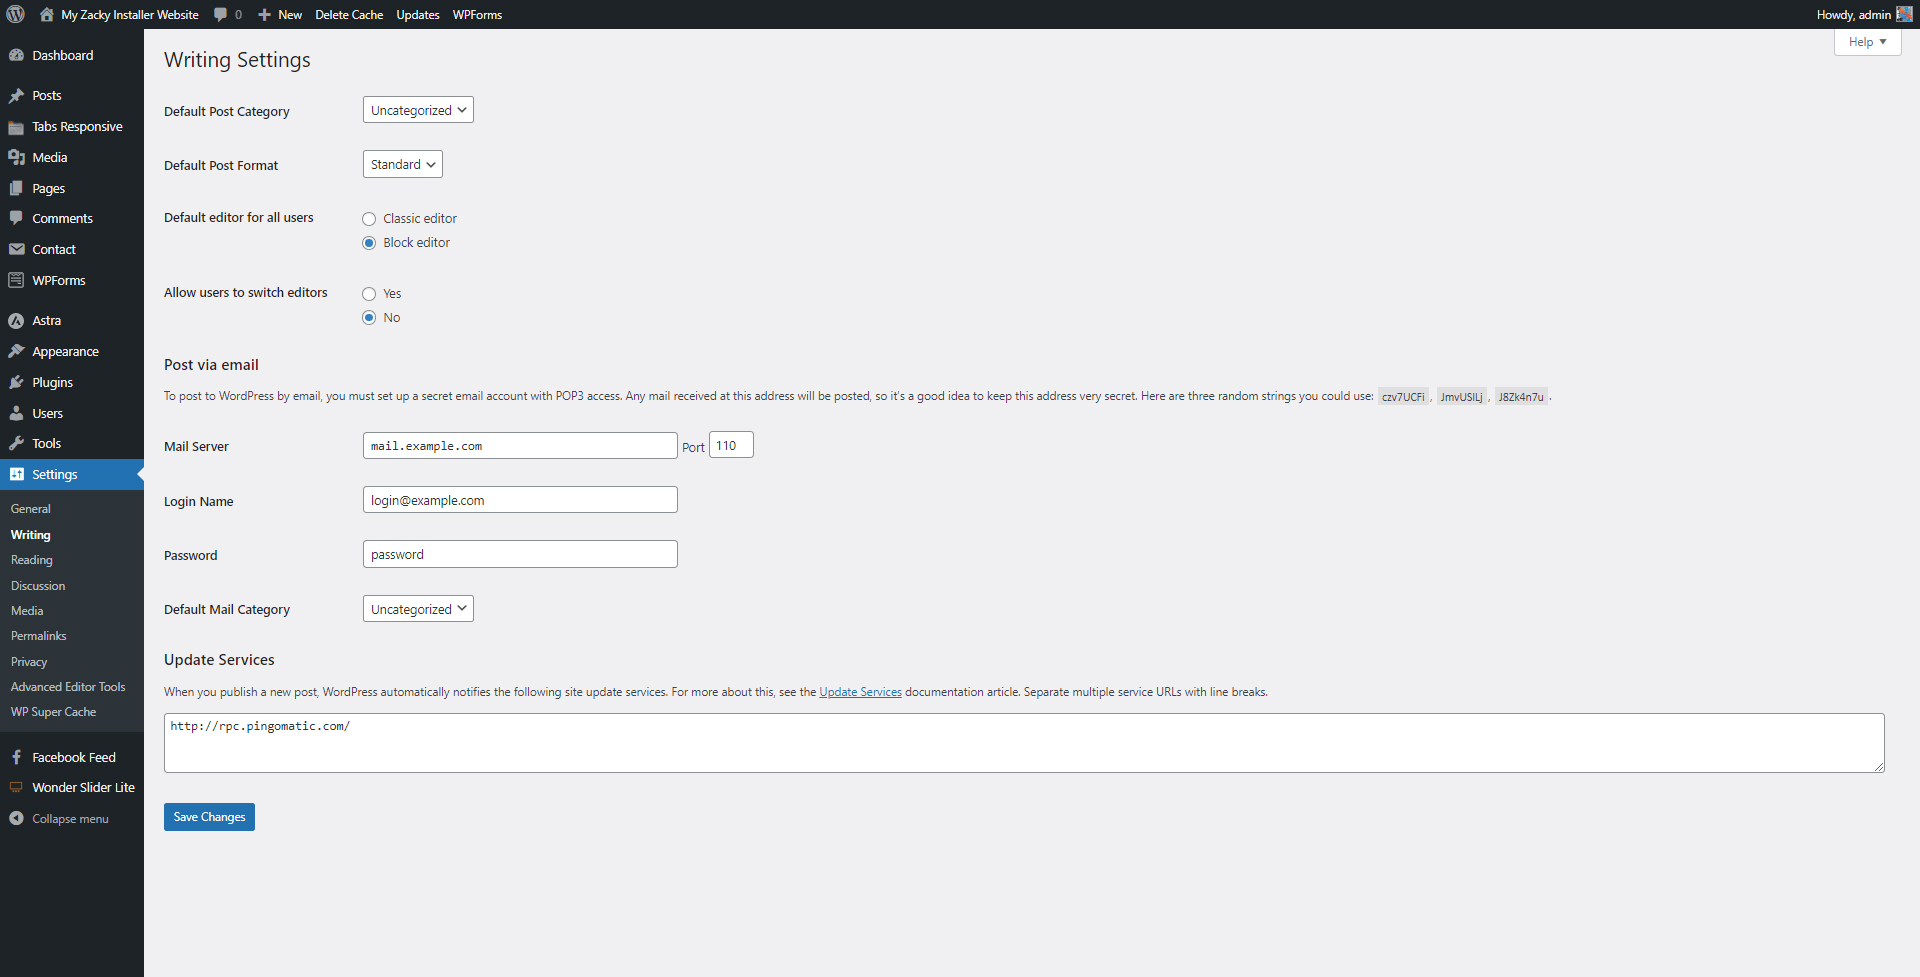
On this page search for the Default editor for all users options:
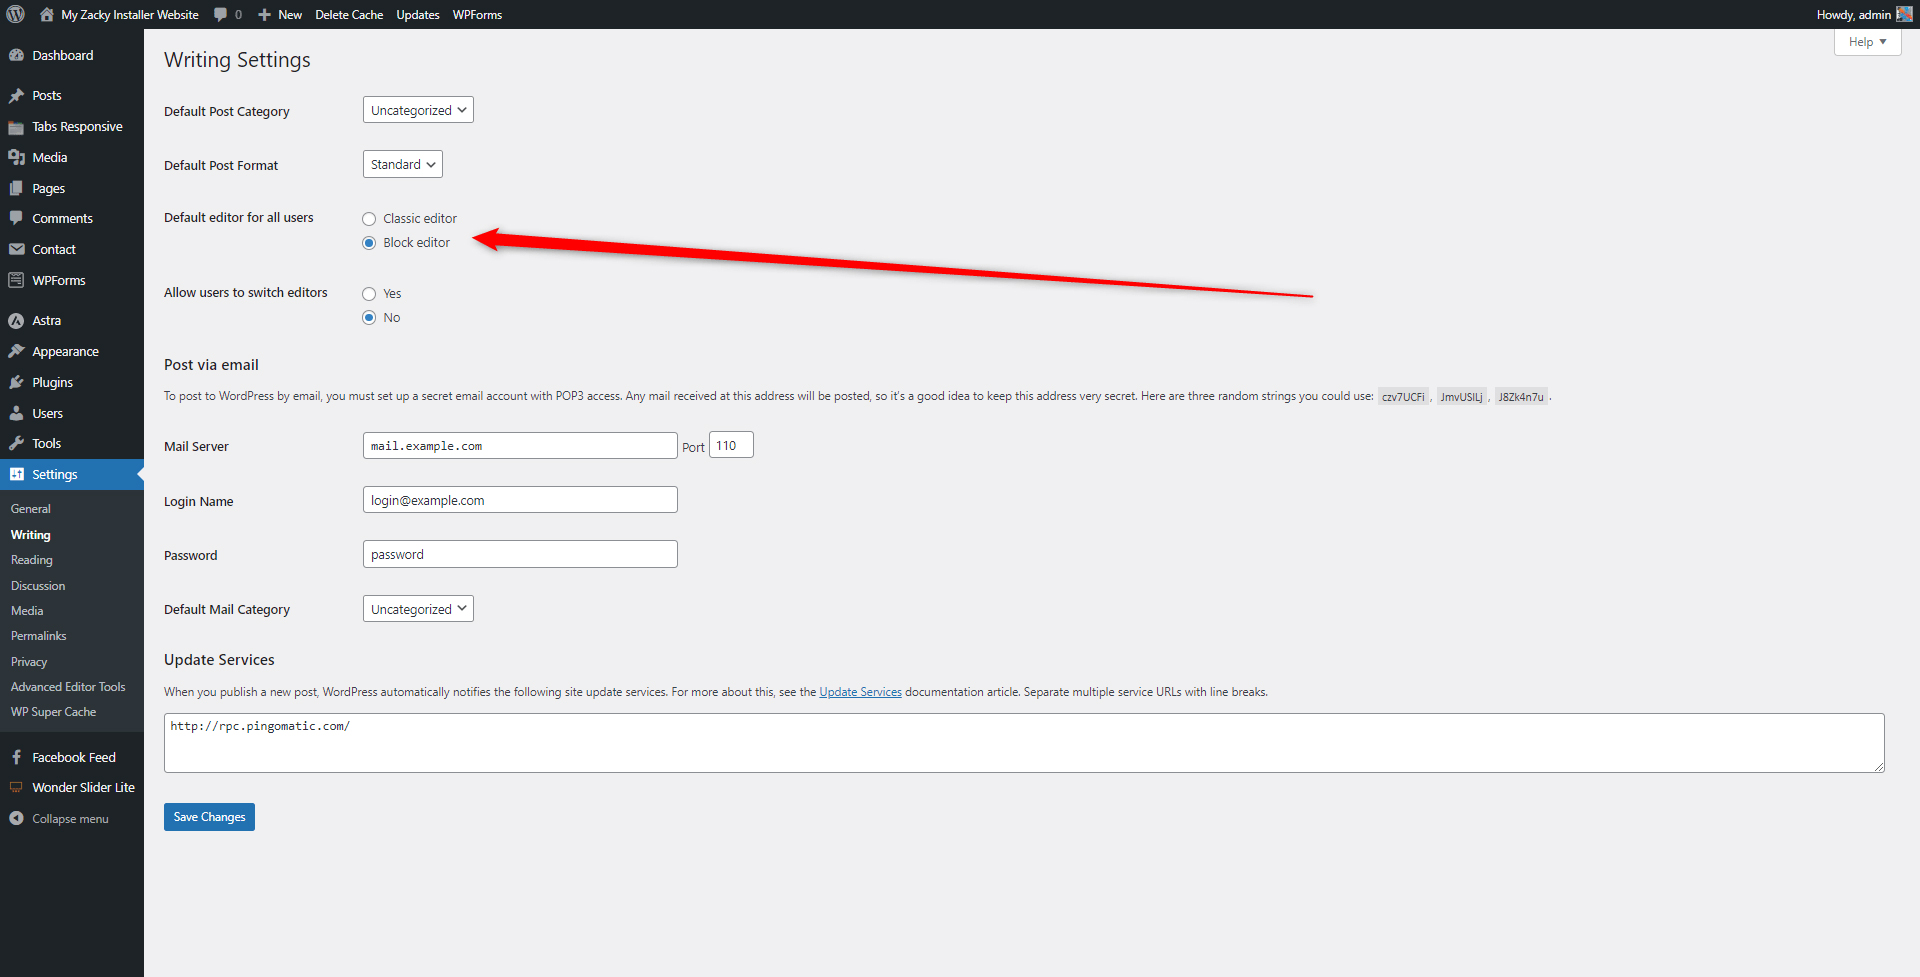
Once you find the default editor settings, select Block Editor:

Once you do, click on the blue Save Changes button located at the bottom left of the screen:

Now that you have activated Gutenberg, it is time to proceed forward and read how to add tabs to your site content.
Although there are numerous ways to add tabs to your site content, it is highly advisable to use WordPress plugins that are compatible with the Block Editor, as by far, this is the fastest, easiest, and most efficient way to include such functionality in any WordPress website.
More precisely, using Gutenberg plugins is great because:
- Such plugins are very user-friendly.
- You can use various code snippets.
- Can be applied to blog posts, static pages, and widgets.
- Most plugins come with a wide array of styling options.
There are numerous handy plugins that you can use to design and use tabs on your site. Browse the plugin library and install the one that best fits your needs.
If you are not sure what plugins are or how to use them, then have a look at our comprehensive article explaining everything about WordPress plugins:
For this demonstration, we will be using Tabs Responsive – a simple yet effective tabs plugin, completely compatible with Gutenberg Block Editor.
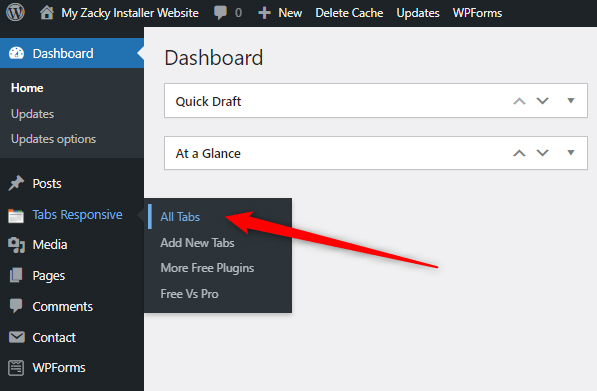
Once you have installed and activated a suitable plugin, it is time to start crafting the tabs. To do so, via the plugin’s settings, open the new tab setup section. Should you use the plugin we are using, you can do so by going to Tabs Responsive->Add New Tabs:
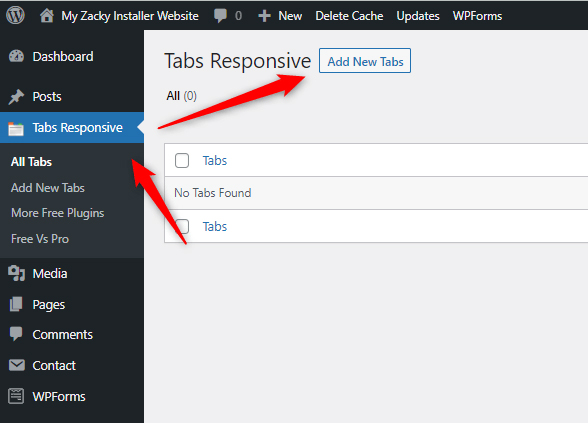
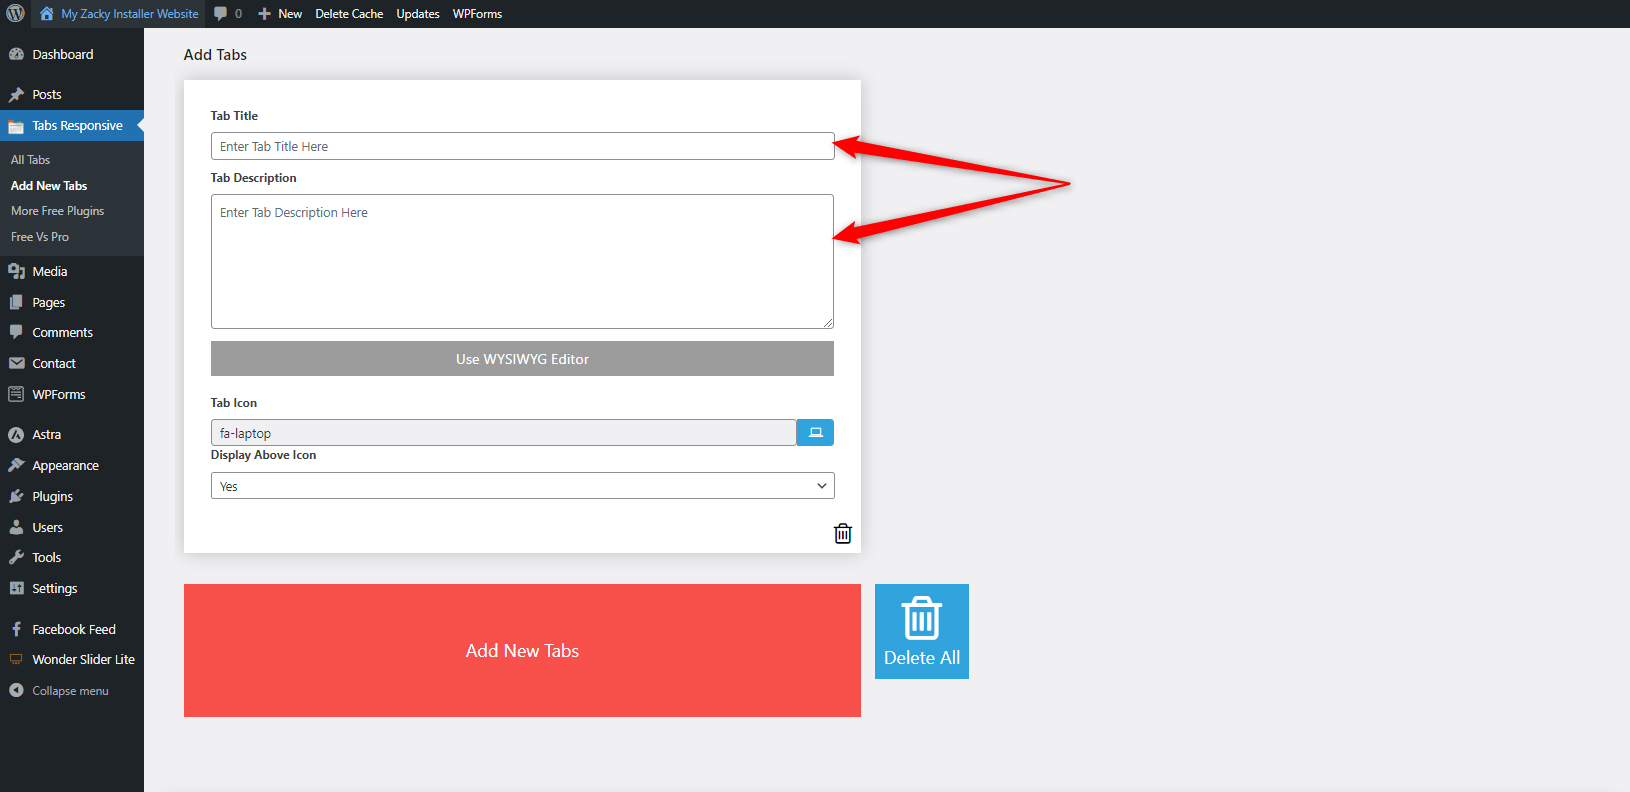
Then, add a new tab by clicking on the large red Add New Tabs button:

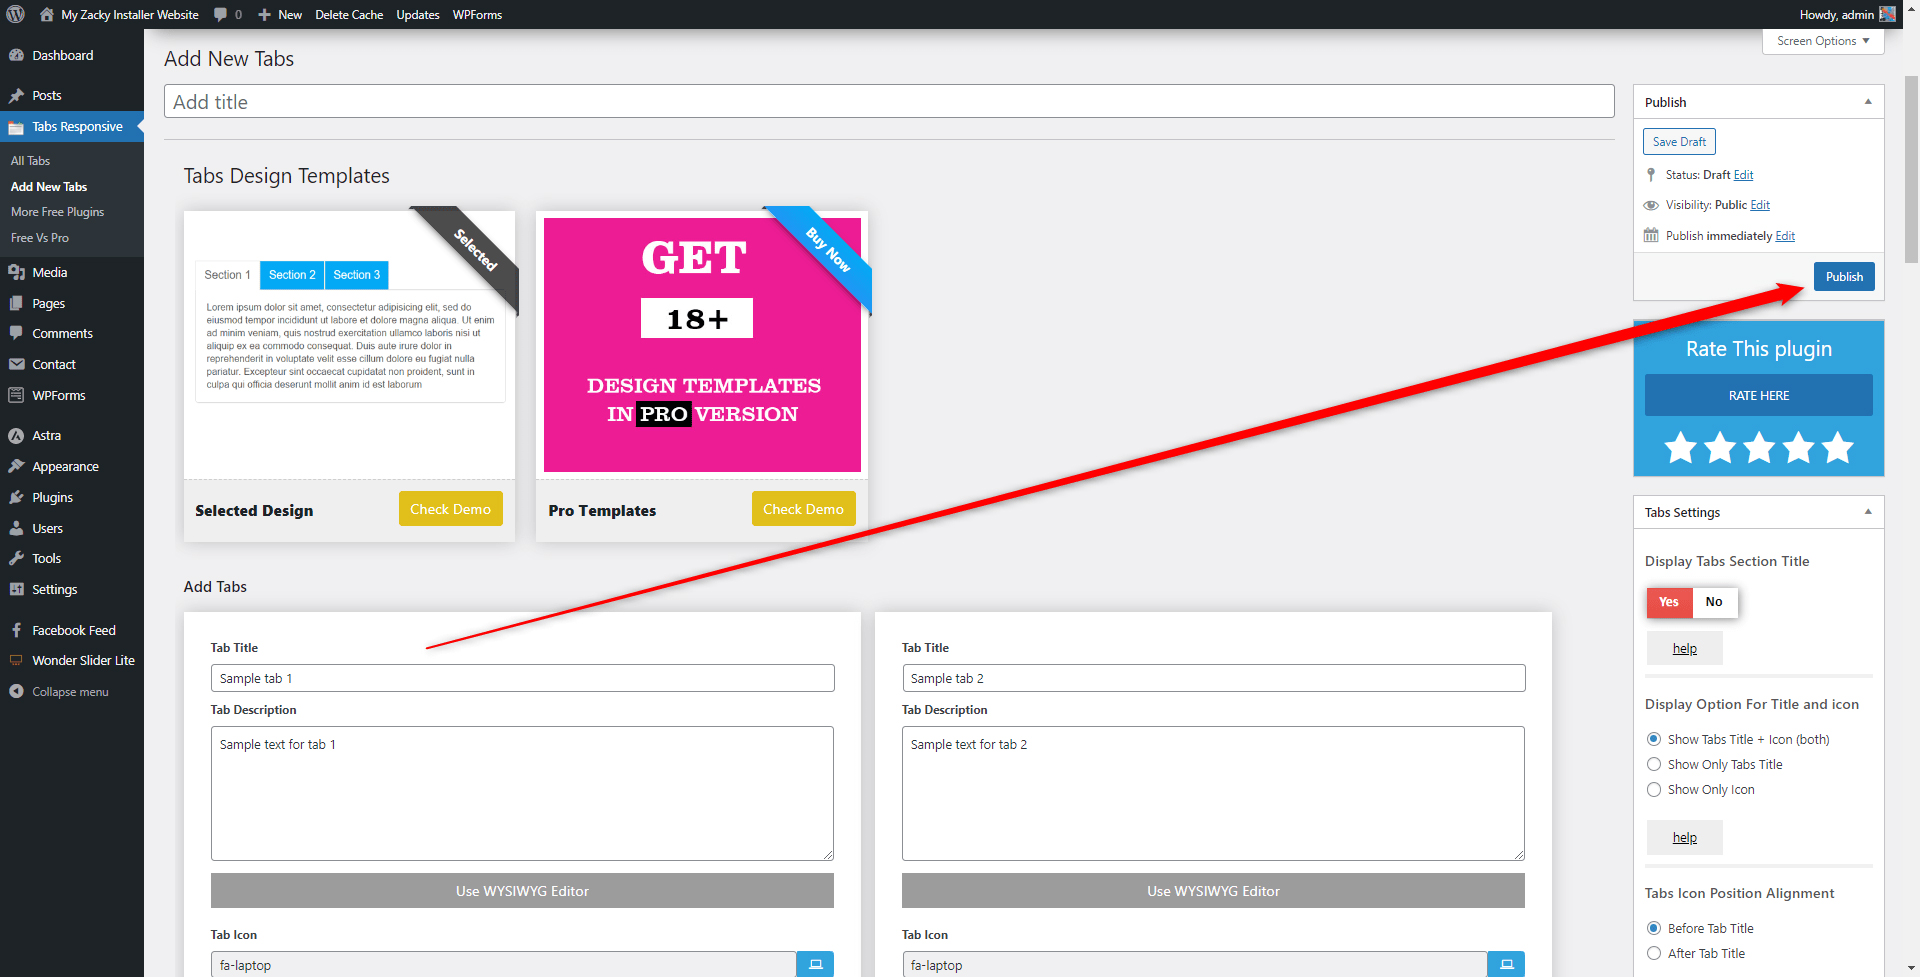
Clicking the button will prompt WordPress to display a new section in which you can add your tab details such as title and description:
Add as many tabs as you need and then click on the blue Publish button at the top right of the screen, so WordPress applies and saves your settings:
Now that you have published your first tab set, it is time to add it to a page. To do so, open the list with all published tabs and copy the Tab Shortcode.
Should you use Tabs Responsive, you can find the Shortcode by simply going to Tabs Responsive->All Tabs:
Clicking on All Tabs will open a list of all your saved tab sets. In our case, there’s only one, but you can create as many as you wish:
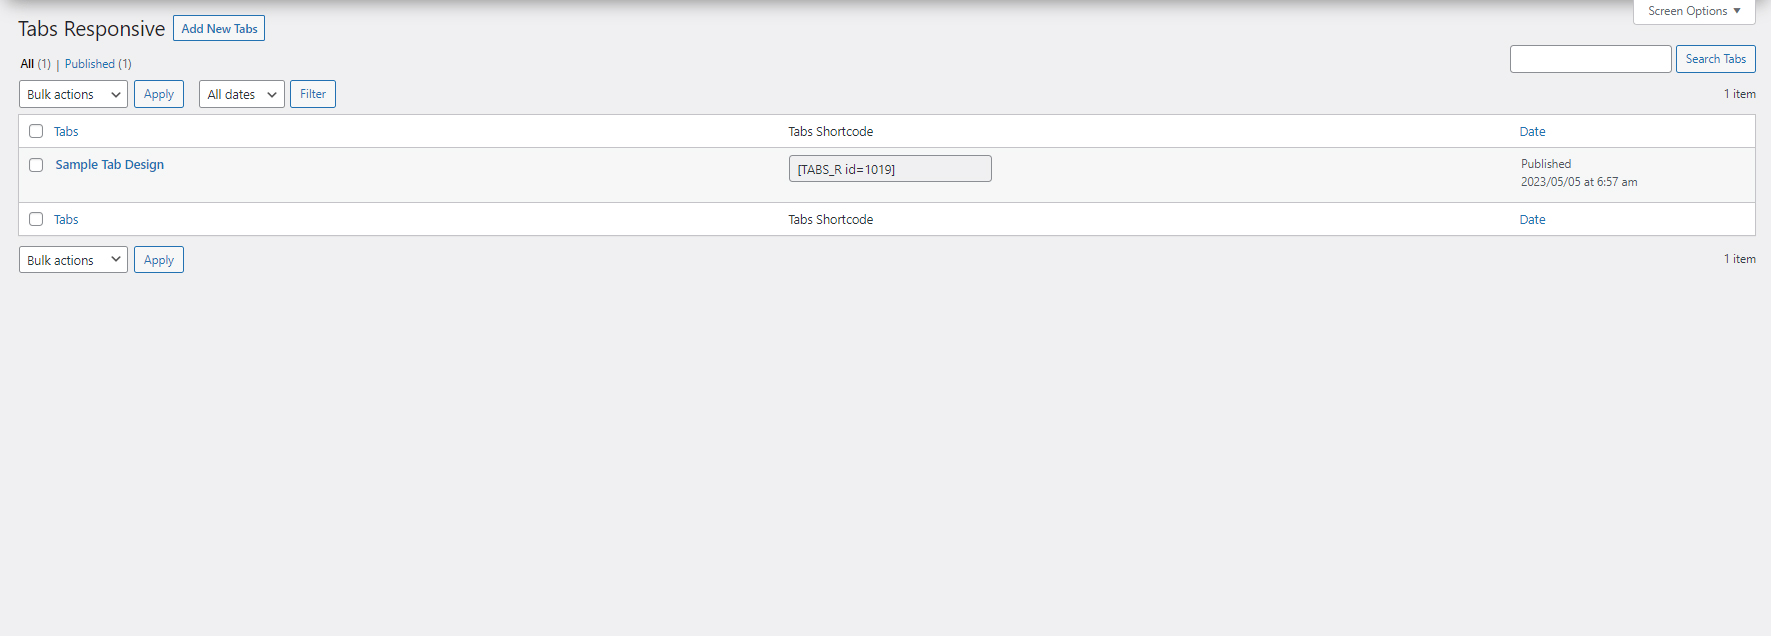
Now, while on this page, locate the Tabs Shortcode column. This column contains a short code for each of your tab sets – a simple code snippet that you insert in your blog posts or pages, so the tab set appears on them:
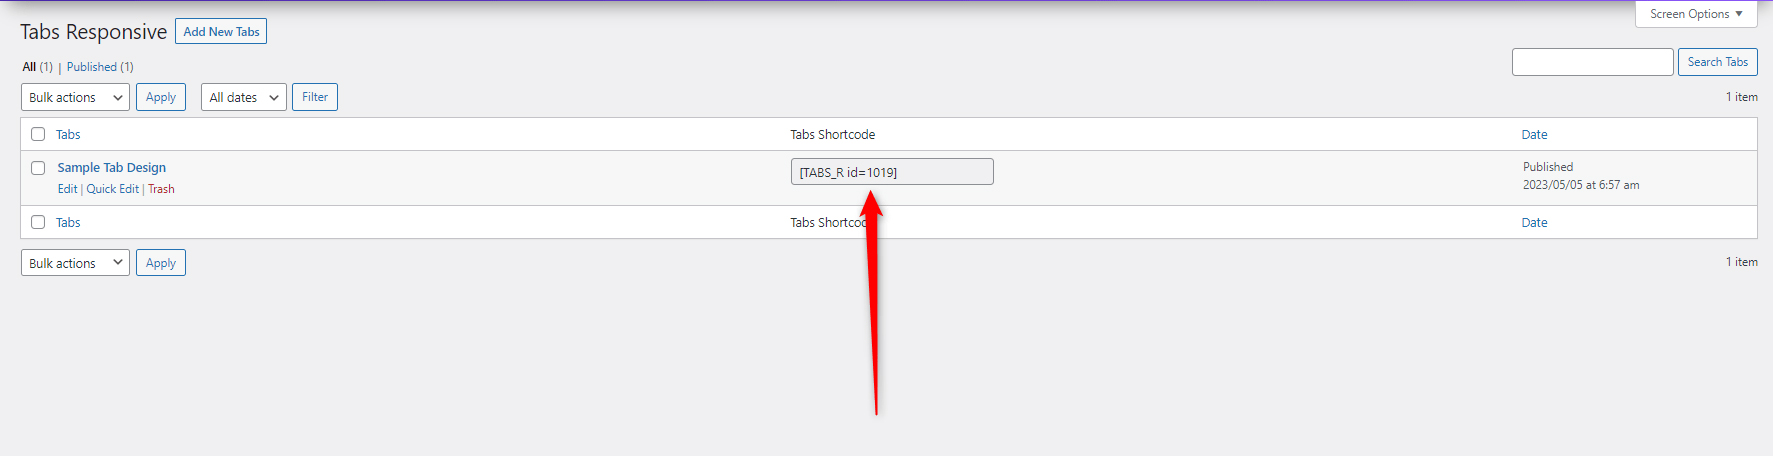
Once you locate the Shortcode, copy it.
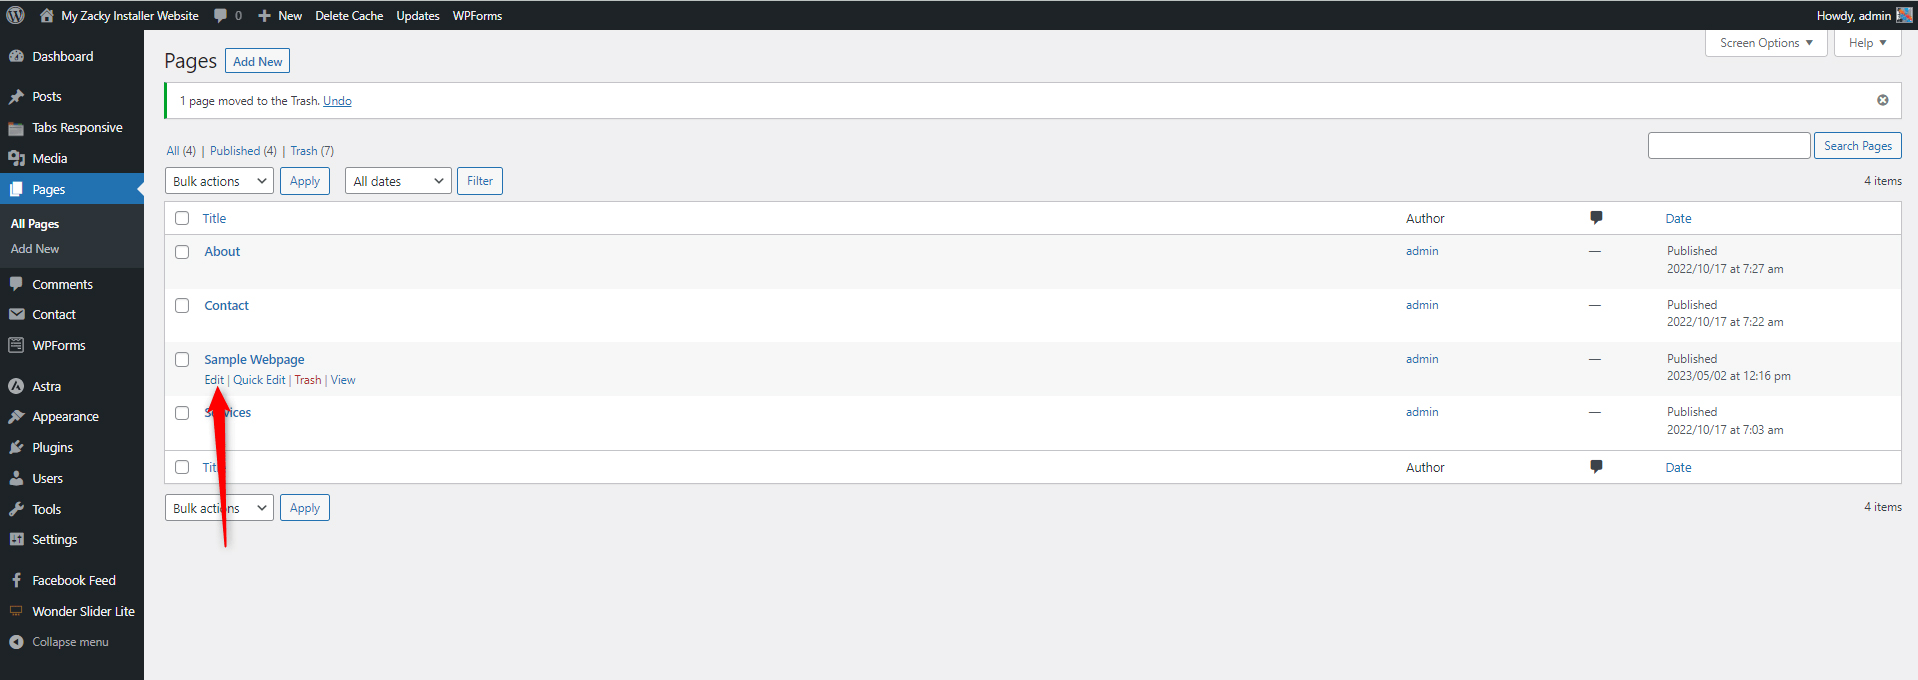
After you copy the snippet, open a web page or a blog post in which you wish to insert the tab set.
For this demonstration, we will insert our tabs on a static page.
To insert the snippet, simply go to Pages->All Pages->Edit Page, should you wish to insert your tab set within a page, or to Posts->All Posts->Edit Post:
This will activate Gutenberg:
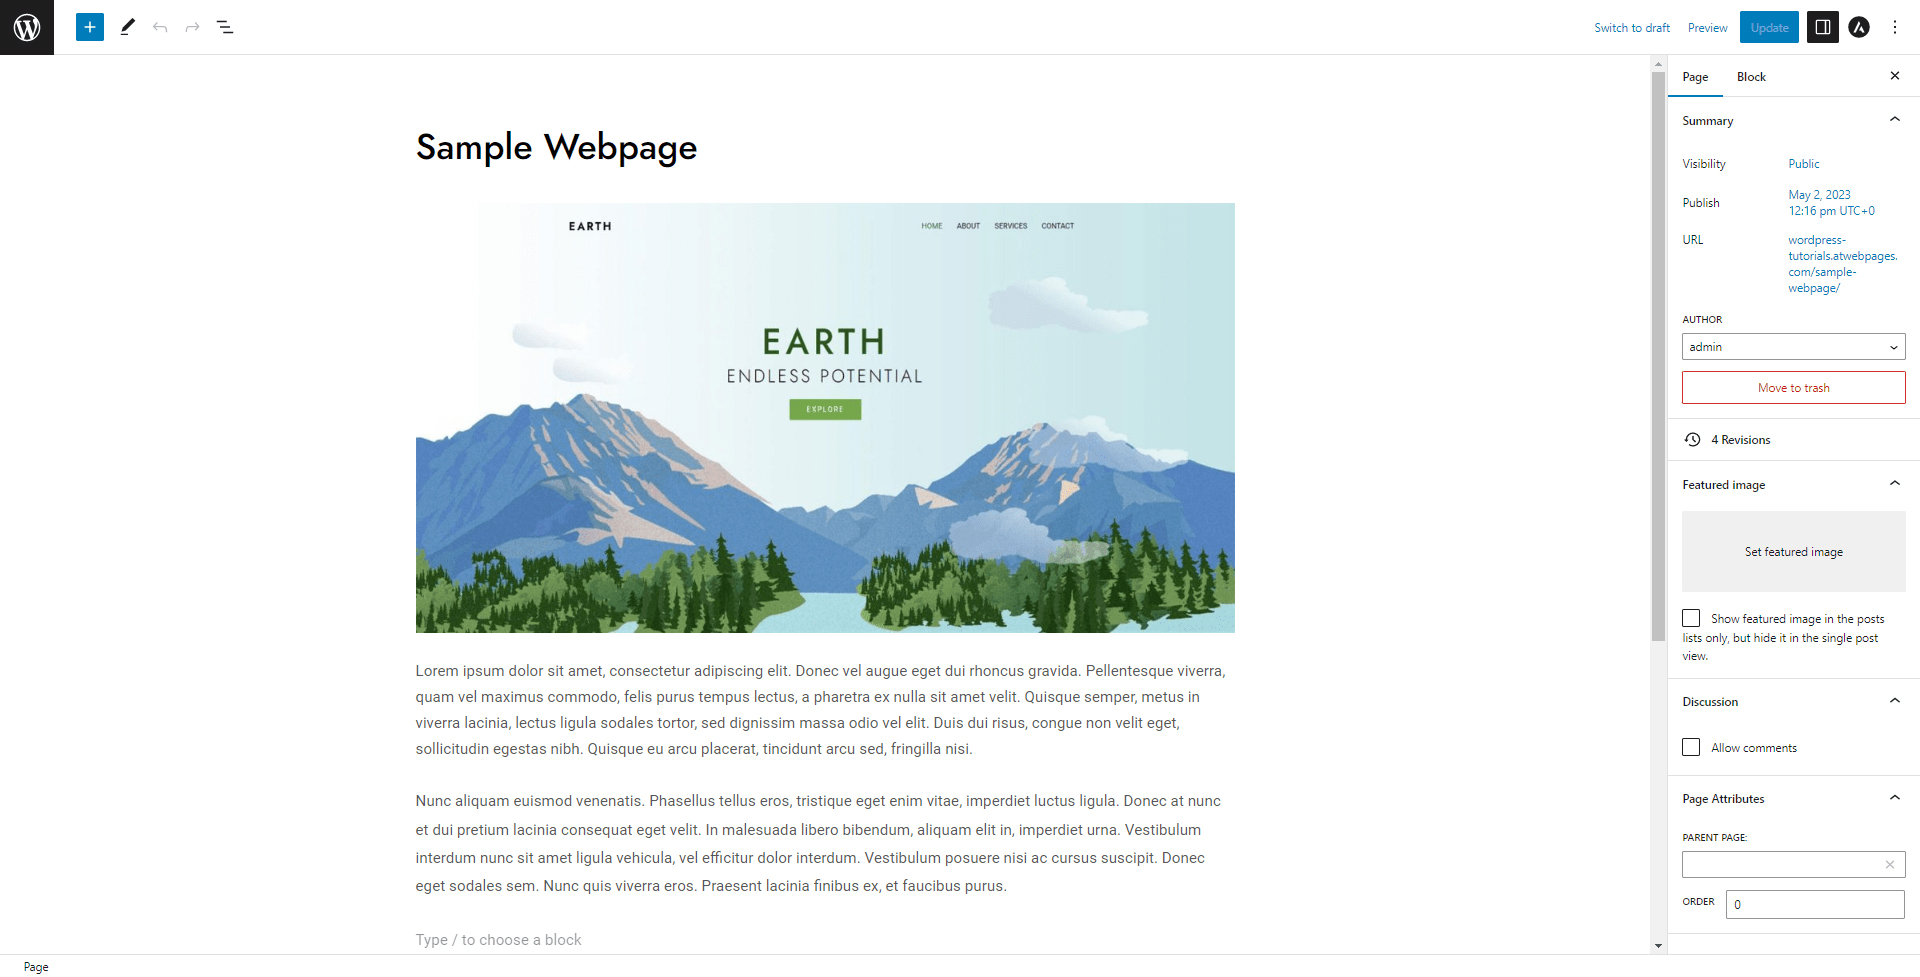
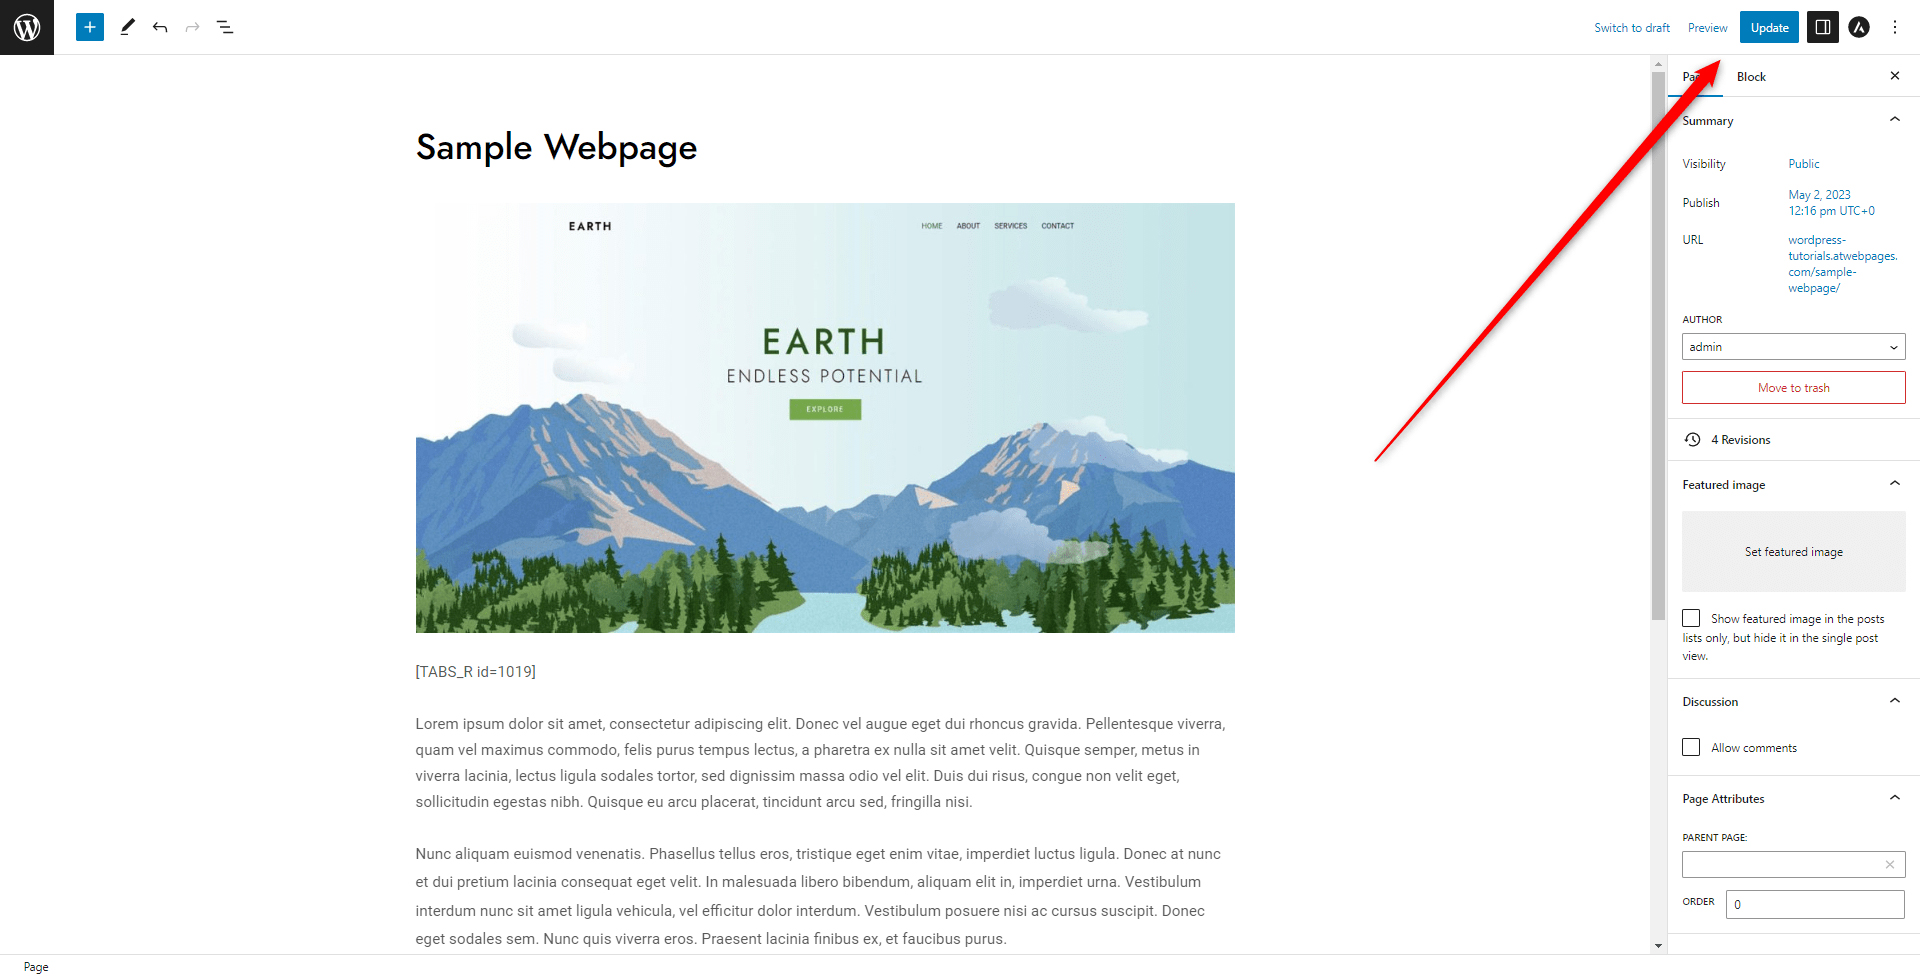
Now, while the editor is active, select a location in which you wish to insert your tabs. In our case, this will be right below the image. To insert the Shortcode, first, insert a Paragraph block in the content area:
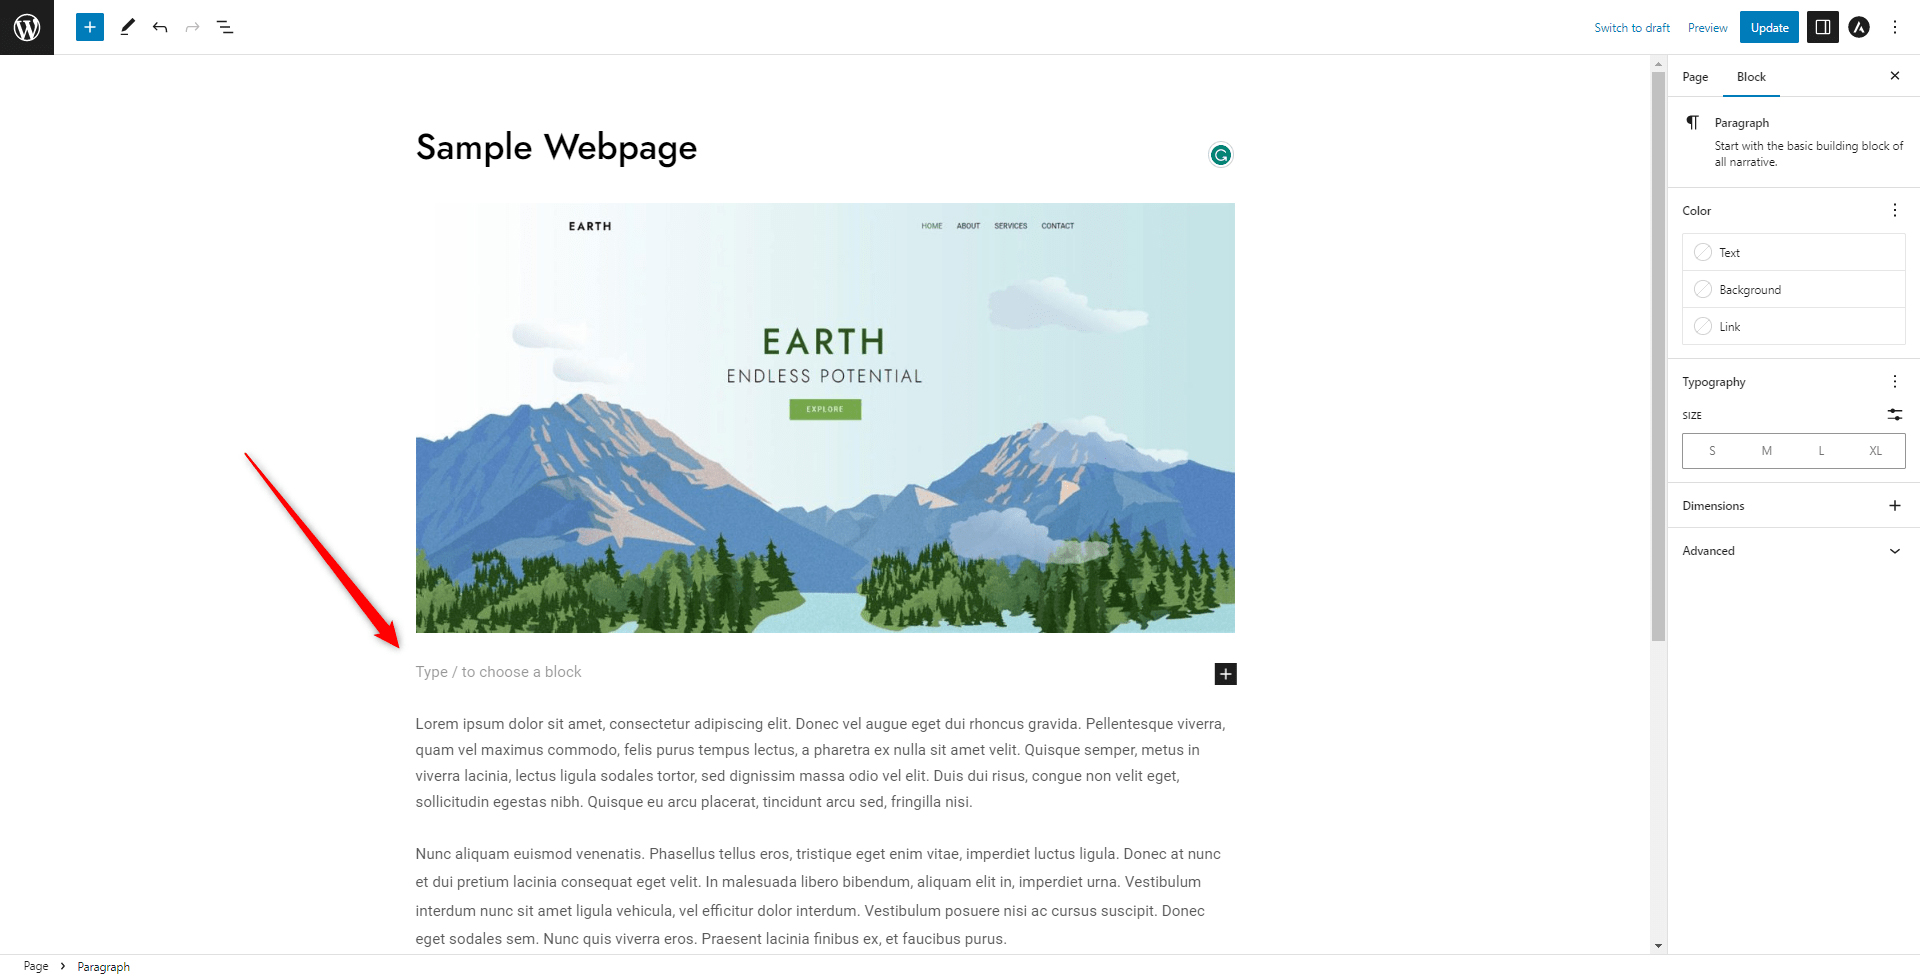
Now, within this newly inserted paragraph add the tab’s Shortcode:

Then, click on the blue Update button (Publish, should this be a new web page or a blog post):
Once you publish or update your content, open the page or post that you have just edited to see how the tab appears:
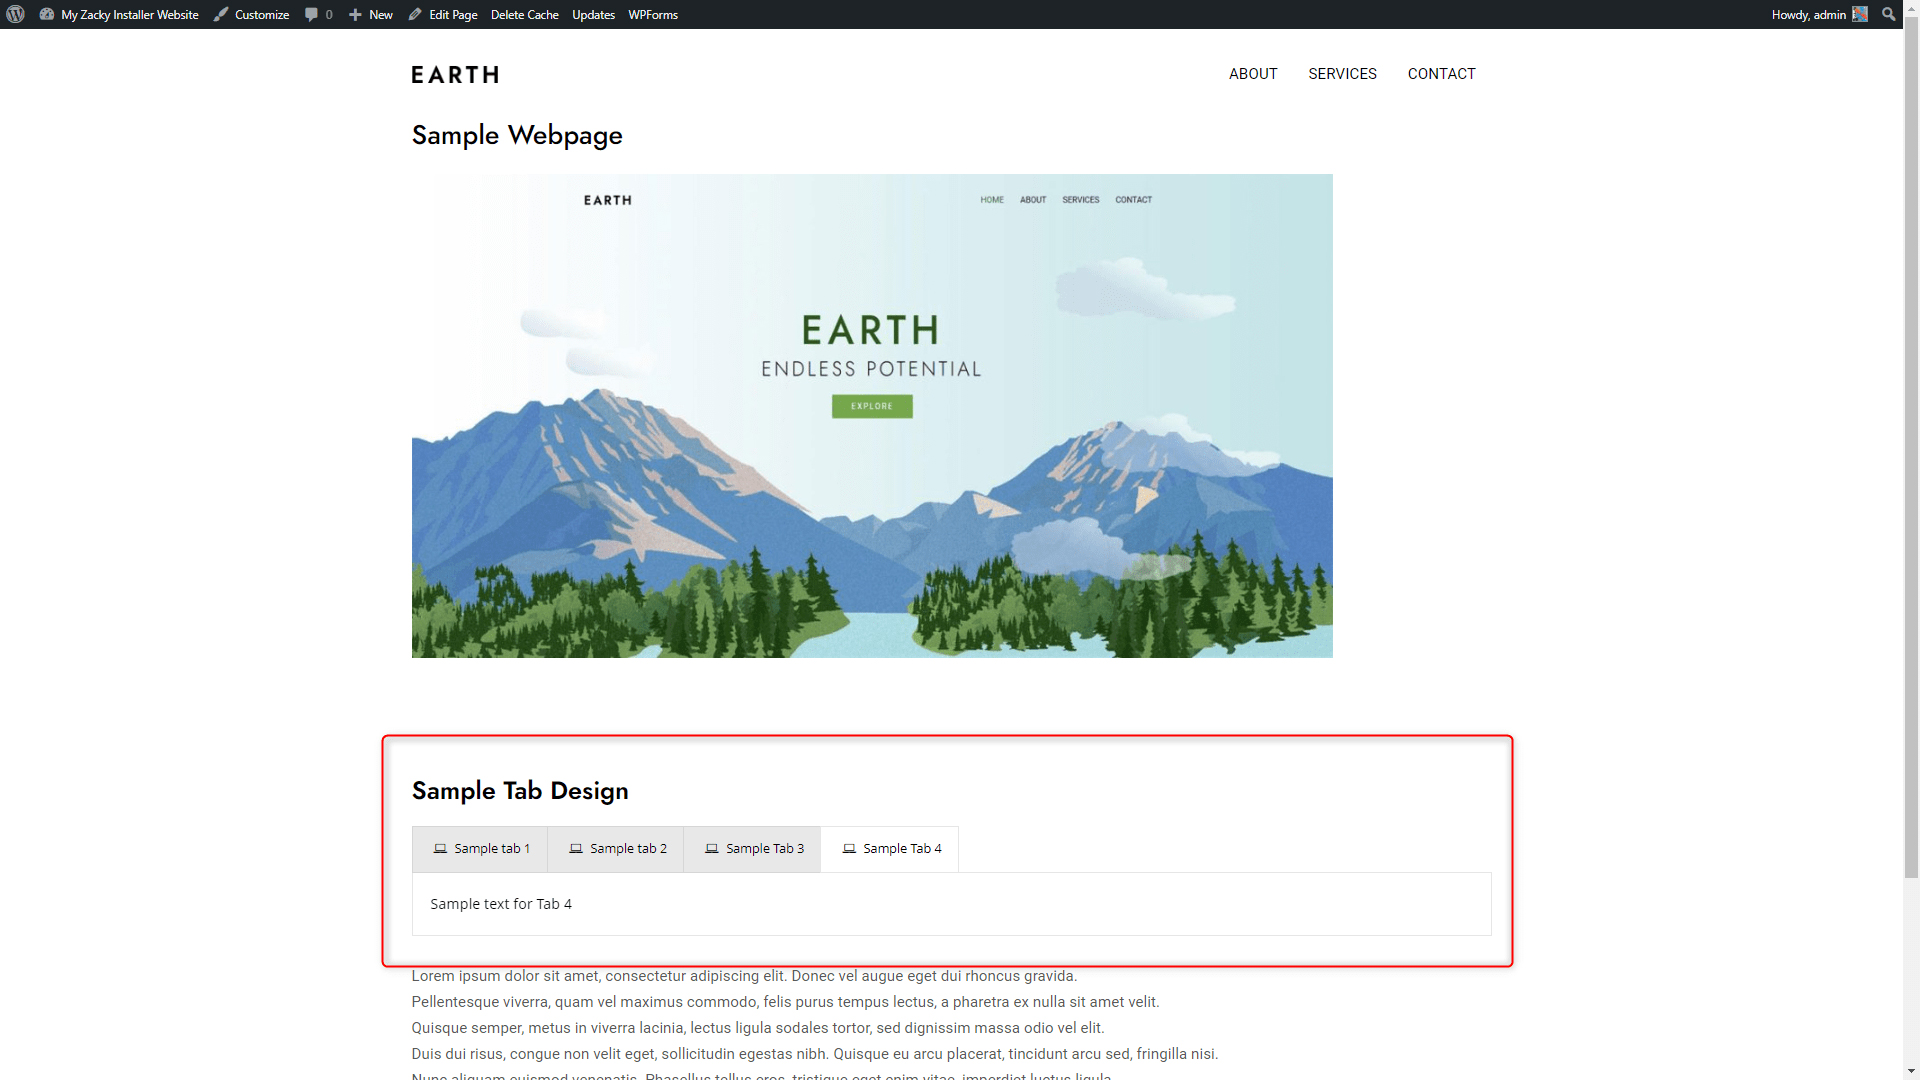
Now you have managed to insert tabs with the Gutenberg Block editor.
Depending on the plugin you are using, you can customize your tabs in numerous ways, so their design completely fits your website’s layout and purpose.
Conclusion
Tabs can become a very powerful addition to your website, thanks to their convincing way of distributing your content and making it easy for your site visitors to engage with your site.
Related:
- How to Use WordPress Gutenberg Block Editor
- How to Insert Gutenberg Blocks in WordPress
- How to Display Code with WordPress Gutenberg Code Block
- How to Use the Navigation Block in Gutenberg
- 5 Best WordPress Slider Plugins for Gutenberg
- 5 Best Gutenberg Plugins for WordPress
- How to Copy a Page with WordPress Gutenberg Editor
- How to Create Tables in WordPress Using Gutenberg Editor
- How to Create Posts in WordPress via the Block Editor (Step By Step Guide)
- 10 Best WordPress Themes for Gutenberg
- How to Design a Website Header with Gutenberg
- How to Add a Contact Form with WordPress Gutenberg Editor
- How to Add Images in WordPress with Gutenberg
- How to Add a Site Logo Block in WordPress with Gutenberg