If Gutenberg is not suitable for your needs and wish to switch back to the Classic Editor, continue reading, as in this article we will show you 3 simple methods of how to disable the block editor.
In the following sections, you will read how to disable Gutenberg by:
- Using the Classic Editor Plugin
- Using the Disable Gutenberg Plugin
- Adding a code snippet within the functions.php file in your website’s root directory
How to Disable Gutenberg in WordPress
All three methods are simple to apply and take no longer than a few minutes of your time. Each one is as effective as the others, and it is up to you to decide which approach is most suitable for your needs.
Method 1: Disable WordPress by Using the Classic Editor Plugin
For this method, you should install and activate a plugin – the Classic Editor. When this plugin is active, you have the chance to switch between the two main WordPress editors – Gutenberg and Classic Editor.
To install the plugin, first, open your WordPress dashboard.
Once you are in your admin panel, head to Plugins->Add New.
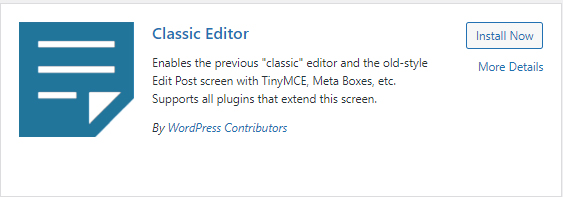
Then, search for “Classic Editor” and install the plugin:
If you need more help knowing how to download and install WordPress plugins, have a look at our in-depth guide:
How to Install and Activate a WordPress Plugin
Once the plugin is active, Gutenberg will be automatically disabled, and the Classic Editor will become active instead.
This plugin also grants you the option to select which of both editors you would want to use. Should you wish to switch back to Gutenberg, from the WordPress dashboard go to Settings->Writing:
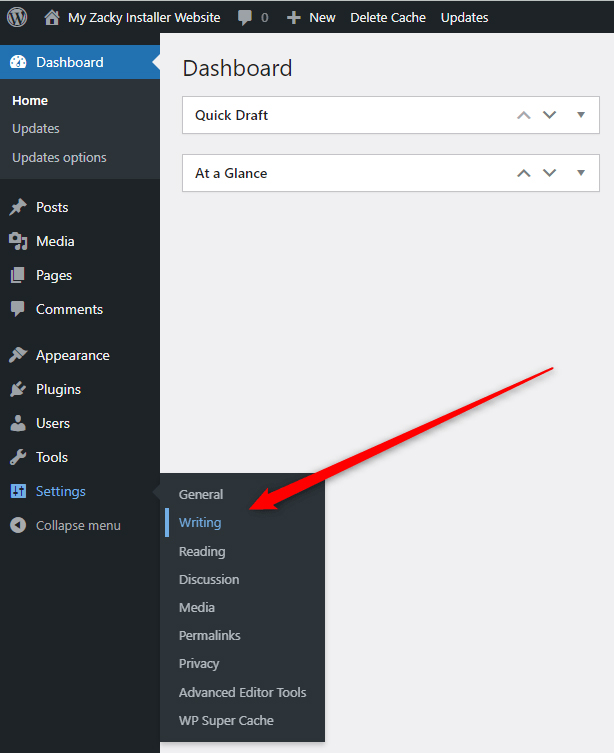
When you open the Writing settings page, you should see a Default editor for all users option:
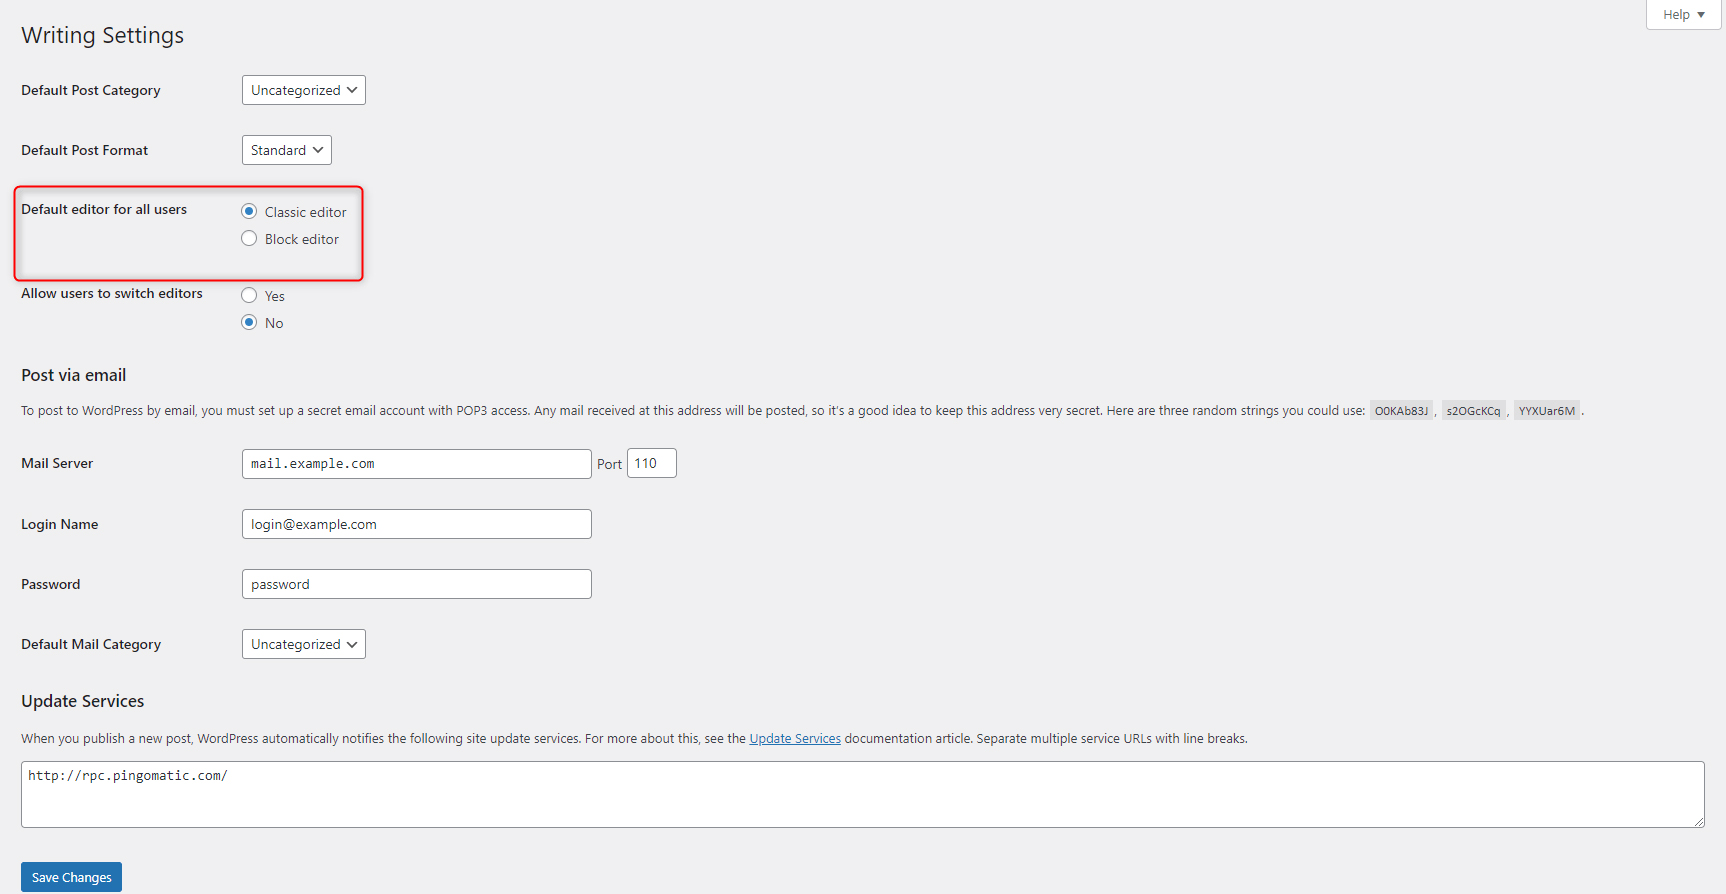
From the suggested options choose Classic Editor. Keep in mind that this option is only available when the Classic Editor plugin is active.
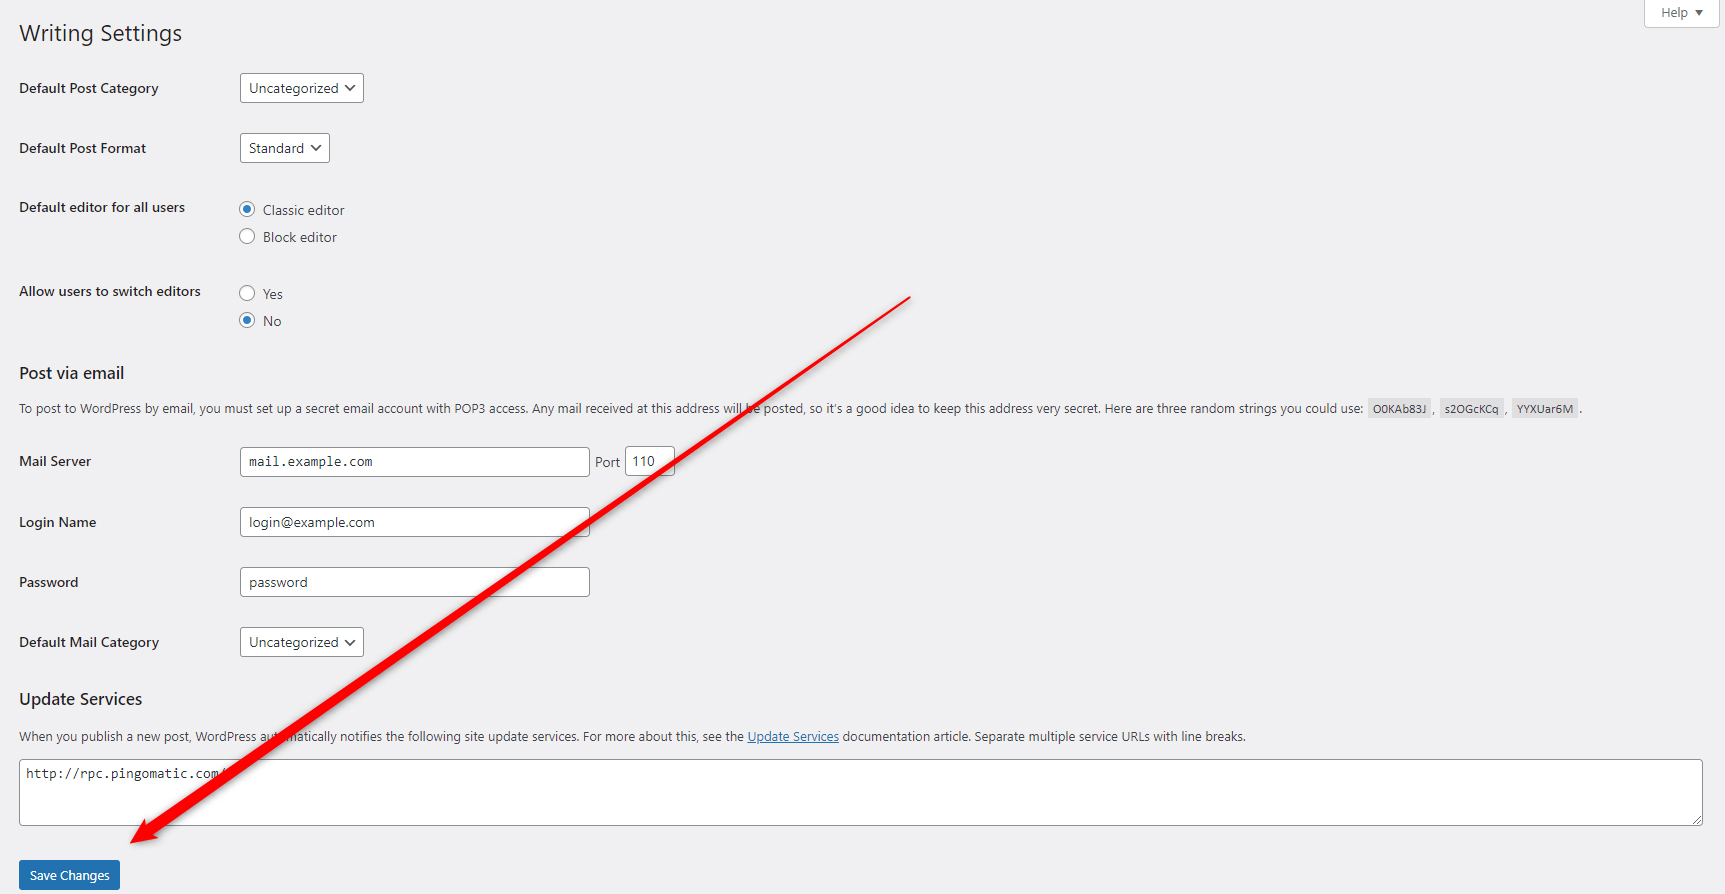
Once you select the Classic editor, click on the blue Save Changes button at the bottom left of the screen, so WordPress applies and saves your new preferences:
Now you have managed to disable Gutenberg.
Method 2: Use the Disable Gutenberg Plugin
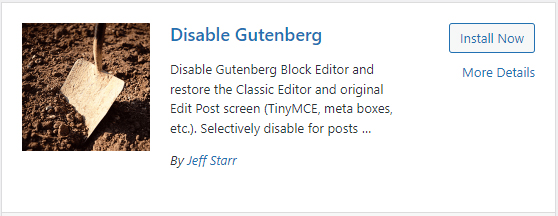
Another handy plugin is called Disable Gutenberg. As the name suggests, it deactivates the block editor, but also can do much more – Along with allowing you to fully deactivate Gutenberg, this plugin allows you to select which functionalities you wish to leave active, should you wish to do so.
To use these features, once again go to the WordPress plugins library and install and activate Deactivate Gutenberg:
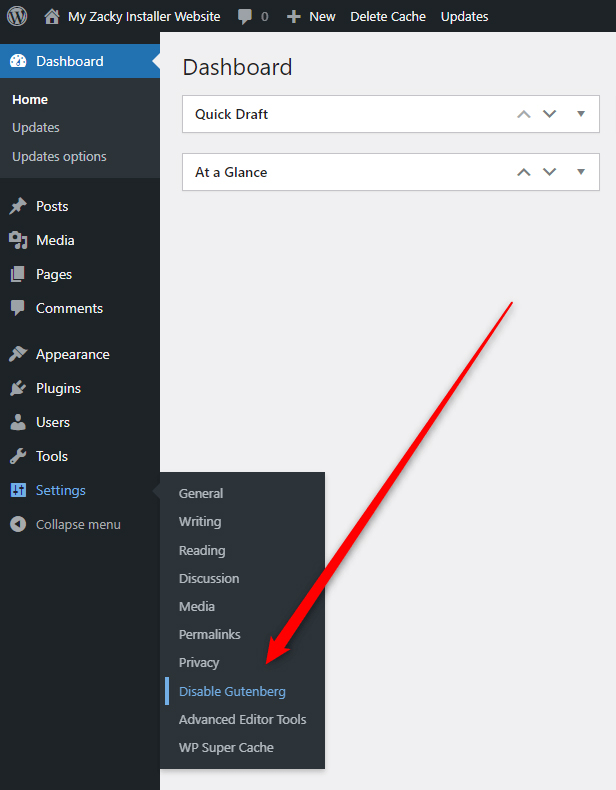
Once you install and activate the plugin, head to Settings->Disable Gutenberg within your WordPress admin dashboard (keep in mind that this option is available only when this plugin is active):
Once you click on Disable Gutenberg, a new page with options will appear:
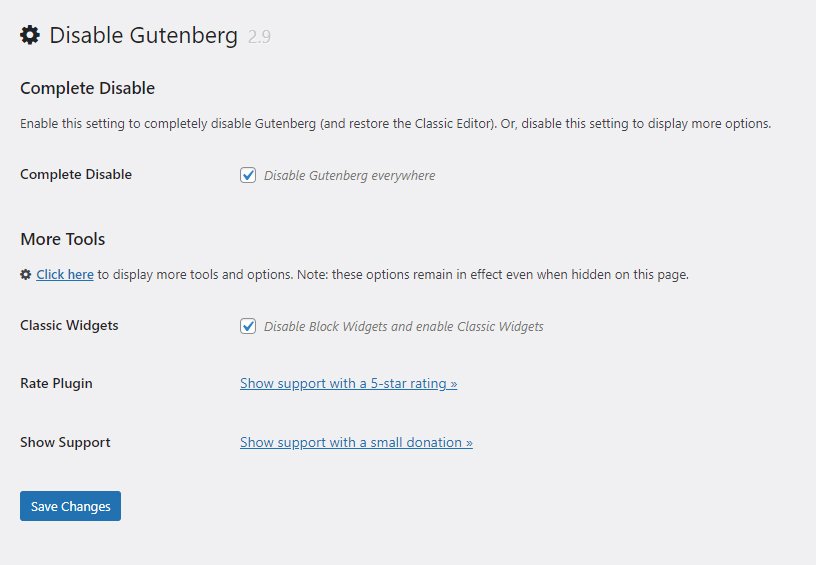
Notice that there are two main options that you can either activate or deactivate by adding ticks to the respective tick boxes:
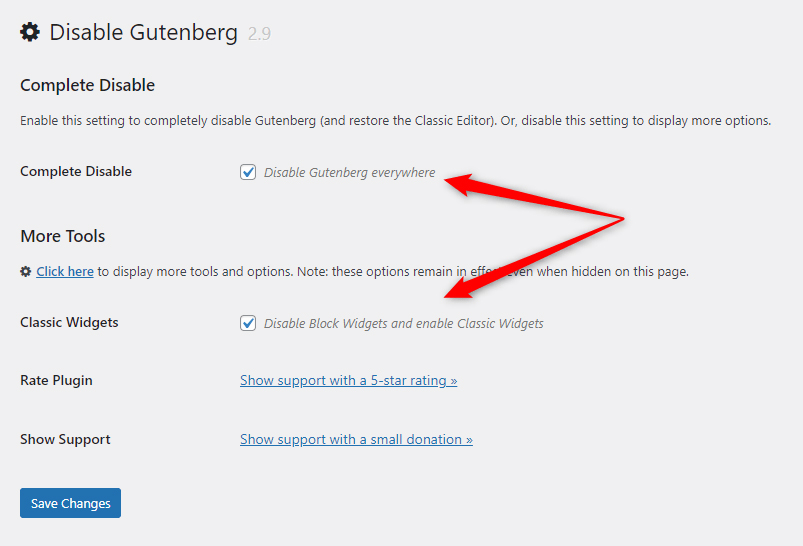
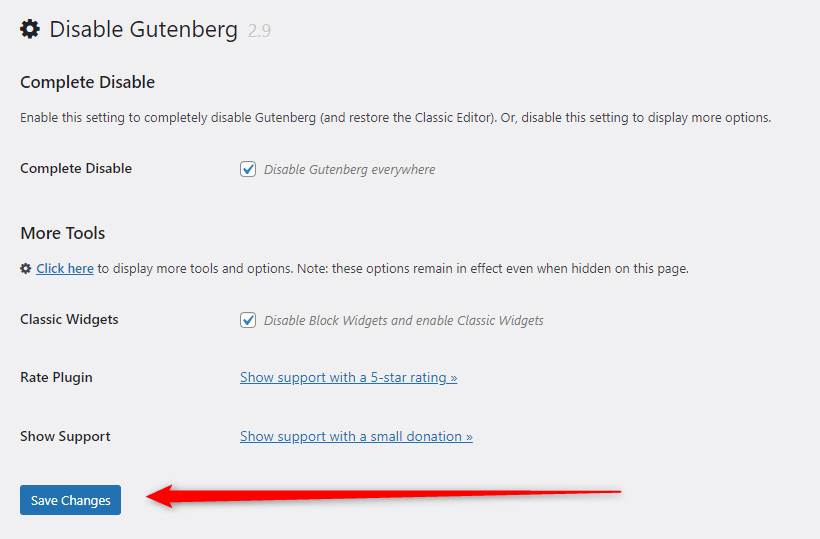
To be able to disable Gutenberg, make sure that there’s a tick to Complete Disable. You can also enable the Classic editor widgets by adding a tick to the Classic Widgets box.
Once you add the ticks, click on the blue Save Changes button located at the bottom of the page:
Now you have managed to disable Gutenberg.
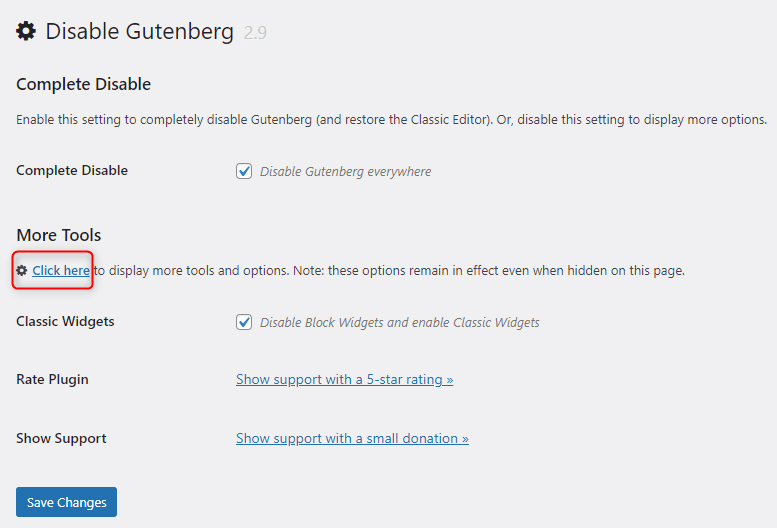
However, as mentioned, this plugin comes with more options that you can browse and customize by clicking on the Click here button just below More Tools:
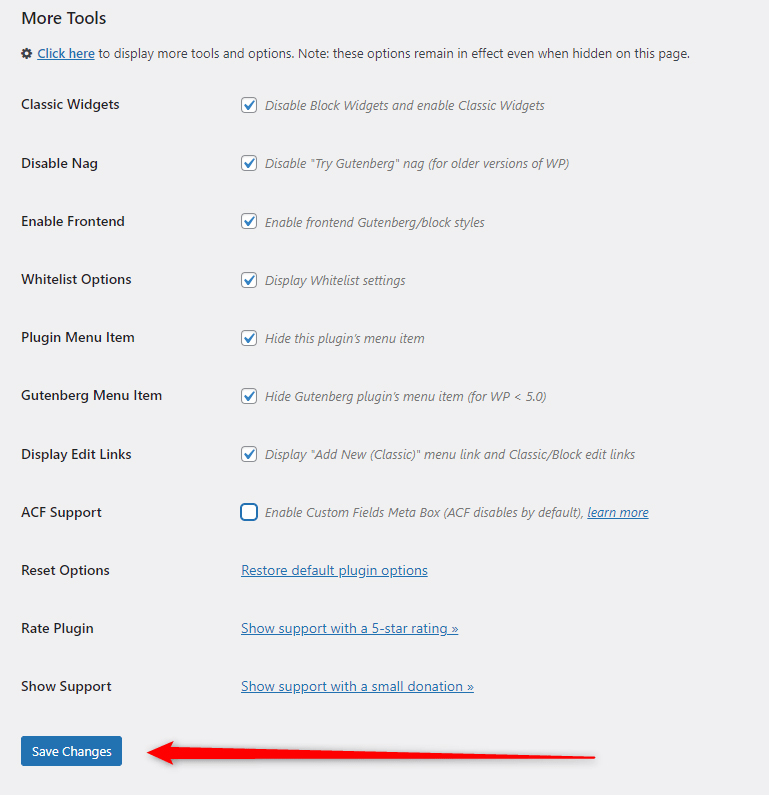
Once you click the button, a new list with available options will appear:
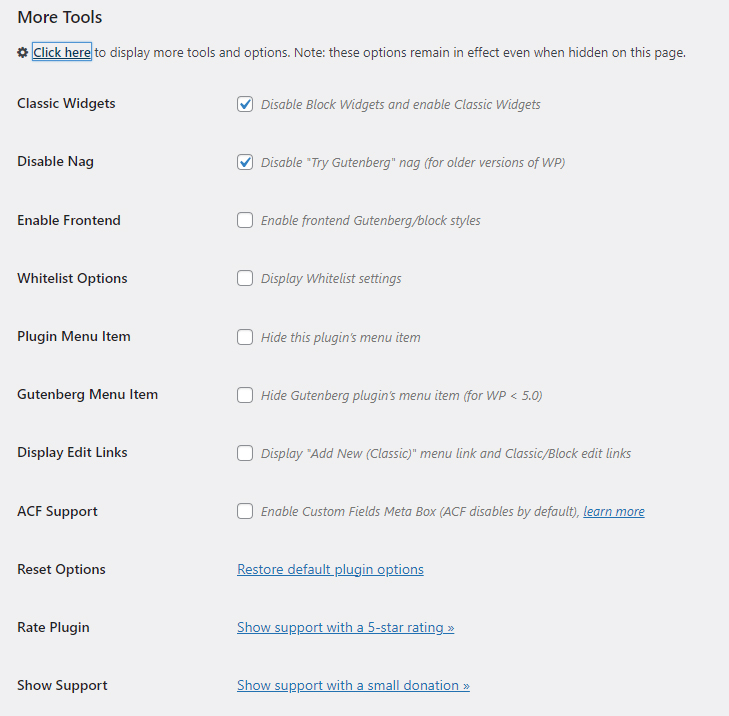
Have a look at all the options and add ticks to the functions that you want enabled/disabled. Then click on Save Changes, so WordPress applies and saves your setup:
Method 3: Disable Gutenberg with a Code Snippet
With this method, you don’t need to install a plugin or make any kind of setup. You only need to access your website’s core files and add a single string of code to your active WordPress theme’s funticons.php file:
add_filter(‘use_block_editor_for_post’, ‘__return_false’, 10);
Before you continue, it is advisable to make a website backup.
The process is very simple and requires only a few clicks here and there. If you are using ZETTAHOST as your hosting provider, here’s what to do:
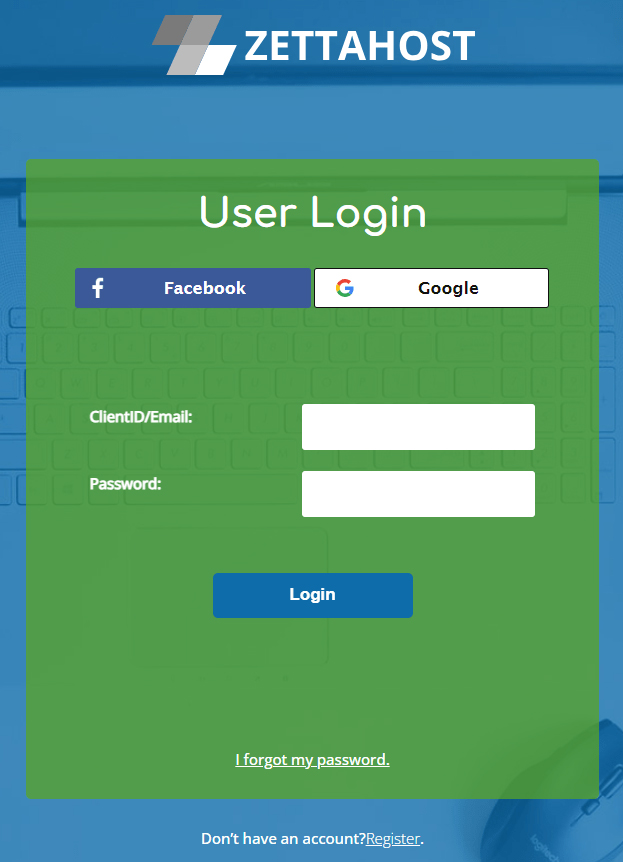
The first thing you should do is open your admin hosting dashboard. To do so, go to ZETTAHOST.com and click on Login:

On the follow-up page enter your credentials and click the blue Login button:
Once you enter your login credentials, you will enter the Zettahost hosting panel:
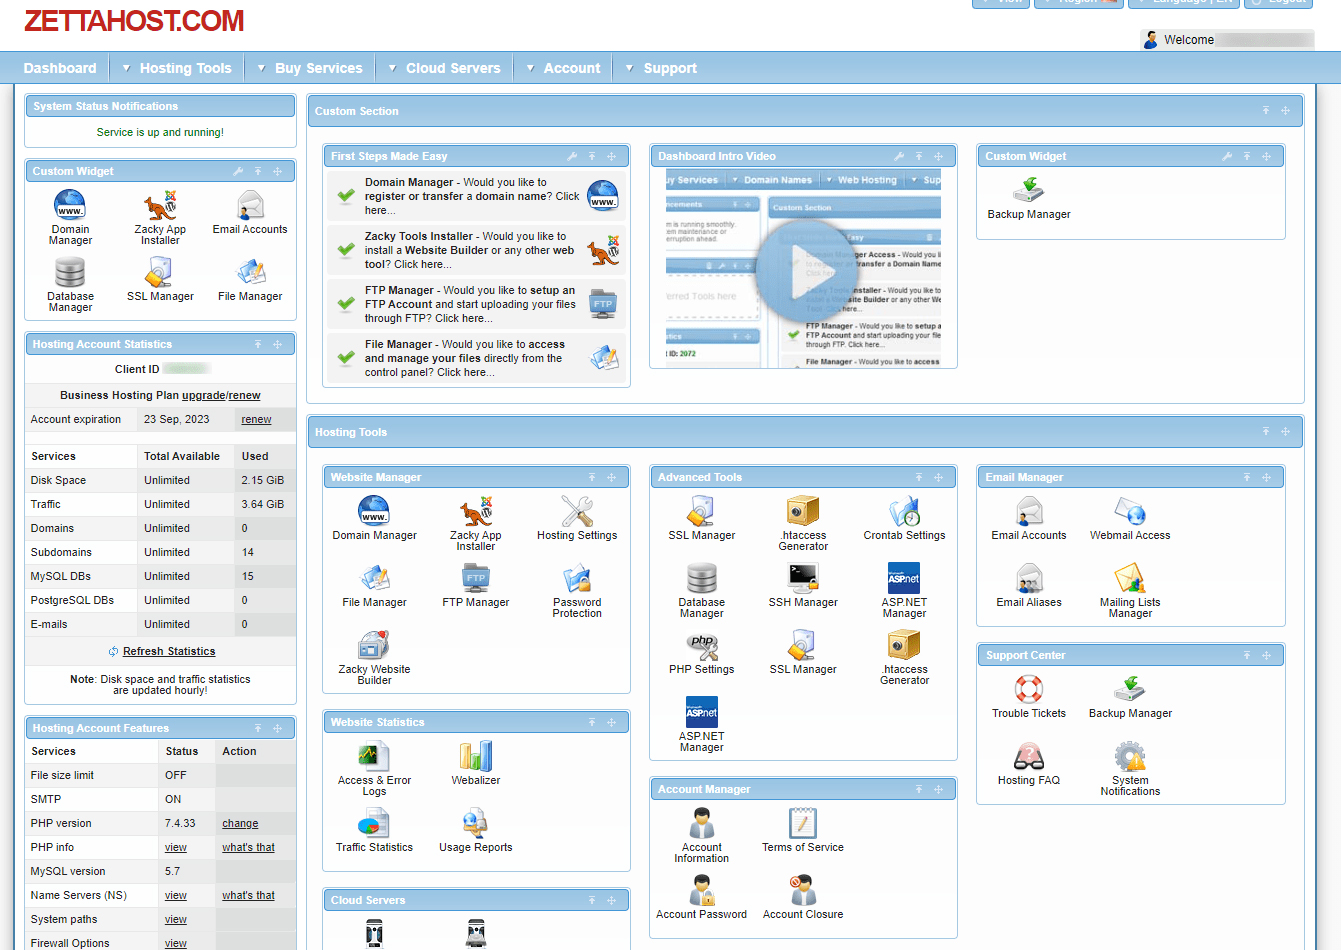
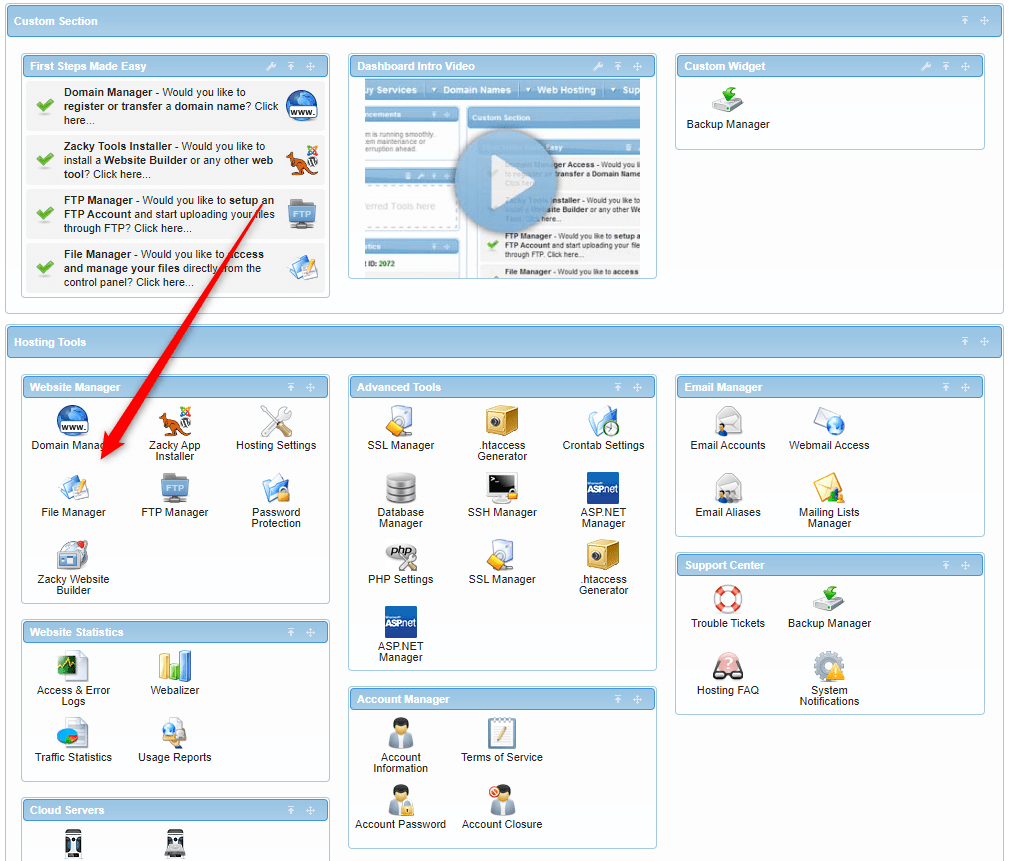
From this page head to File Manager:
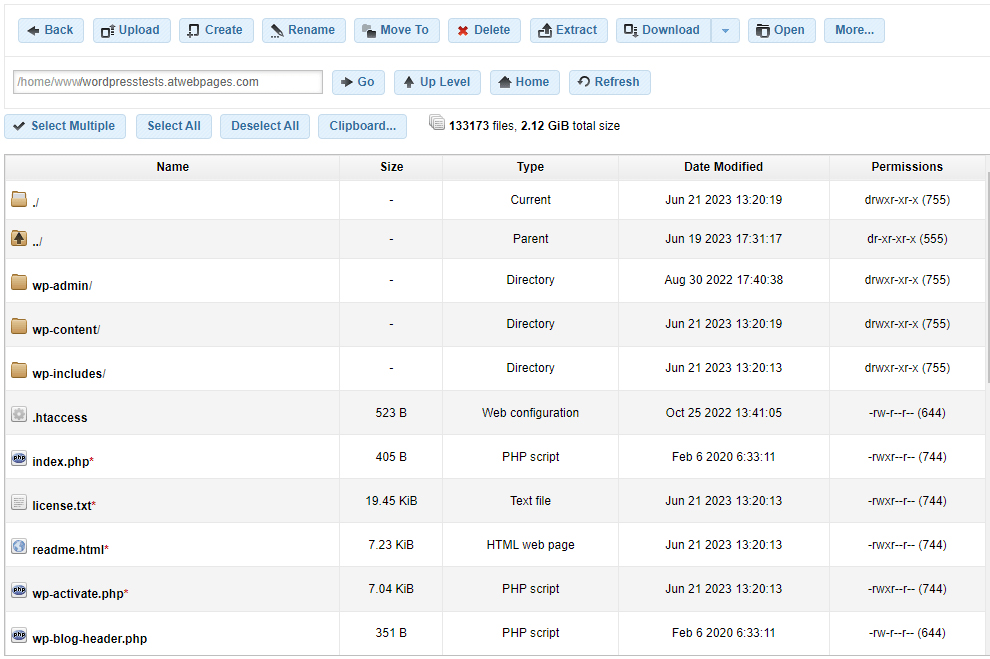
Once you open the File Manager, a list with all your hosted websites will appear:
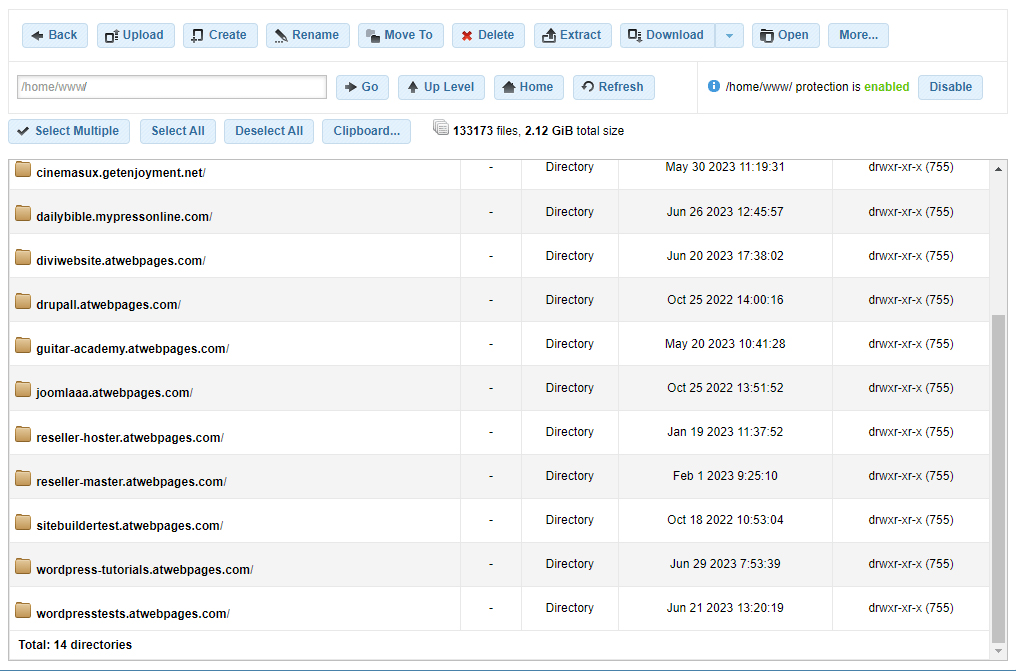
While on this page, double-click on the folder with your website’s name. This will open this website’s list of core files:
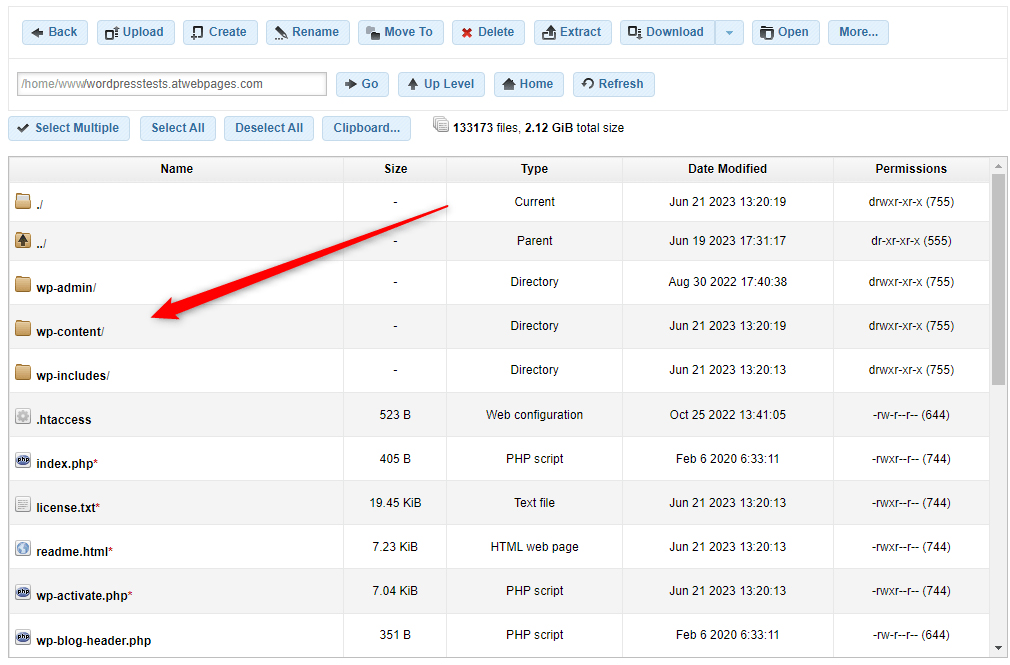
Now, while within your website’s core files directory, double-click on the wp-content/ folder:
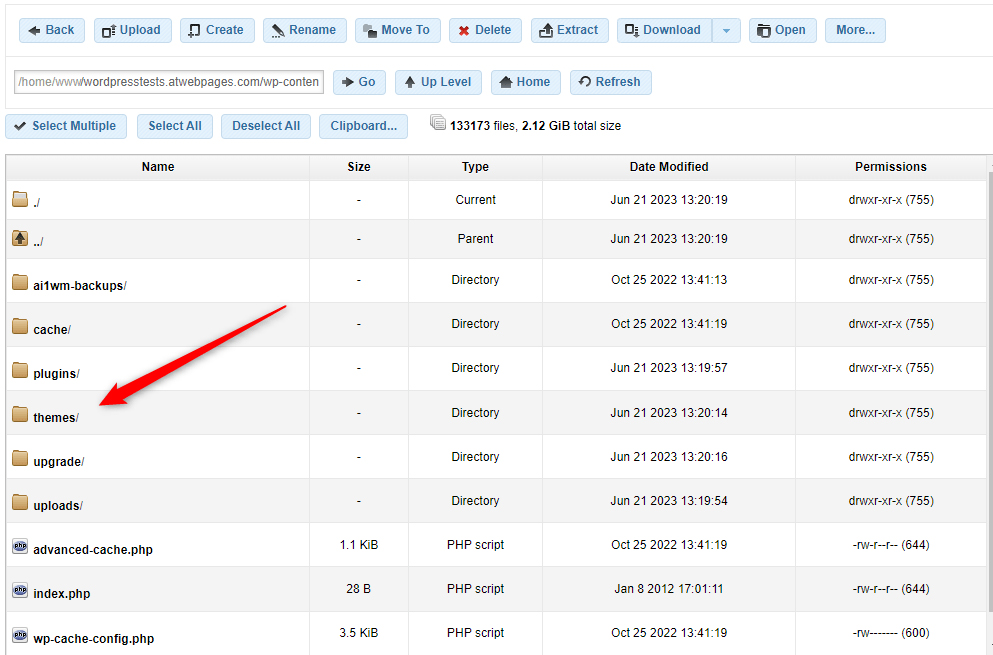
Within wp-content/ double-click on themes/ :
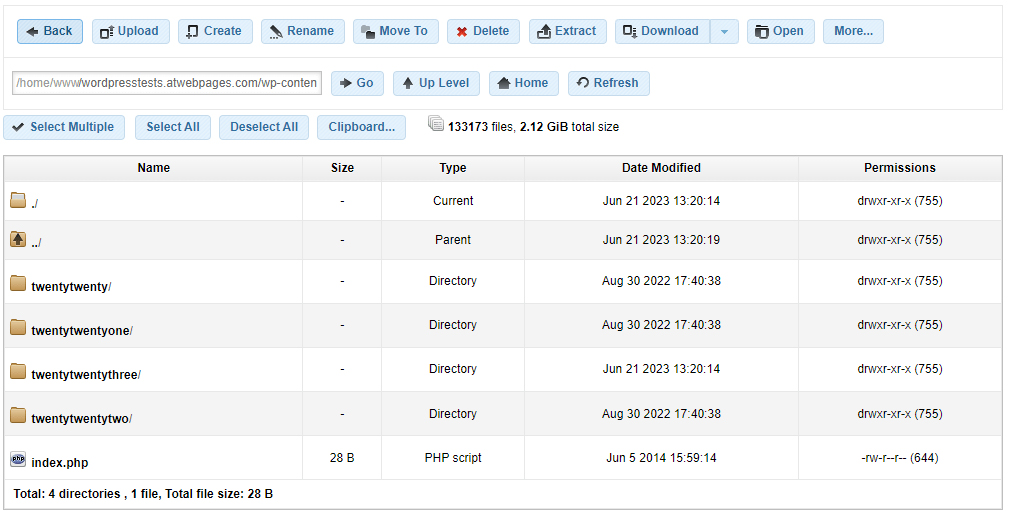
Within themes/ you will see a list of all your installed WordPress themes. Double-click on the folder of your active theme. In our case this is twentytwentytwo/ :
Within the folder of your active theme, search for the functions.php file:
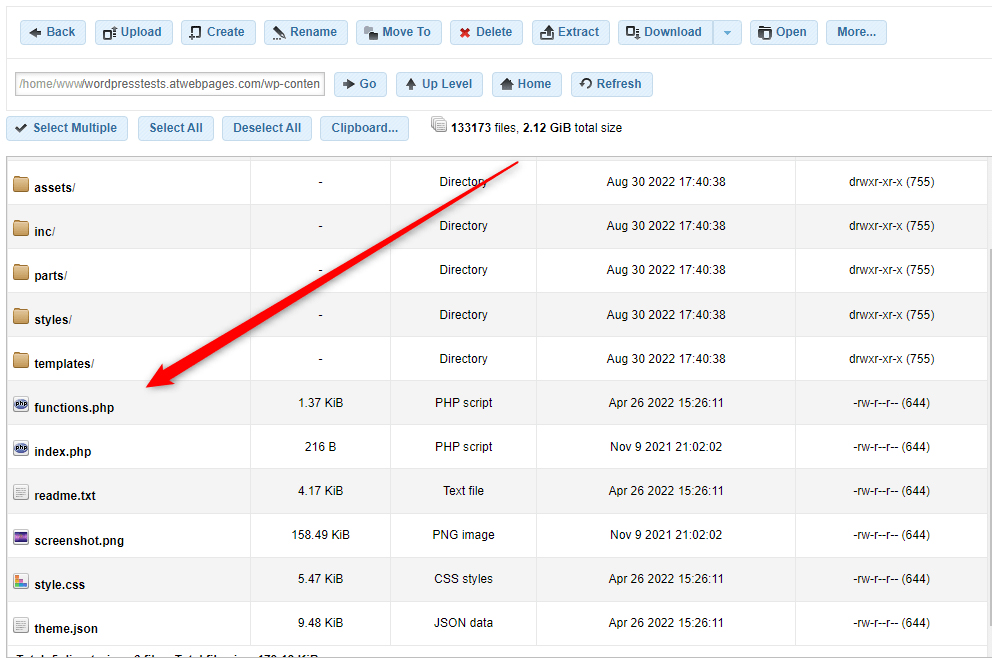
Once you locate the functions.php file, double-click on its icon, so you can browse and edit the files’ content:
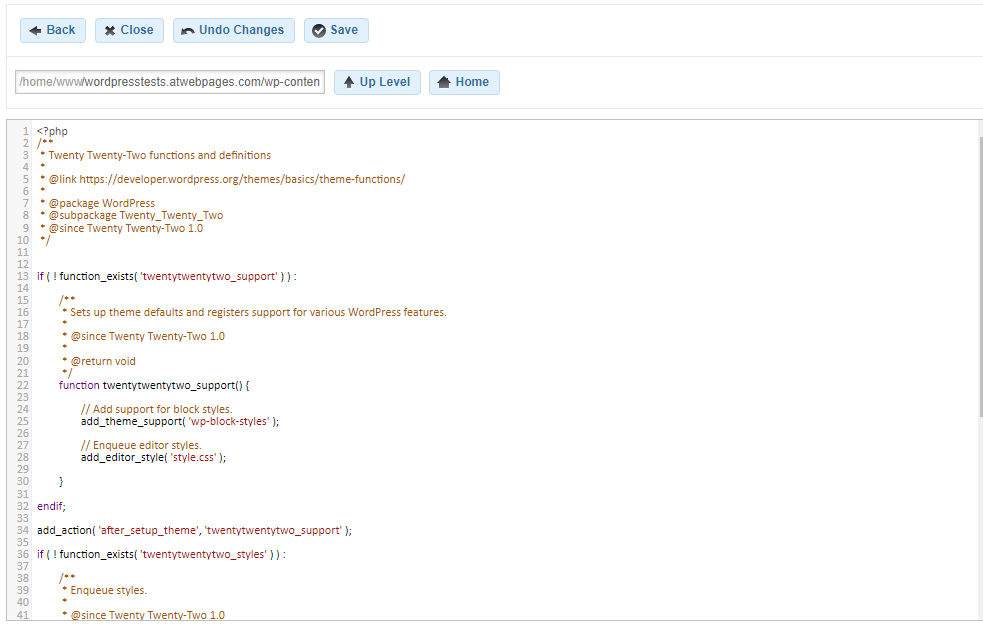
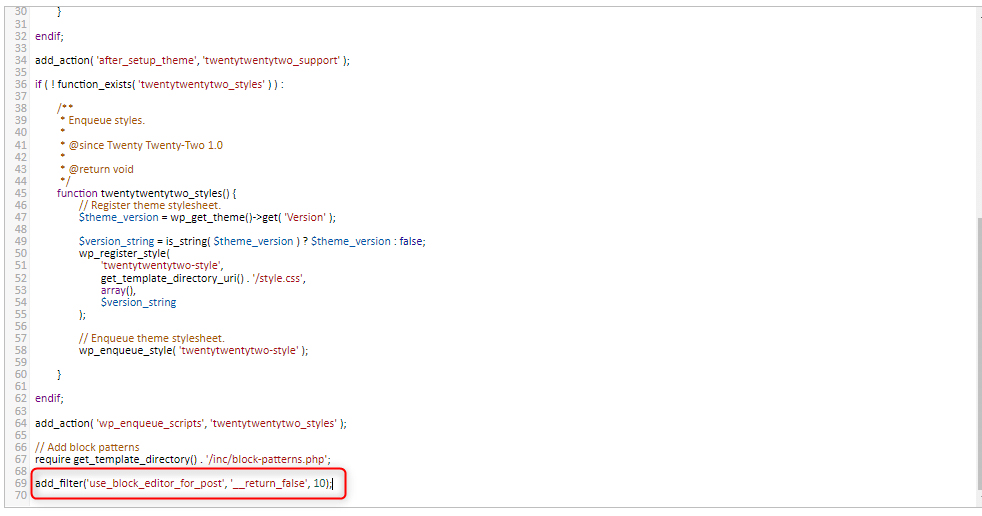
Once you see the code string, head to the document’s bottom and add this snippet:
add_filter(‘use_block_editor_for_post’, ‘__return_false’, 10);
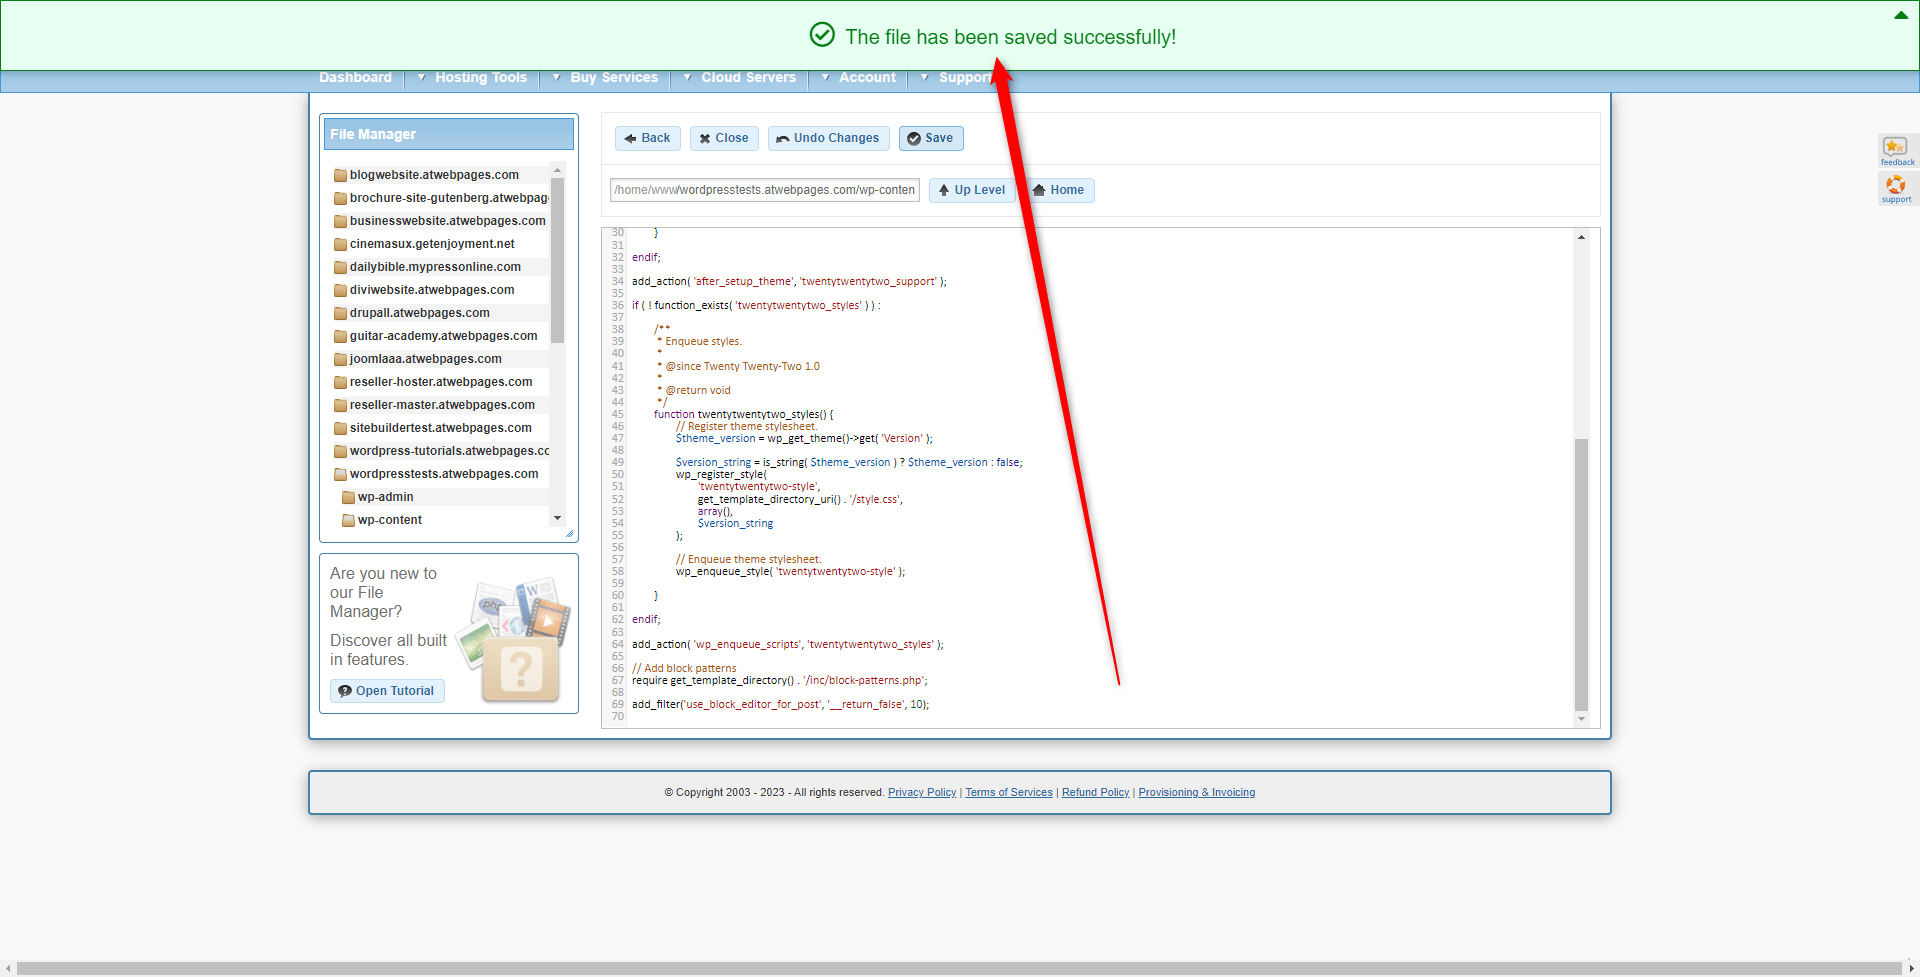
Now that you have placed the snippet within the document, click on the blue Save button at the top of the opened document:
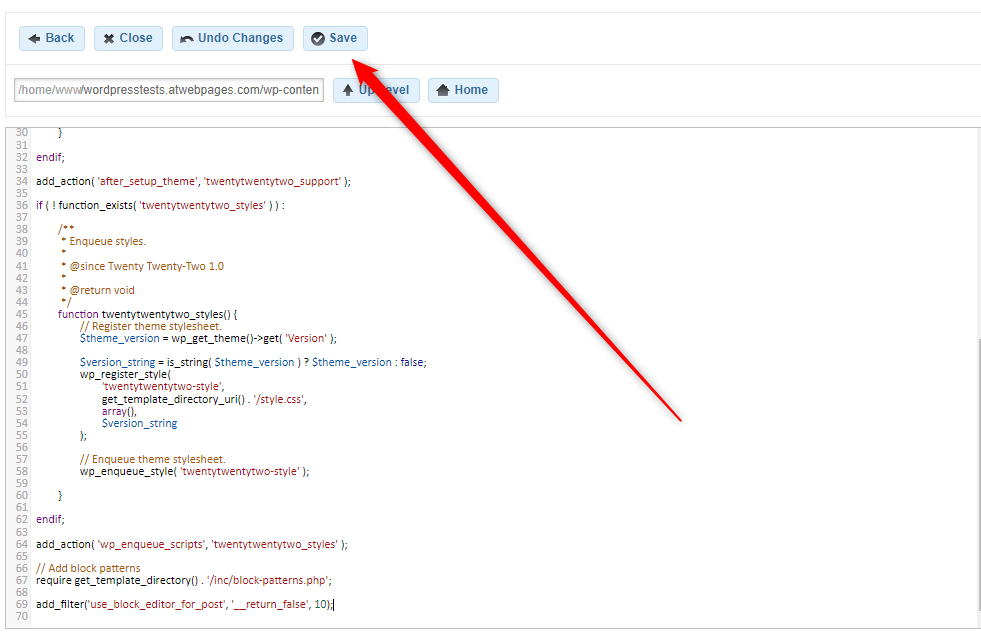
After you click on Save, a notification message will appear, informing you that the changes you just made are already applied to your website:
Now you have managed to disable the block editor.
Conclusion
If Gutenberg is not the WordPress editor of your choice, you can quickly deactivate it with three simple and fast methods:
- Installing the Classic Editor plugin
- Installing Deactivate Gutenberg plugin
- Adding a code snippet within the functions.php file.
Related:
- Create a WordPress Website – The Ultimate Guide
- How to Install and Activate a WordPress Plugin
- How to Create a New Page in WordPress
- How to Browse, Install and Apply a WordPress Theme
- How to Use WordPress Gutenberg Block Editor
- How to Insert Gutenberg Blocks in WordPress
- How to Change Text Color With WordPress Block Editor
- How to Use WordPress Reusable Blocks
- How to Display Code with WordPress Gutenberg Code Block
- How to Use the Navigation Block in Gutenberg
- How to Add a Contact Form with WordPress Gutenberg Editor
- How to Add Images in WordPress with Gutenberg
- 5 Best WordPress Slider Plugins for Gutenberg
- How to Create Tables in WordPress Using Gutenberg Editor
- How to Add Tabs to Your WordPress Site with Gutenberg
- How to Copy a Page with WordPress Gutenberg Editor
- How to Access the Gutenberg Full Site Editor
- 5 Best Gutenberg Plugins for WordPress