When you first start to use WordPress, it all may look a bit confusing and difficult. This is why we created a comprehensive WordPress guide that explains everything you need to know about the platform and how to build your first website step by step.
In this article, however, you will read about how to add a contact form to your website. It is separate from the main guide, as not anyone would need such a feature on their site.
How to Add a Contact Form in WordPress
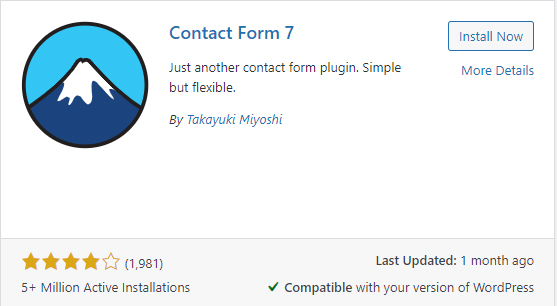
The fastest and easiest way so far is by installing a plugin. In this article, you will read how to use a handy one named Contact Form 7. This is one of WordPress’s most popular contact form plugins and is very easy to use.
If you don’t want to use this one, you can install and use a plugin of your choice. The process is similar for all such plugins.
Step 1: Install and activate a plugin
Search for a contact form plugin that fits your needs and then install and activate it. For this demonstration, we will use Contact Form 7:
Step 2: Browse the plugin’s settings
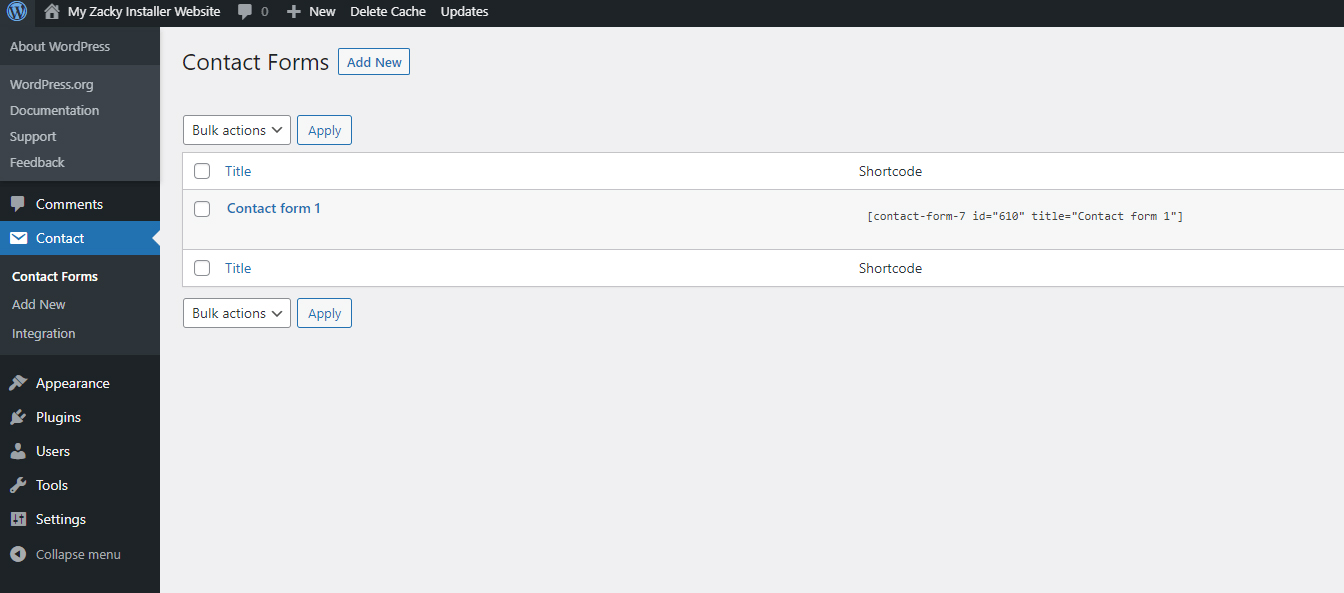
Once you installed and activated the plugin, via the WordPress admin panel open its settings. In the case of Contact Form 7, you can do so by clicking the Contact button in the sidebar. This will open all the plugin’s available options:
![]()
Once you click the icon, you will open the plugin’s main settings:
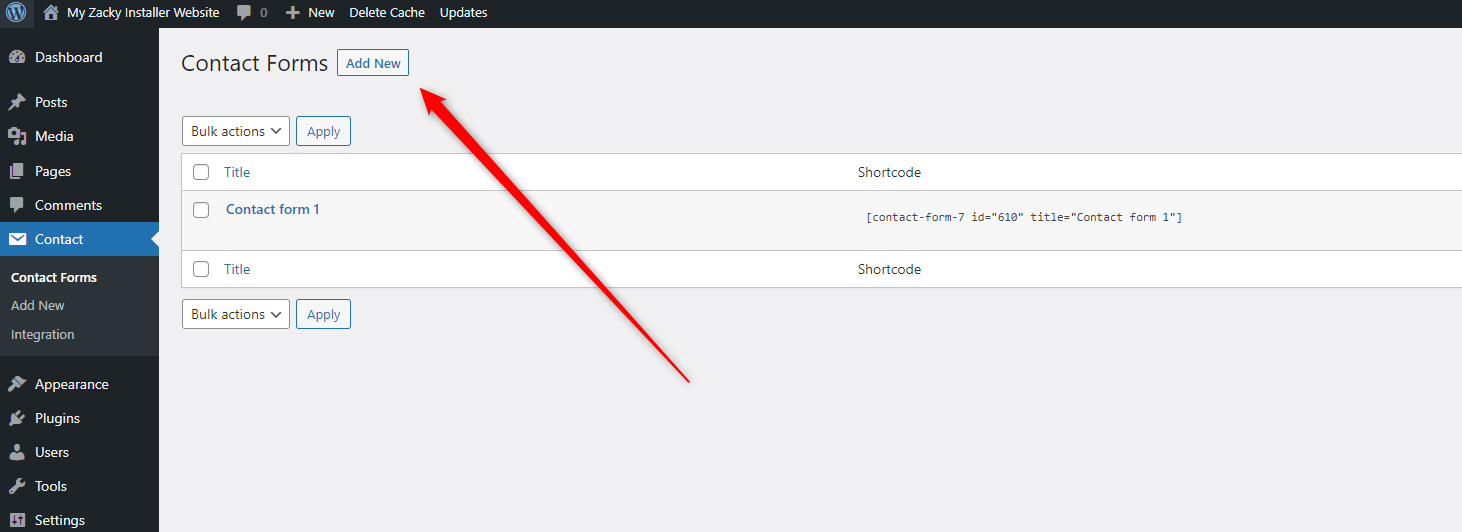
Step 3: Create a new contact form
Once the plugin’s settings page is opened, click on the Add New button:
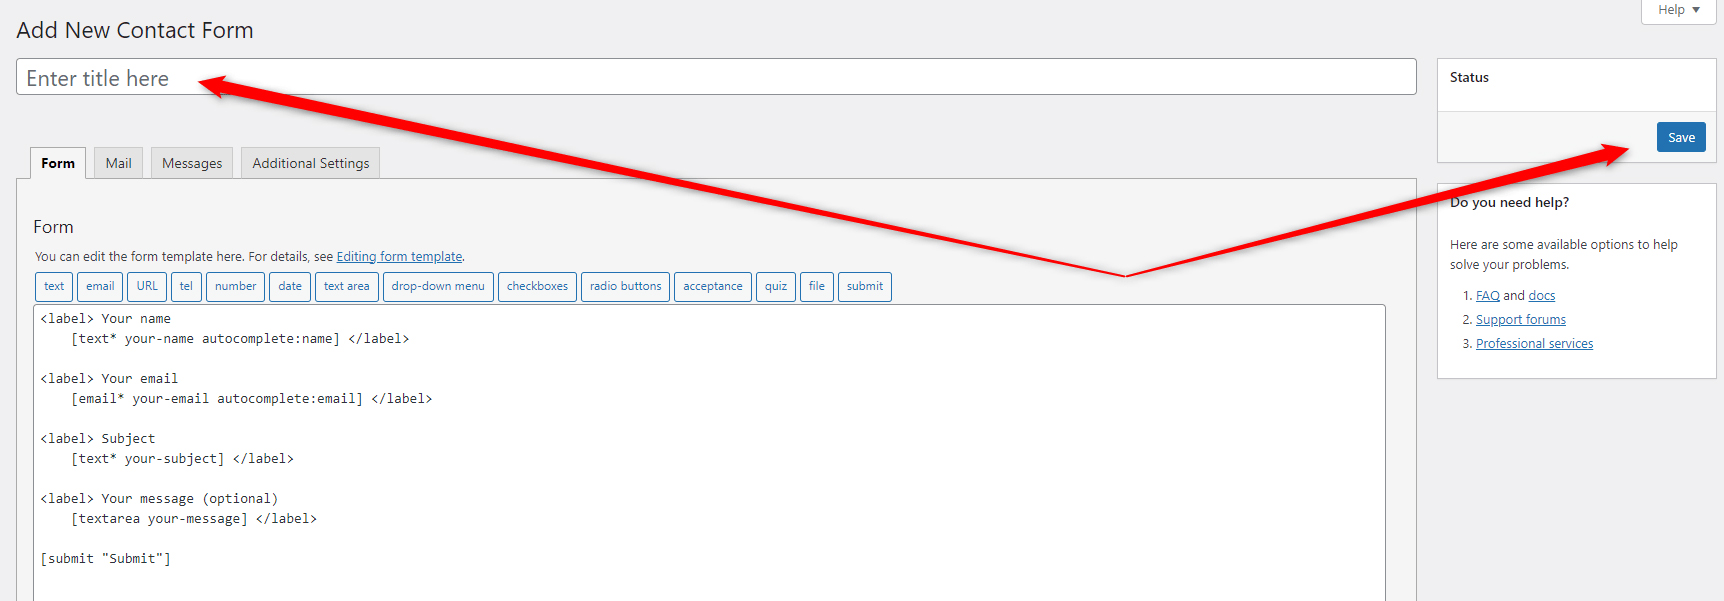
After that, have a look at the options that the plugin offers and think about what you would want to include in your contact form. Contact Form 7 allows you to choose among different settings and options, so you can customize your form precisely the way you wish it to appear to your website visitors:
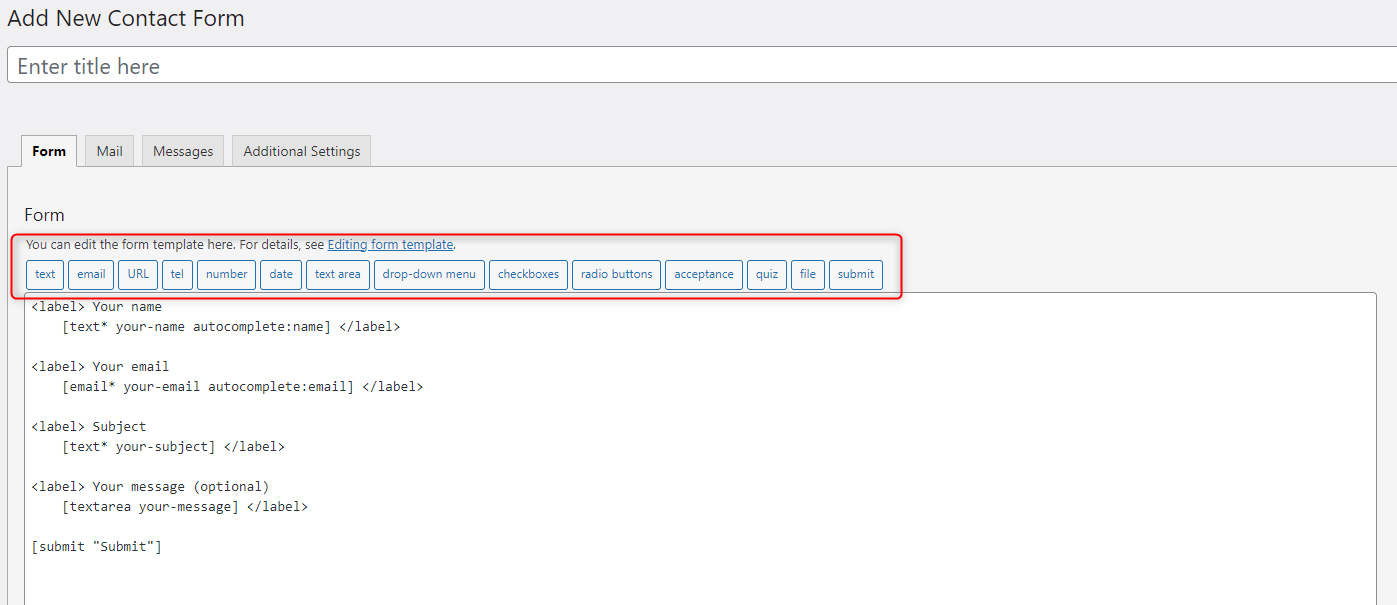
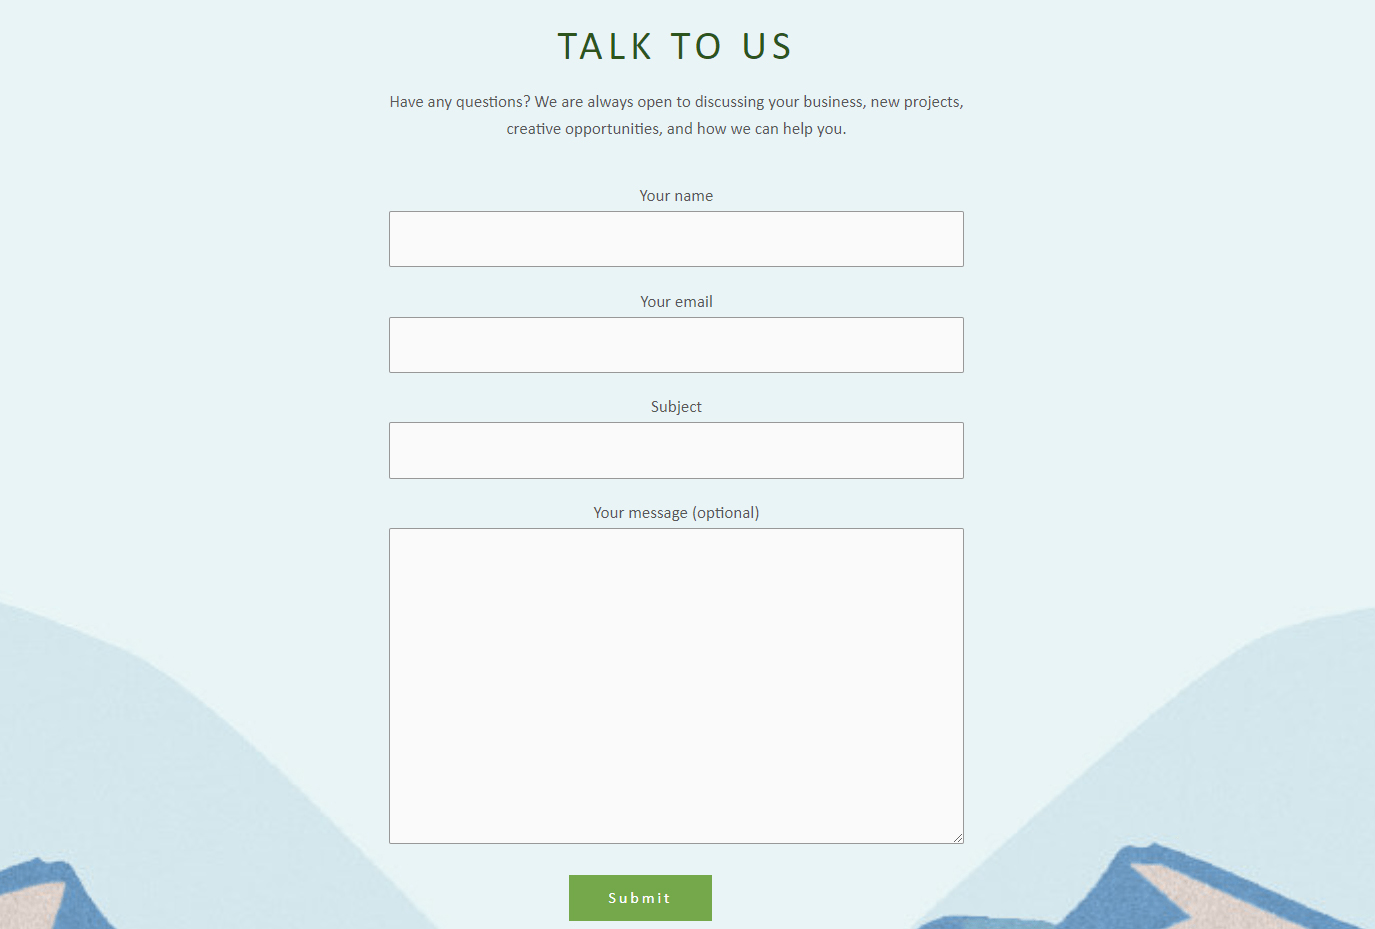
For this example, we will include a name, email, and a text field, so our site visitors can ask us various questions and give us suggestions.
Once you have added the elements to your contact form, you can give it a name and save it:
Step 4: Add your contact form to your web pages
Once you have created and saved your contact form, open your Contact Form page and notice the Shortcode associated with each individual form:
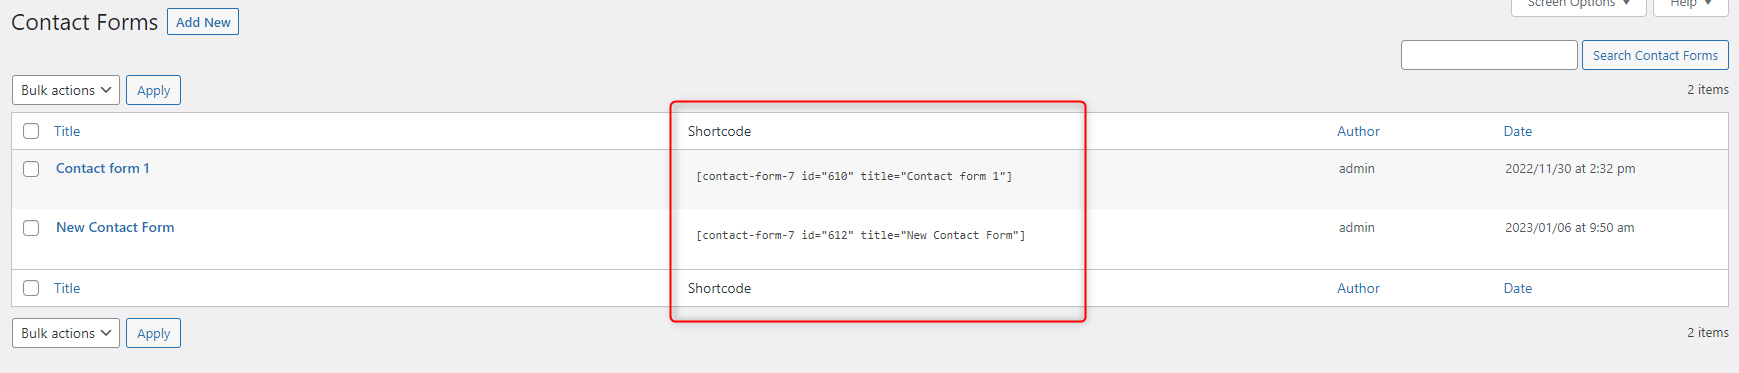
To be able to use any of your forms, you should copy and paste this code into the page where you wish to display the form.
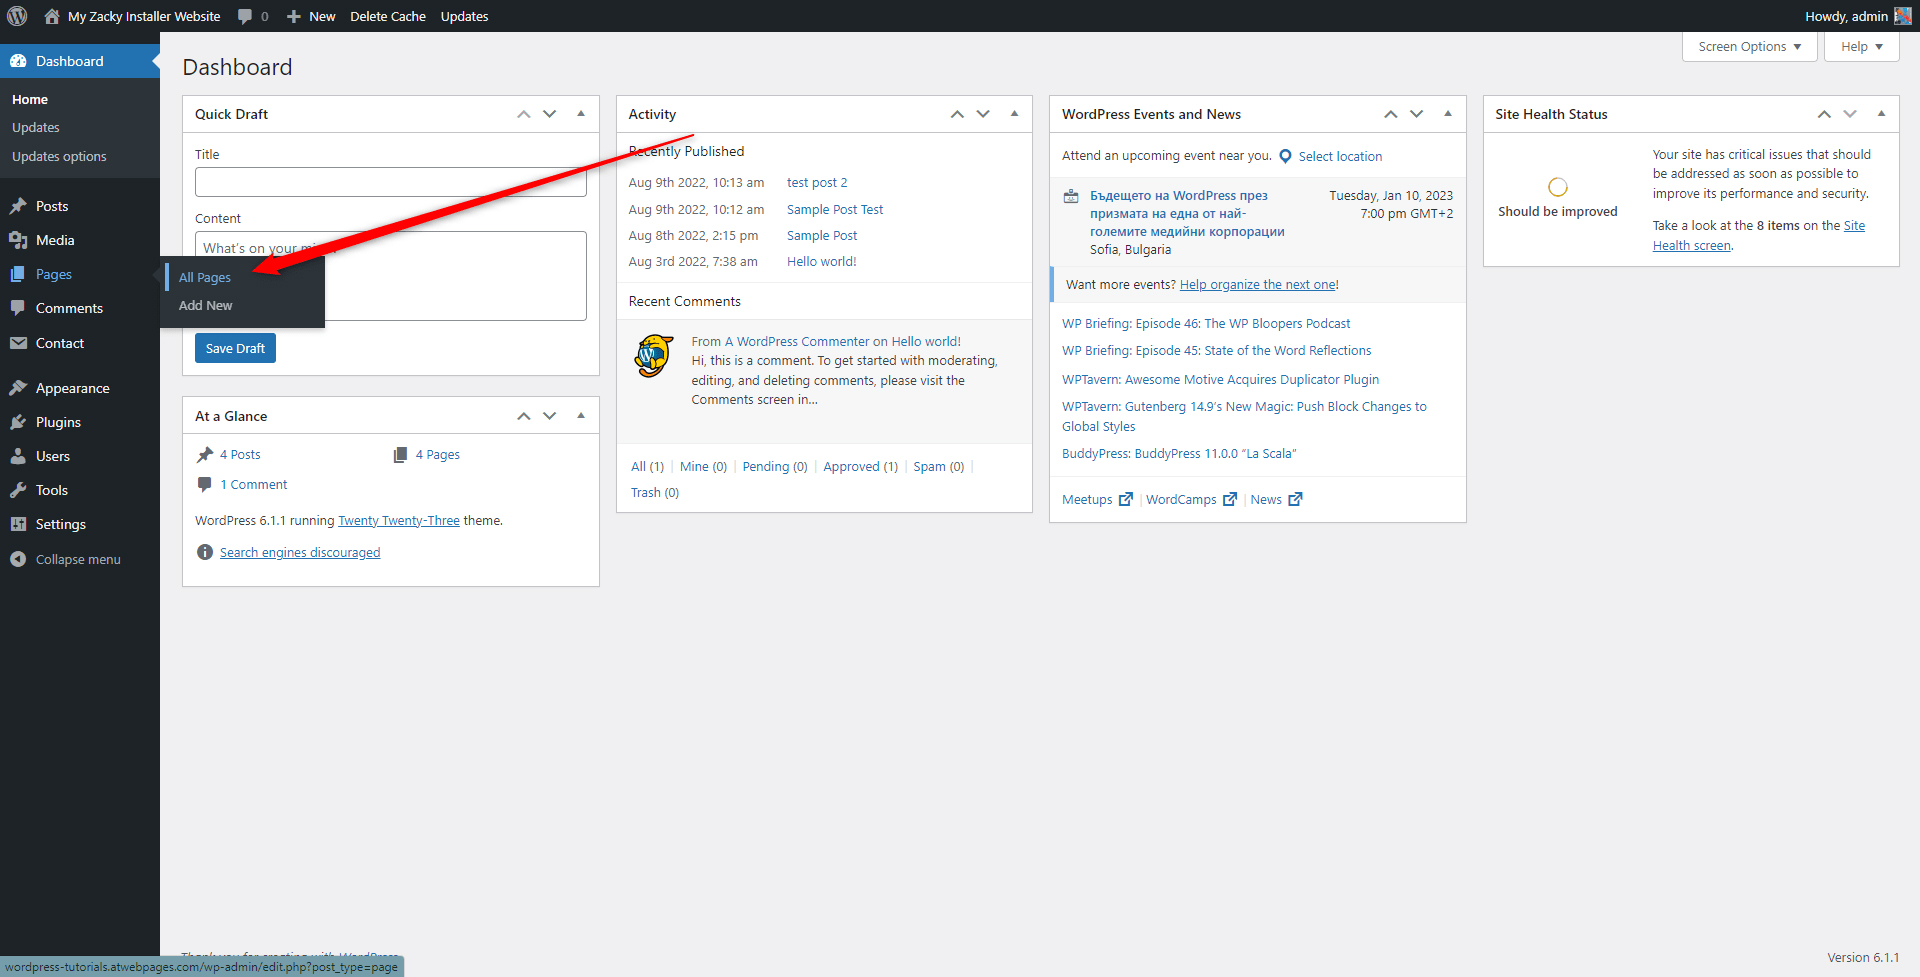
To do so, copy the code and then go to Pages->All Pages:
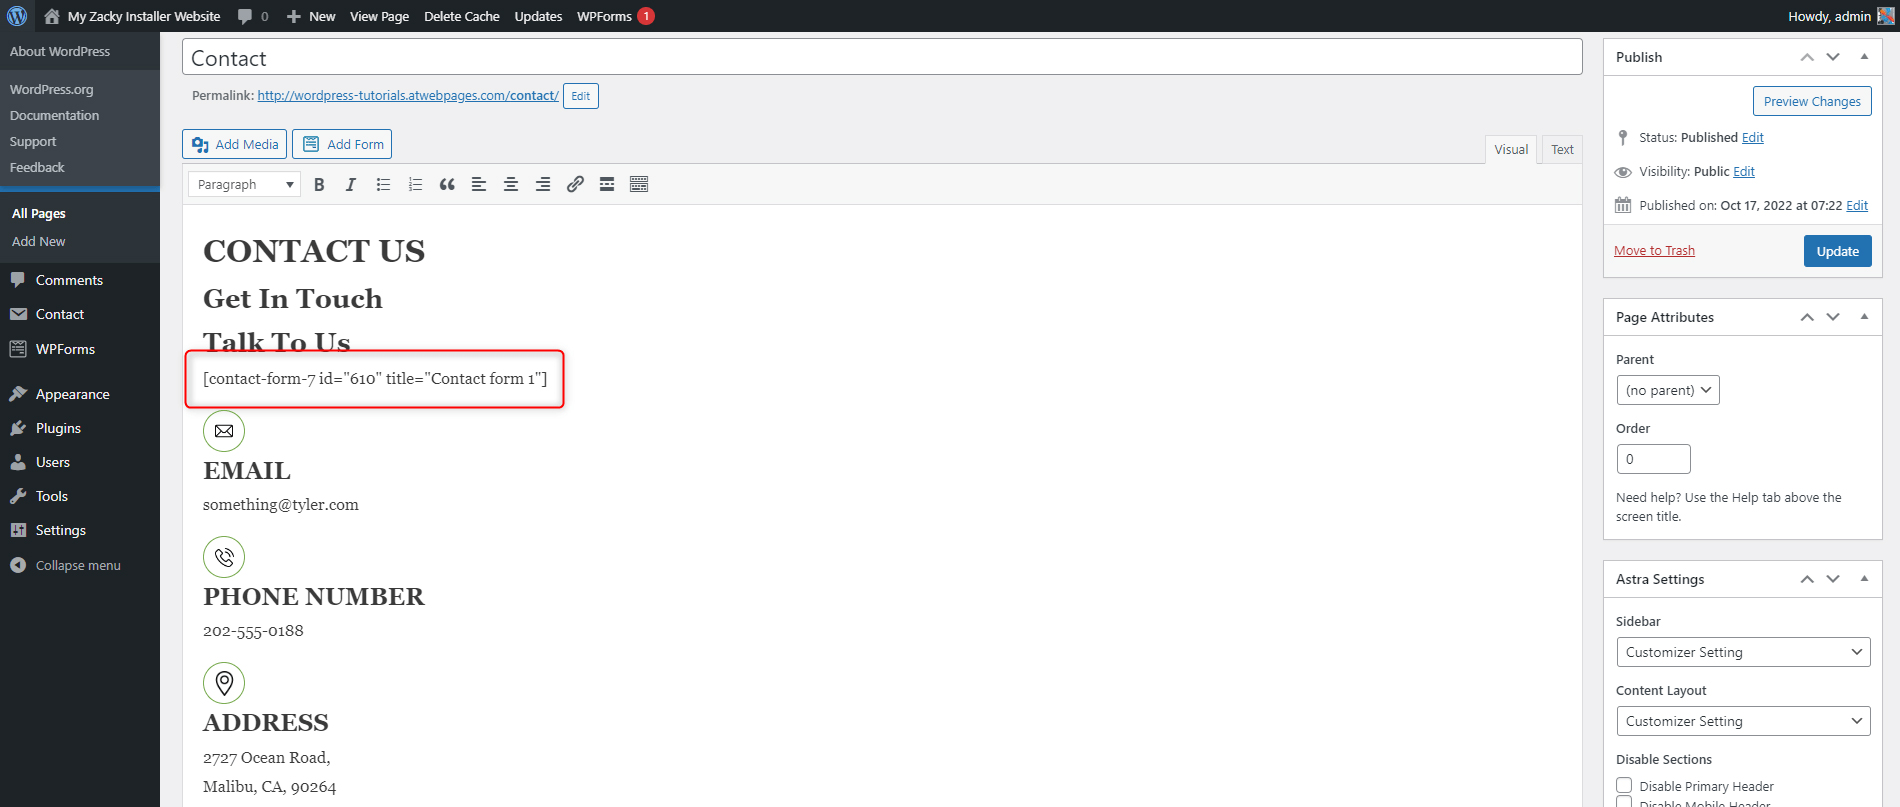
Then select the page that you wish to include this contact form. Once you open the page, paste the code right at the place you wish it to appear:
Save your changes and open your website.
You should be able to see and use the contact form you just included:
What to use the contact forms for?
Contact forms are a great tool to incorporate into your website and business strategy. They allow your visitors and potential customers to get in touch with you and share their thoughts, and ask questions about various topics concerning your organization.
You can also use contact forms for:
- Build an email marketing list
- Get user-submitted content
- Customer support contact
- Various types of surveys
Conclusion
Adding a contact form to your WordPress website is quite an easy and very effective way to engage your site visitors and keep in touch with them.
With only a few clicks, you can include a fully customized contact form in your website and use it to expand your list of site visitors and customers.
Related: