Categories are one of the two main taxonomies in WordPress (along with the tags). They allow you to classify your posts in logical groups and thus ensuring you can find, edit, group and delete any post or a set of posts quickly and easily.
In the following sections, you will read about:
two ways you can use to add categories to WordPress:
- Add Categories in WordPress From the Categories Menu on the Sidebar
- Create New Categories from the Add New Post Page
two ways to align posts into preferred categories:
- Align a Post Within the Add New Post Page
- Align Posts in Categories Via the Quick Edit Menu on All Posts Page
How to Add Categories in WordPress and Assign Posts to Them
There are a total of two methods you can create categories and two main posts to include posts within them. In the following paragraphs, you will read everything you should know about the topic.
Method 1: Add Categories in WordPress From the Categories Menu on the Sidebar
This approach will let you add a new category or sub-category prior to creating an article.
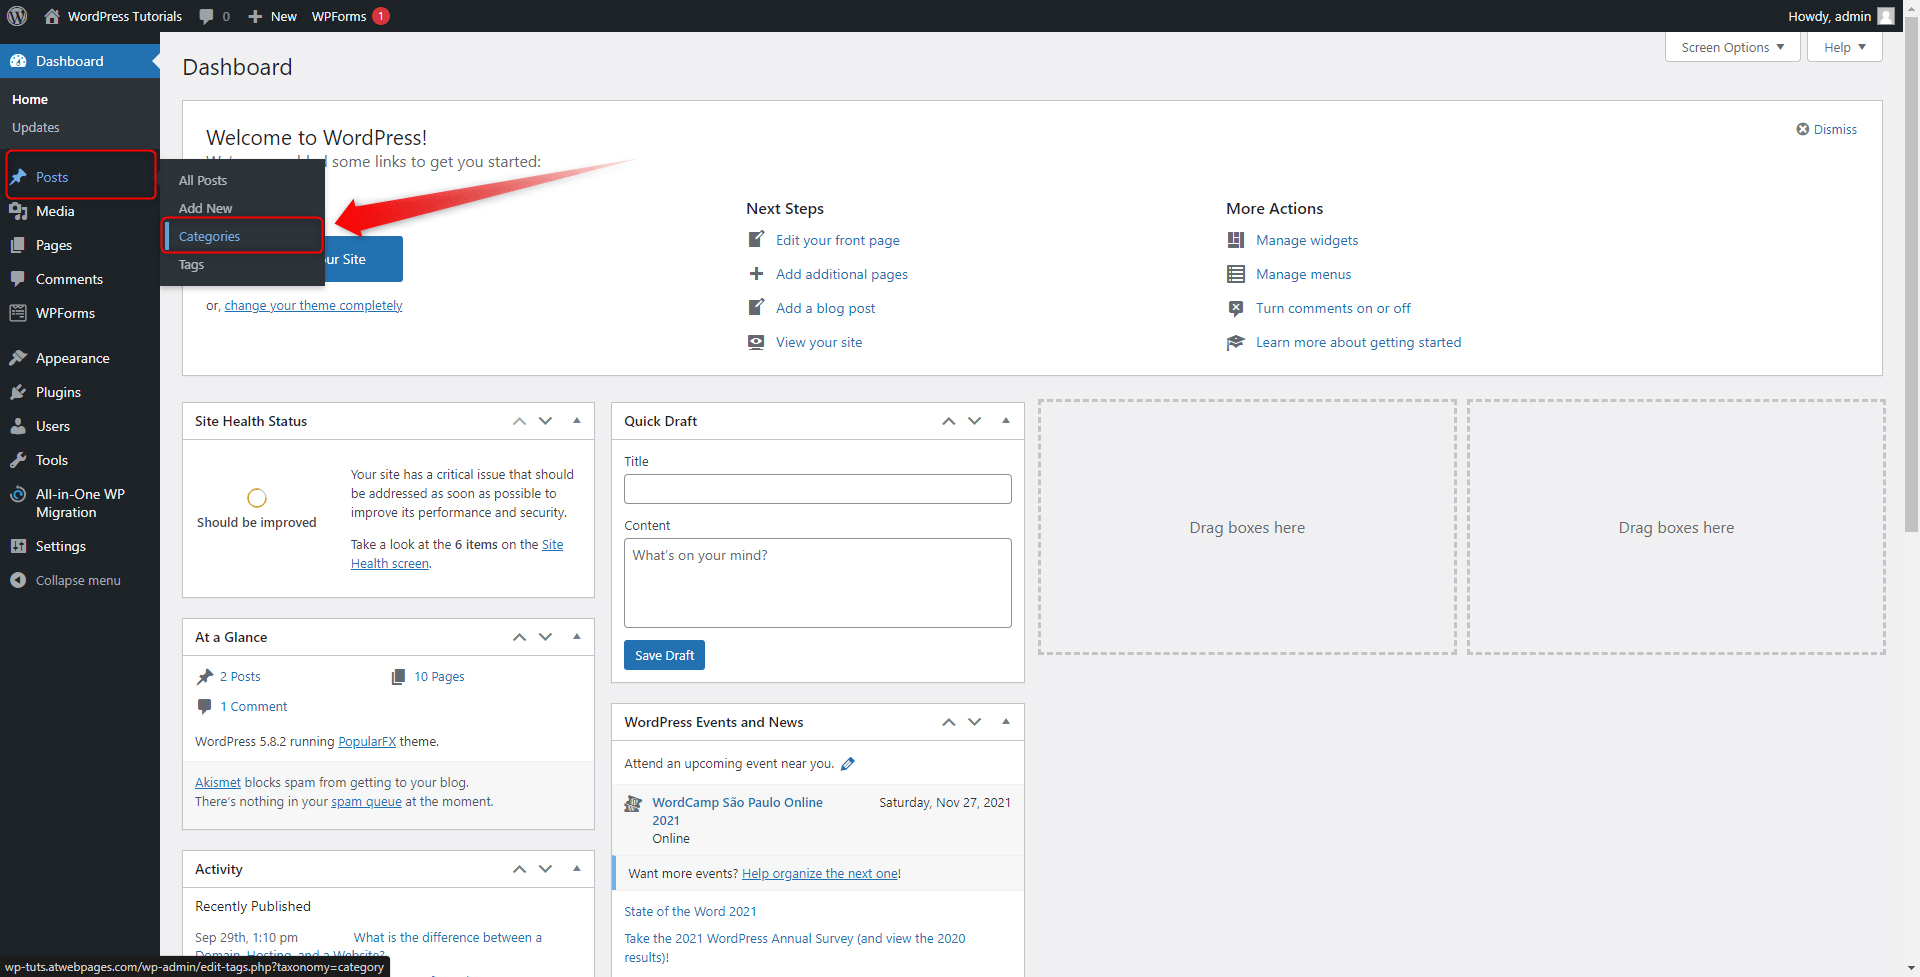
First, enter your WordPress dashboard and go to Posts -> Categories, located in the Sidebar:
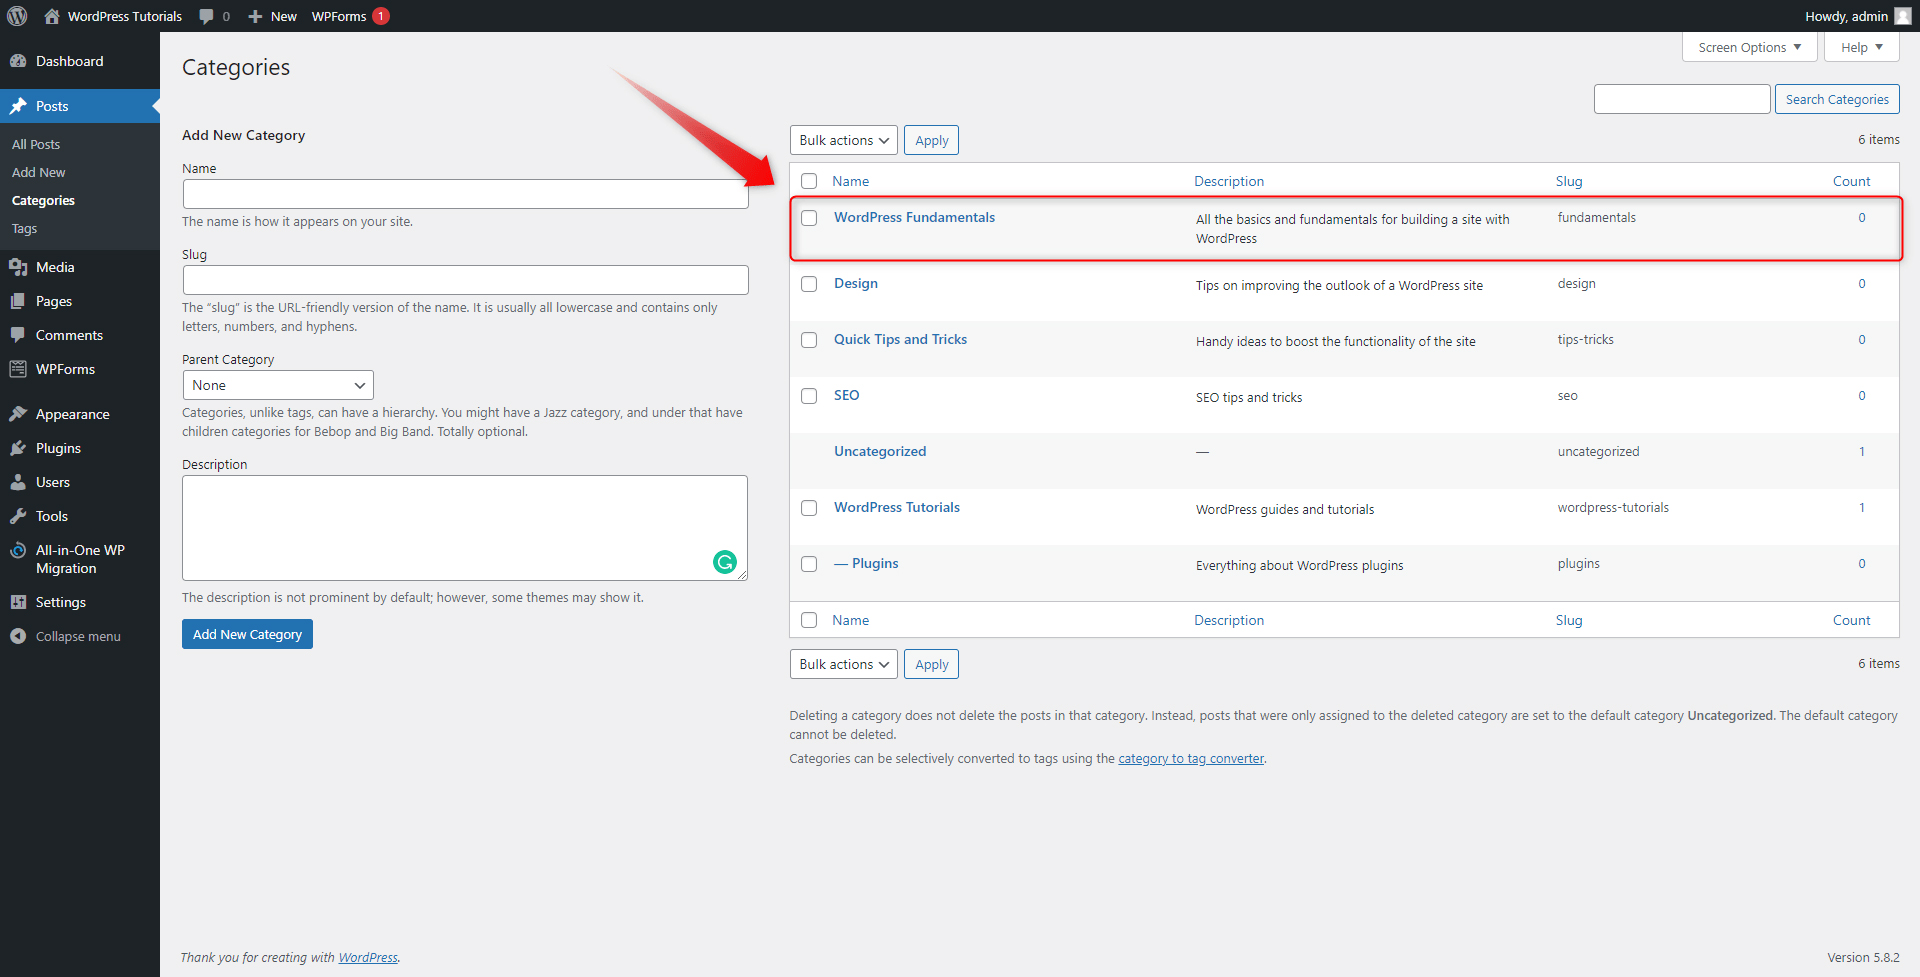
This will open the dedicated Categories page. From here you can create, edit and delete categories and sub-categories, as well as add descriptions and amend the URLs of each individual category:

Let’s have a more detailed look at the two main sections and see what they do:
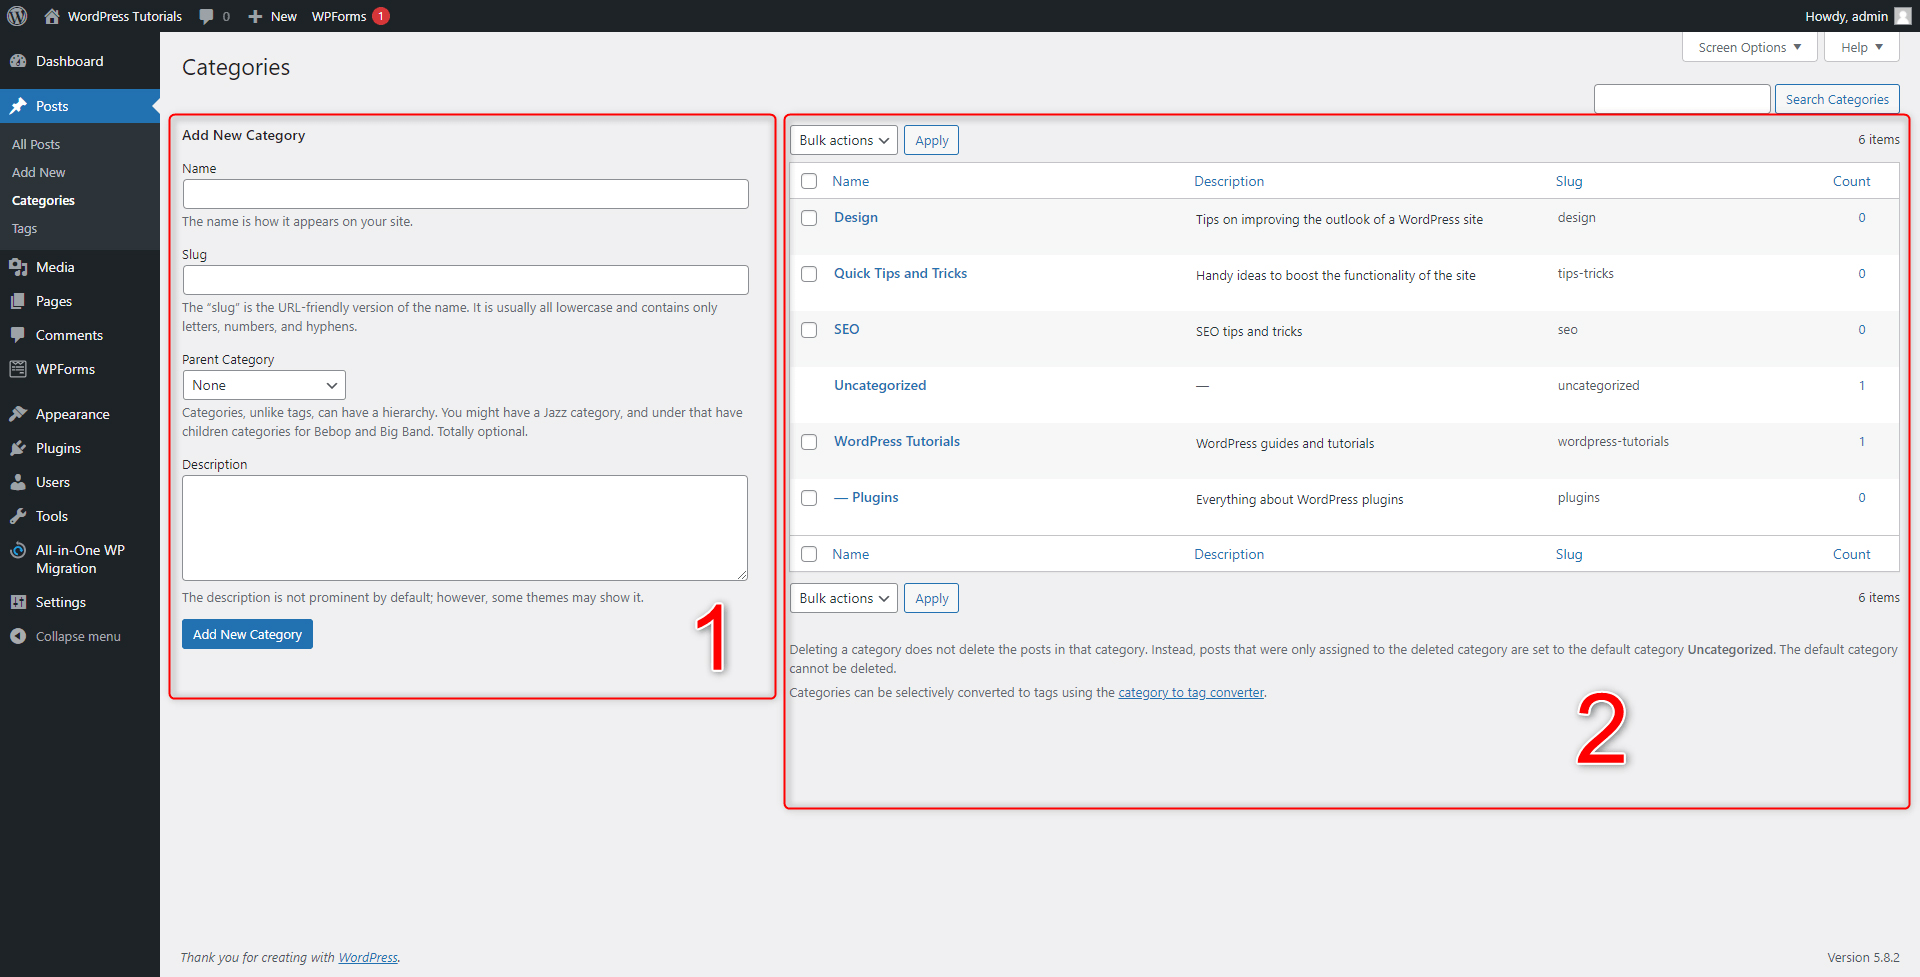
- This is the area from which you create a new category – you do so by adding a name, deciding whether the new category is a main or a sub-category, changing its slug, and adding a description.
- This is the list of all your existing categories – all the main ones and sub-ones. From this area, you can edit, delete, view, and manage all your existing categories. When you create a new one from the left side of the screen, it will automatically appear here, alongside all others.
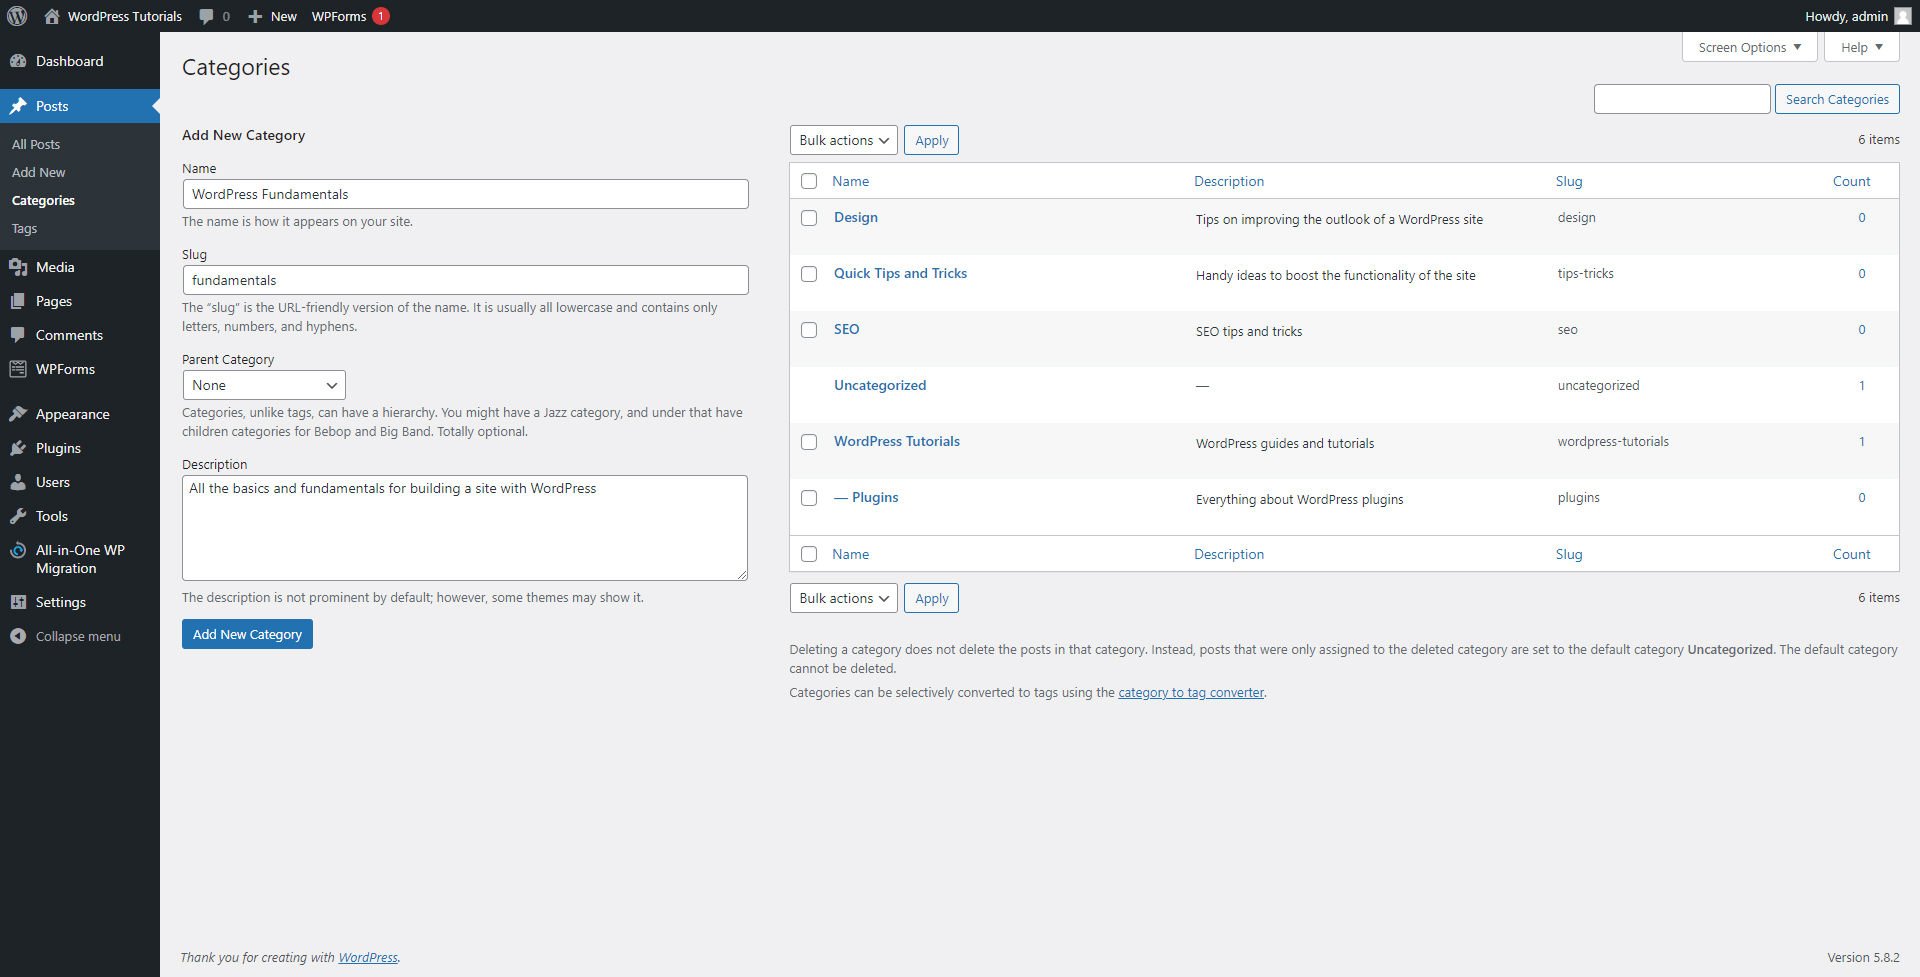
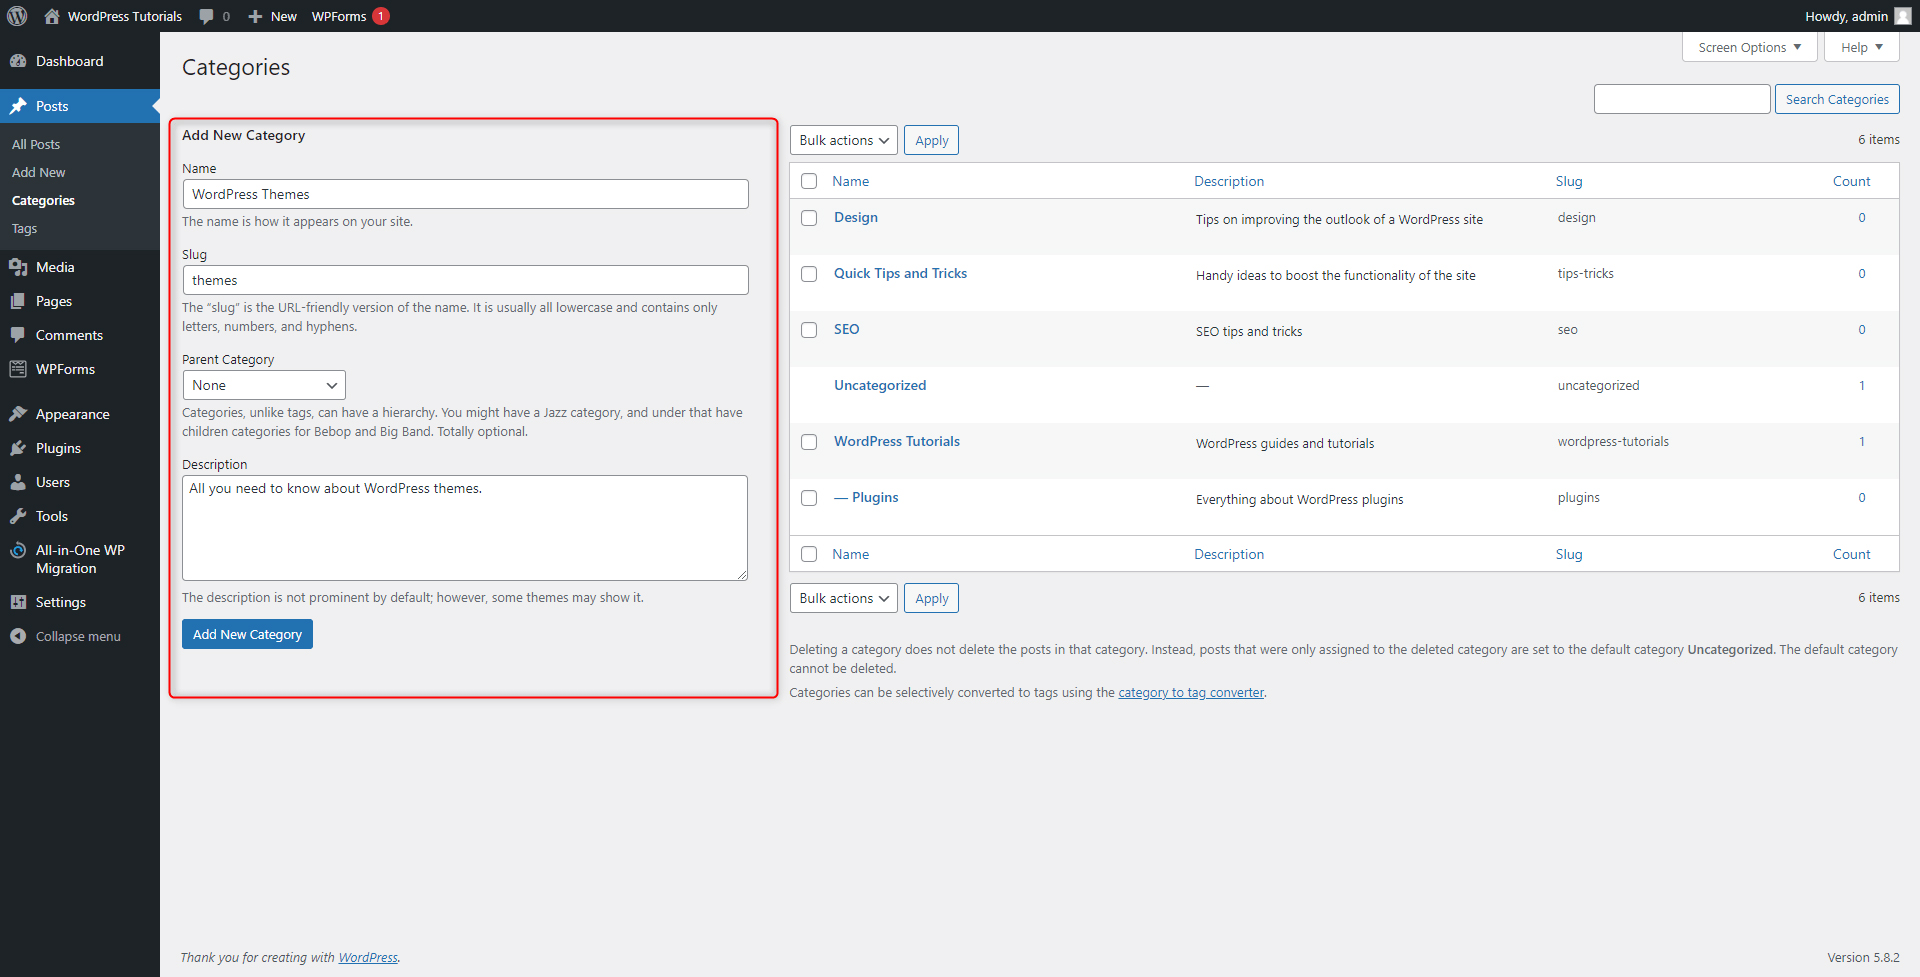
To create a new main category (also known as a parent category), head to the left area of the page and fill in the areas below the Add New Category. This means to choose a name, slug, and add a description:
- Category Name: choose one that conveniently describes the group of articles that would be sorted within this category. In our case, this is WordPress Fundamentals.
- Slug: This allows you to create a custom URL for your new directory. The slug can enhance SEO, and to use the option most efficiently, choose a short phrase that also contains a keyword.
- Parent Category: To make your new category a main one, you should select None from this menu – this will ensure that your new category won’t belong to any other one, and thus, remain the main one.
- Description: It allows adding a few words about your new category. Although it is not mandatory, we highly recommend you add a description to all your categories and sub-categories, as this makes the management of your posts and category sections far more convenient in the long term.
Here’s how ours turned out to be:
Now, to create the new category with these credentials, click on the blue Add New Category button.
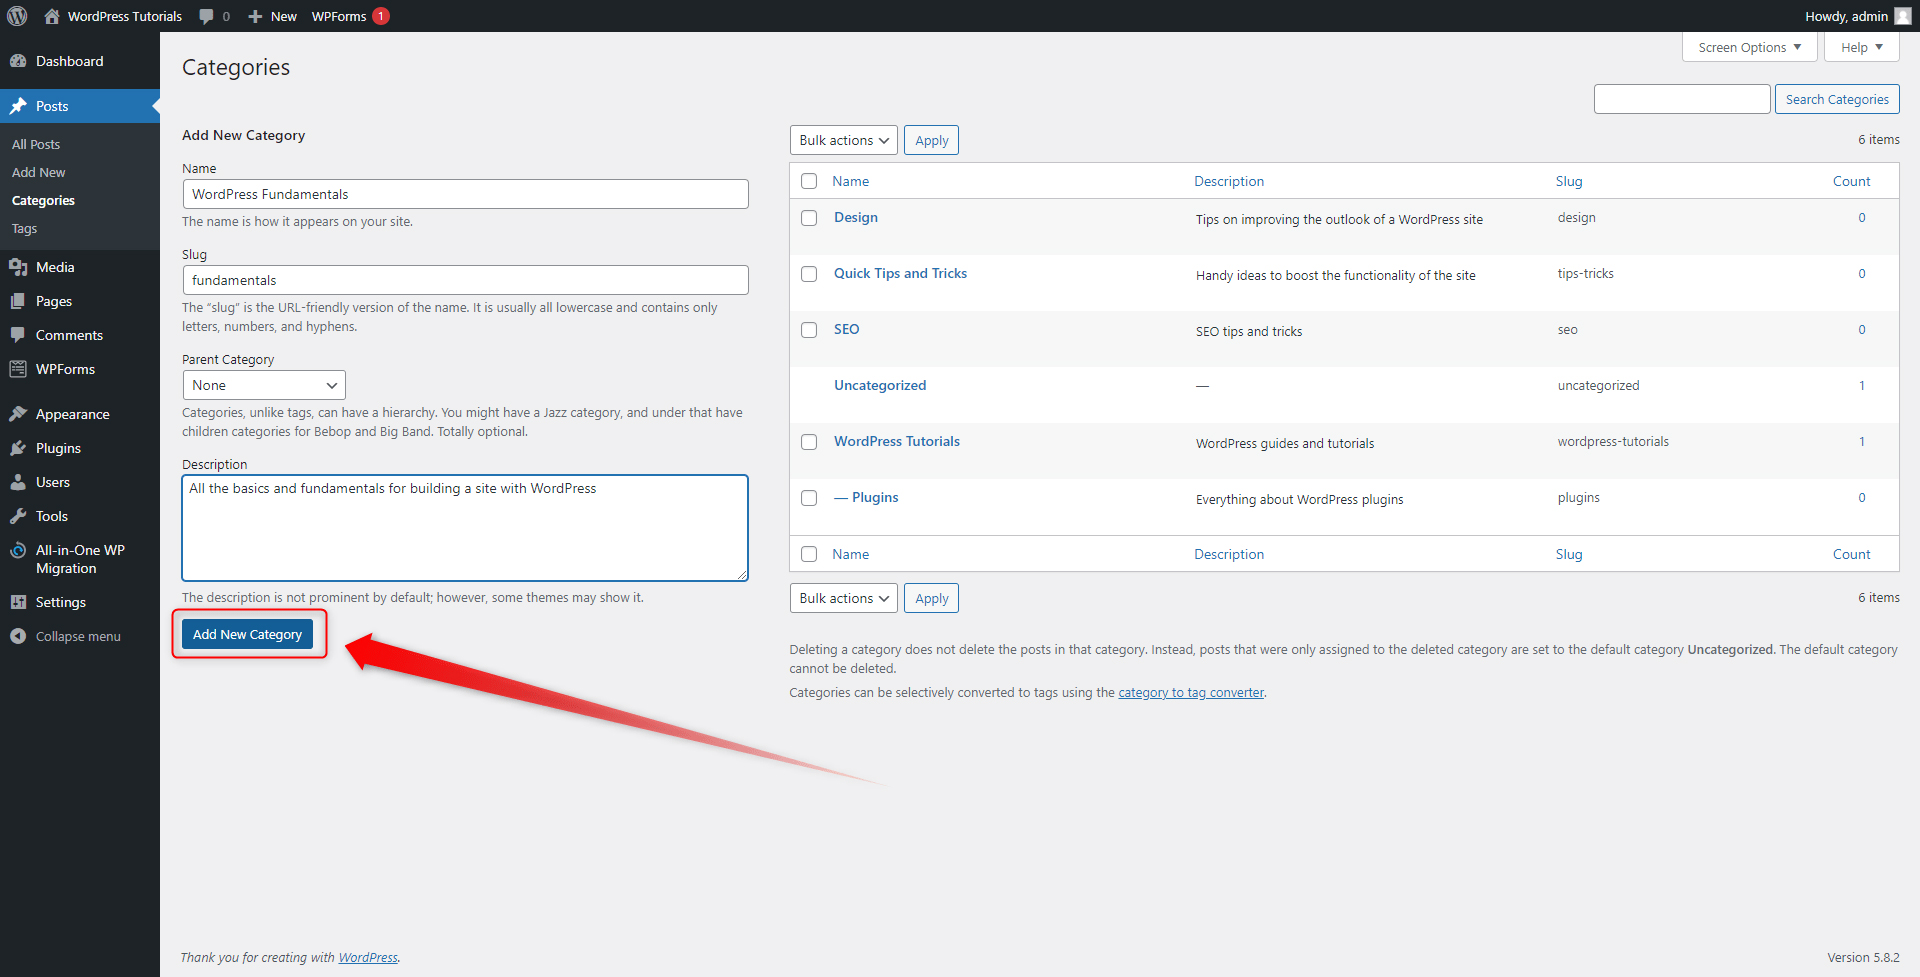
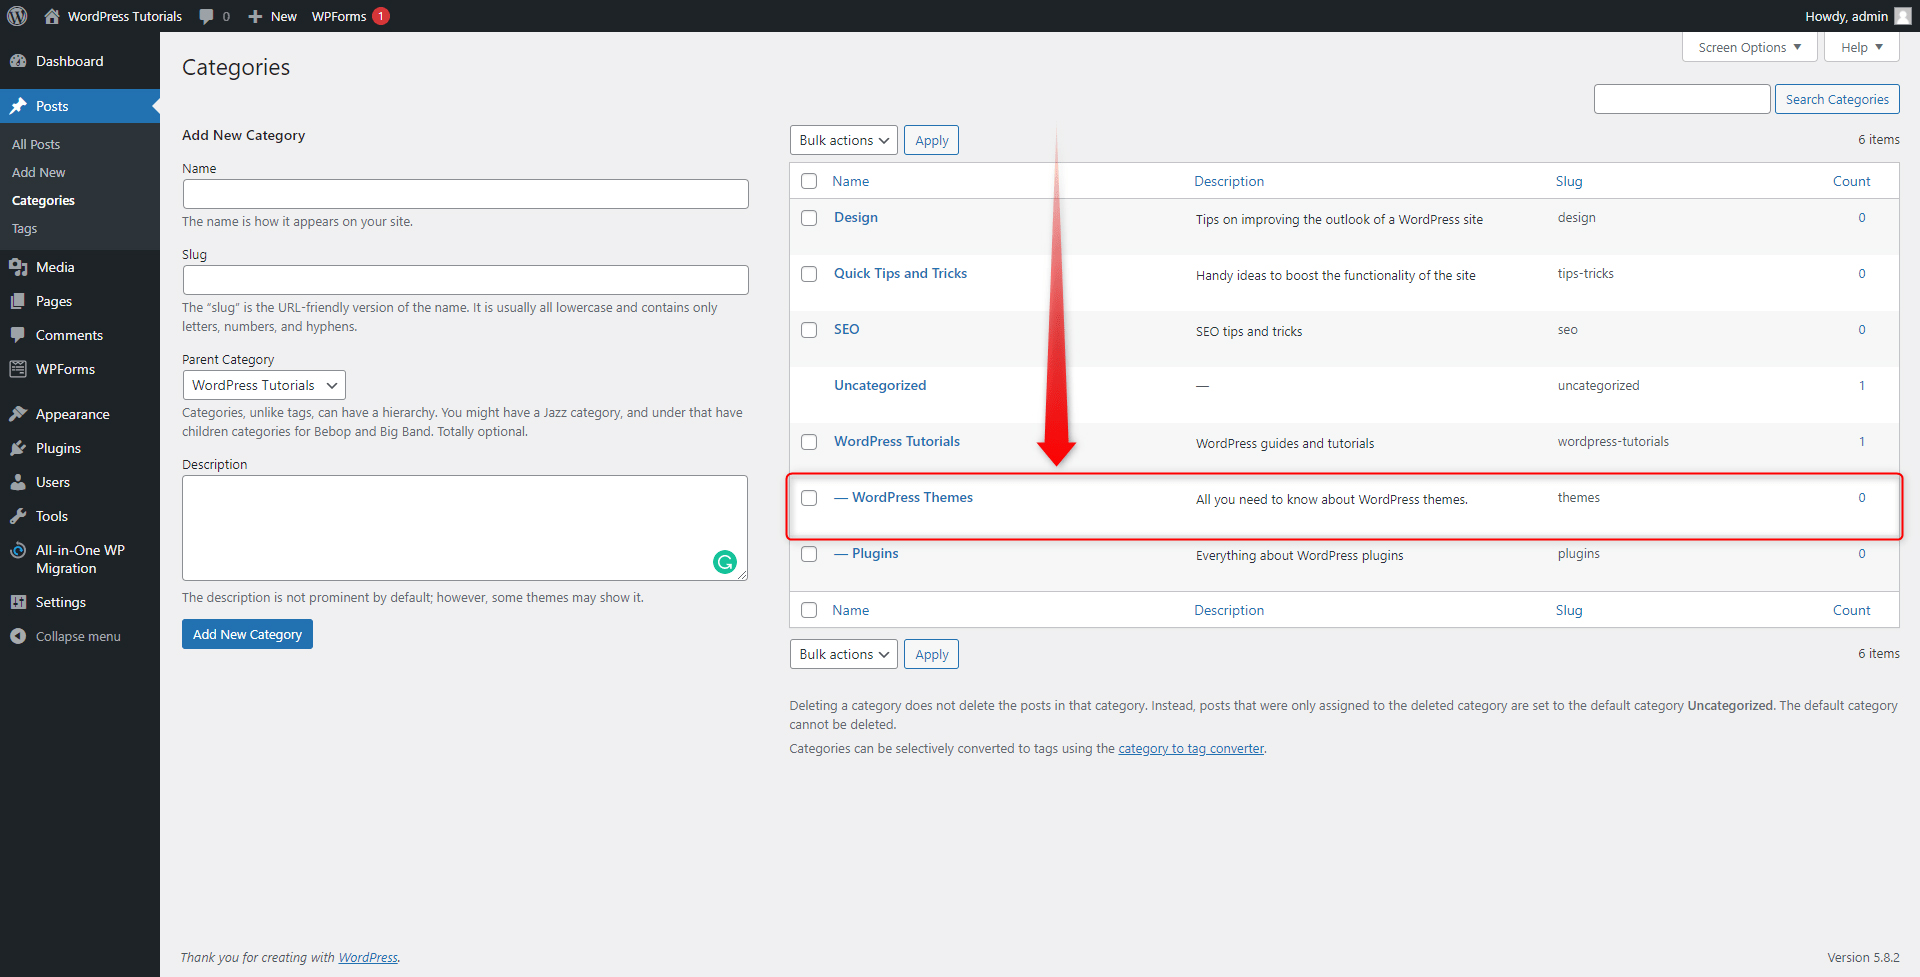
After you’ve clicked it, WordPress will automatically create the category and add it to the top of the list on the right of the screen:
Now, let’s create a new sub-category, a.k.a. child category. As mentioned, this is a category, which is contained within another one, named the main category or a parent category.
Once again, head to the left side of the screen and fill in the credentials for your new category:
However, this time take a closer look at the Parent Category menu. Click the small arrow and have a look at the drop-down menu. This is a list with all your already existing categories:
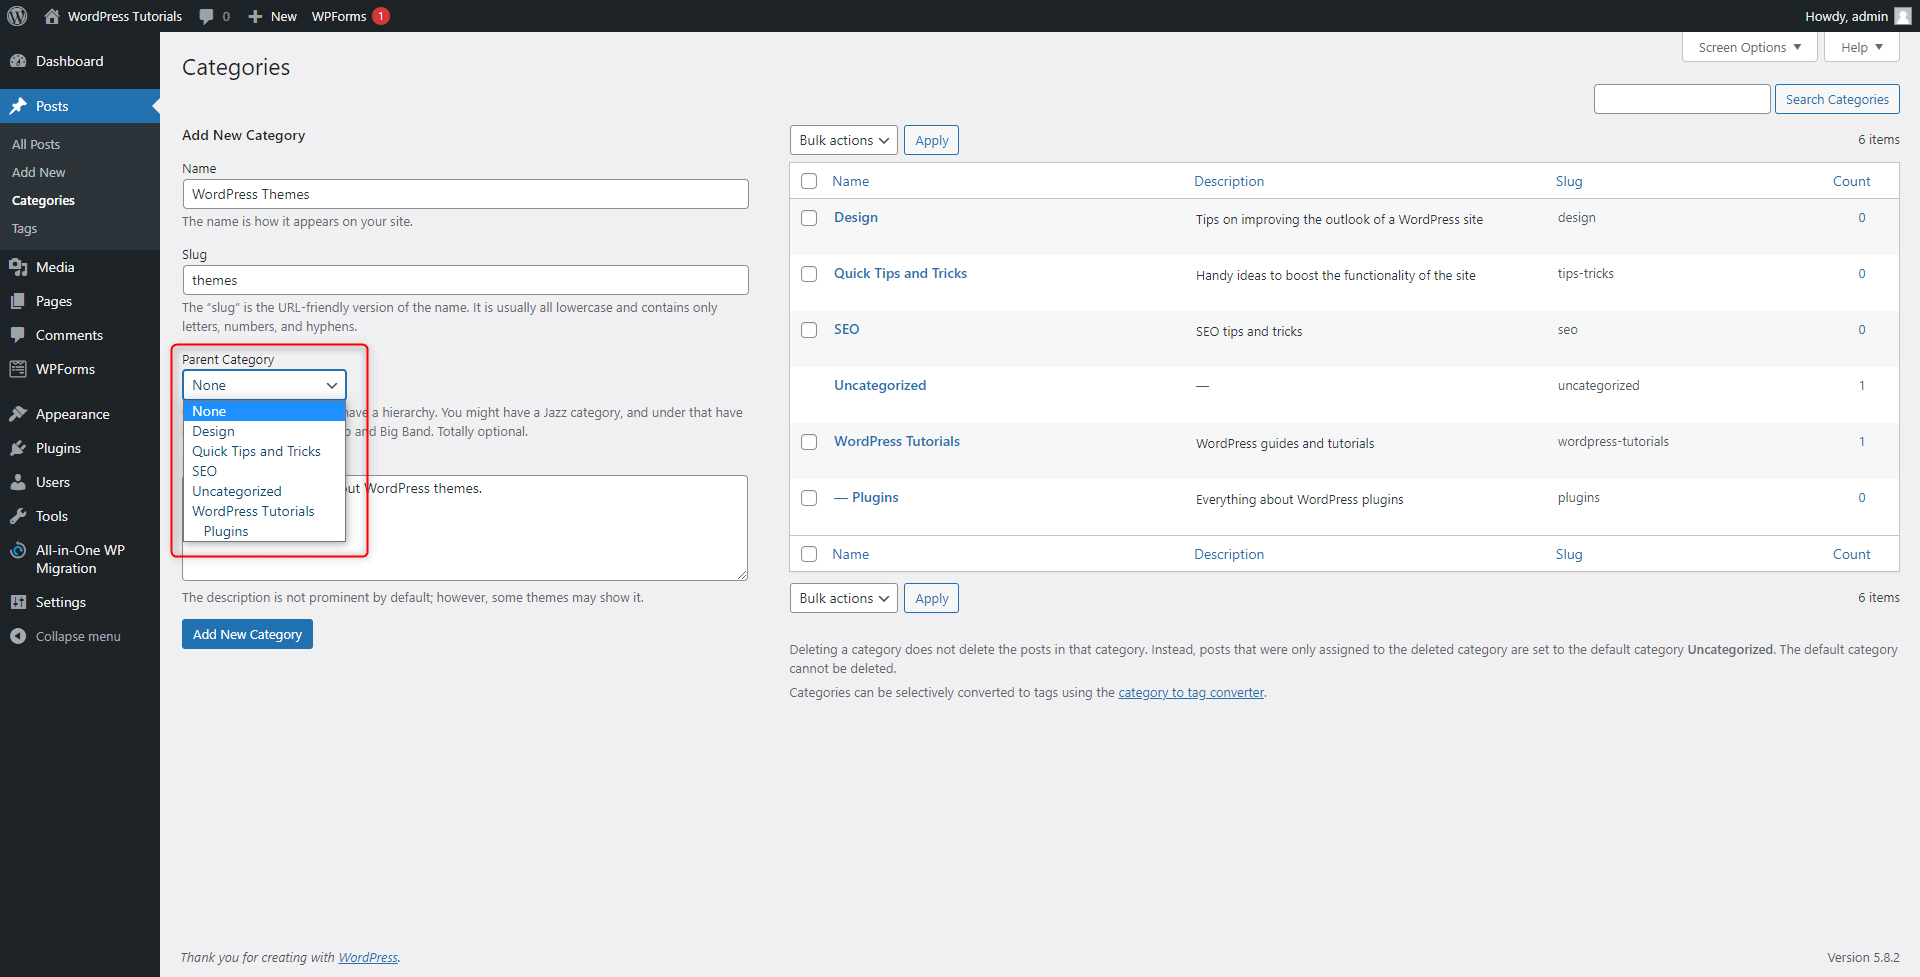
Choose one from this list and select it by clicking on it. When you do so, this selected parent category will contain the one you are creating right now:
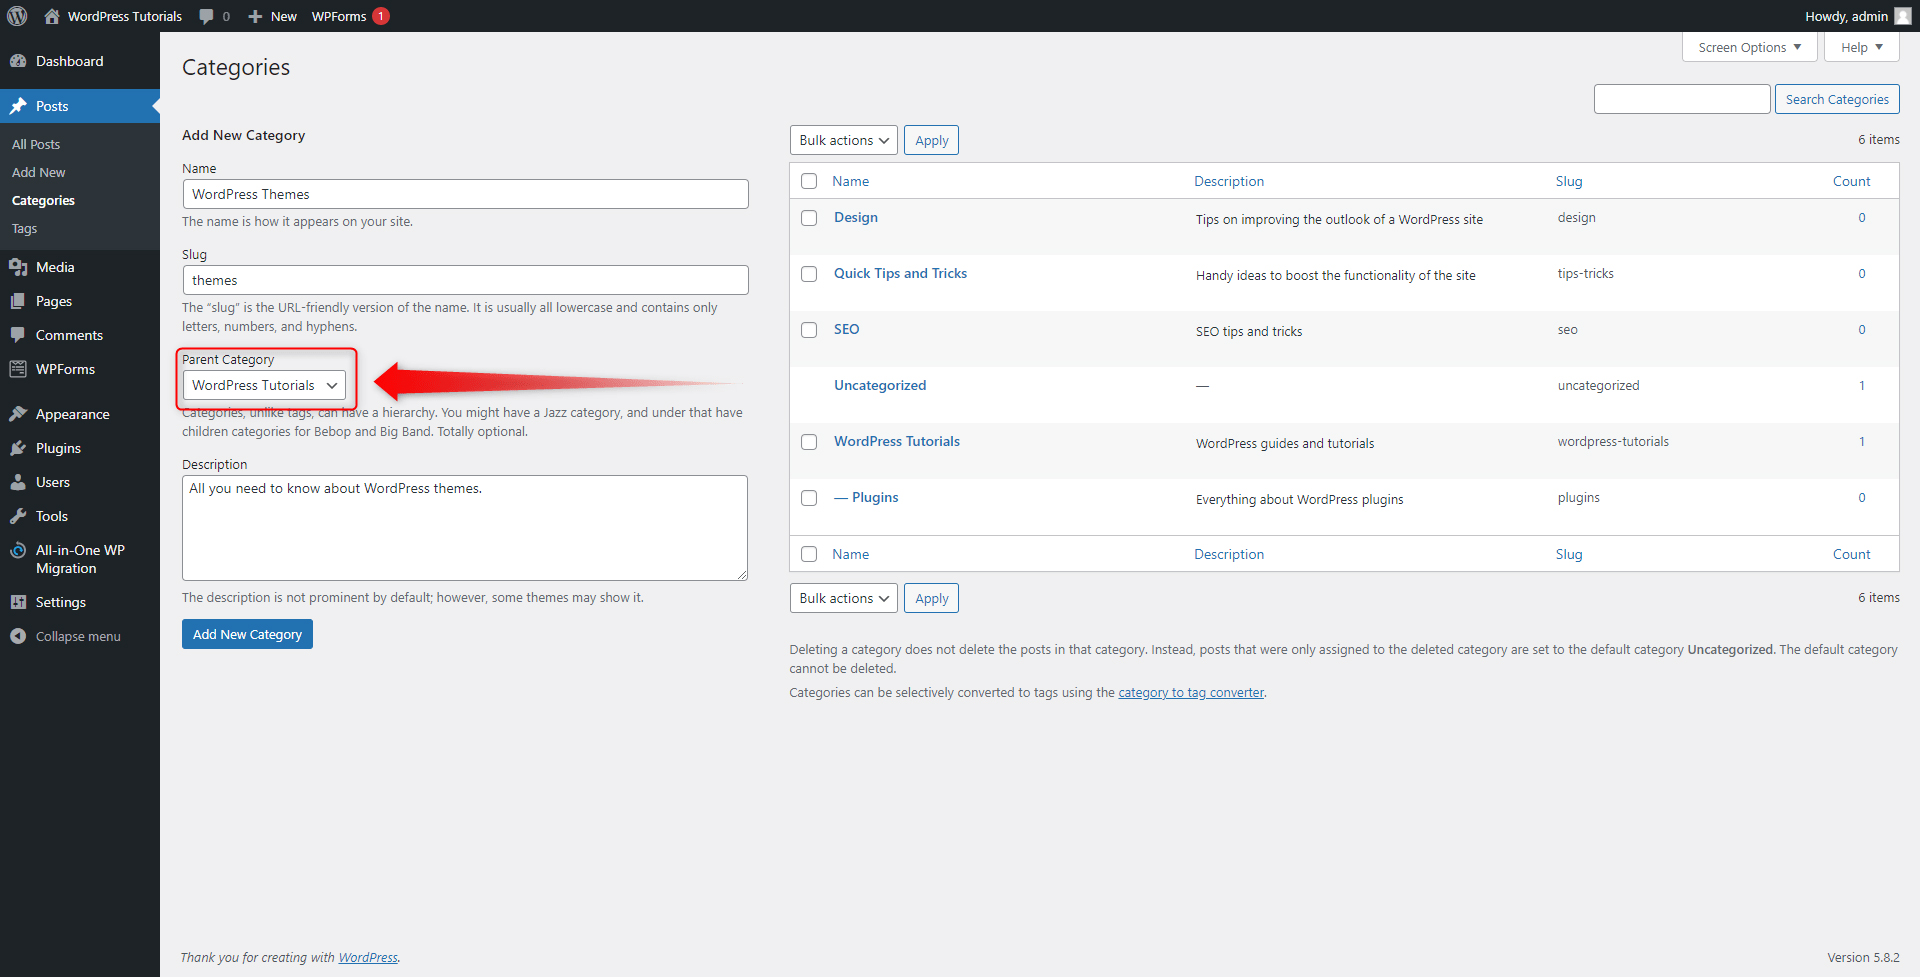
When you select your Parent Category, click on the Add New Category. Once again you will see your newly created one at the right of the screen. However, this time it won’t appear on the top of the categories list, but instead, will be placed just below the main category it is contained within. Also, you should notice that all sub-categories contain a hyphen before their name:
This is how you can create categories and sub-categories via the Categories menu.
In the next section, you will find out how to create new categories within the New Post section.
Method 2: Create New Categories from the Add New Post Page
This approach will let you add a new category or sub-category while you are editing a new post.
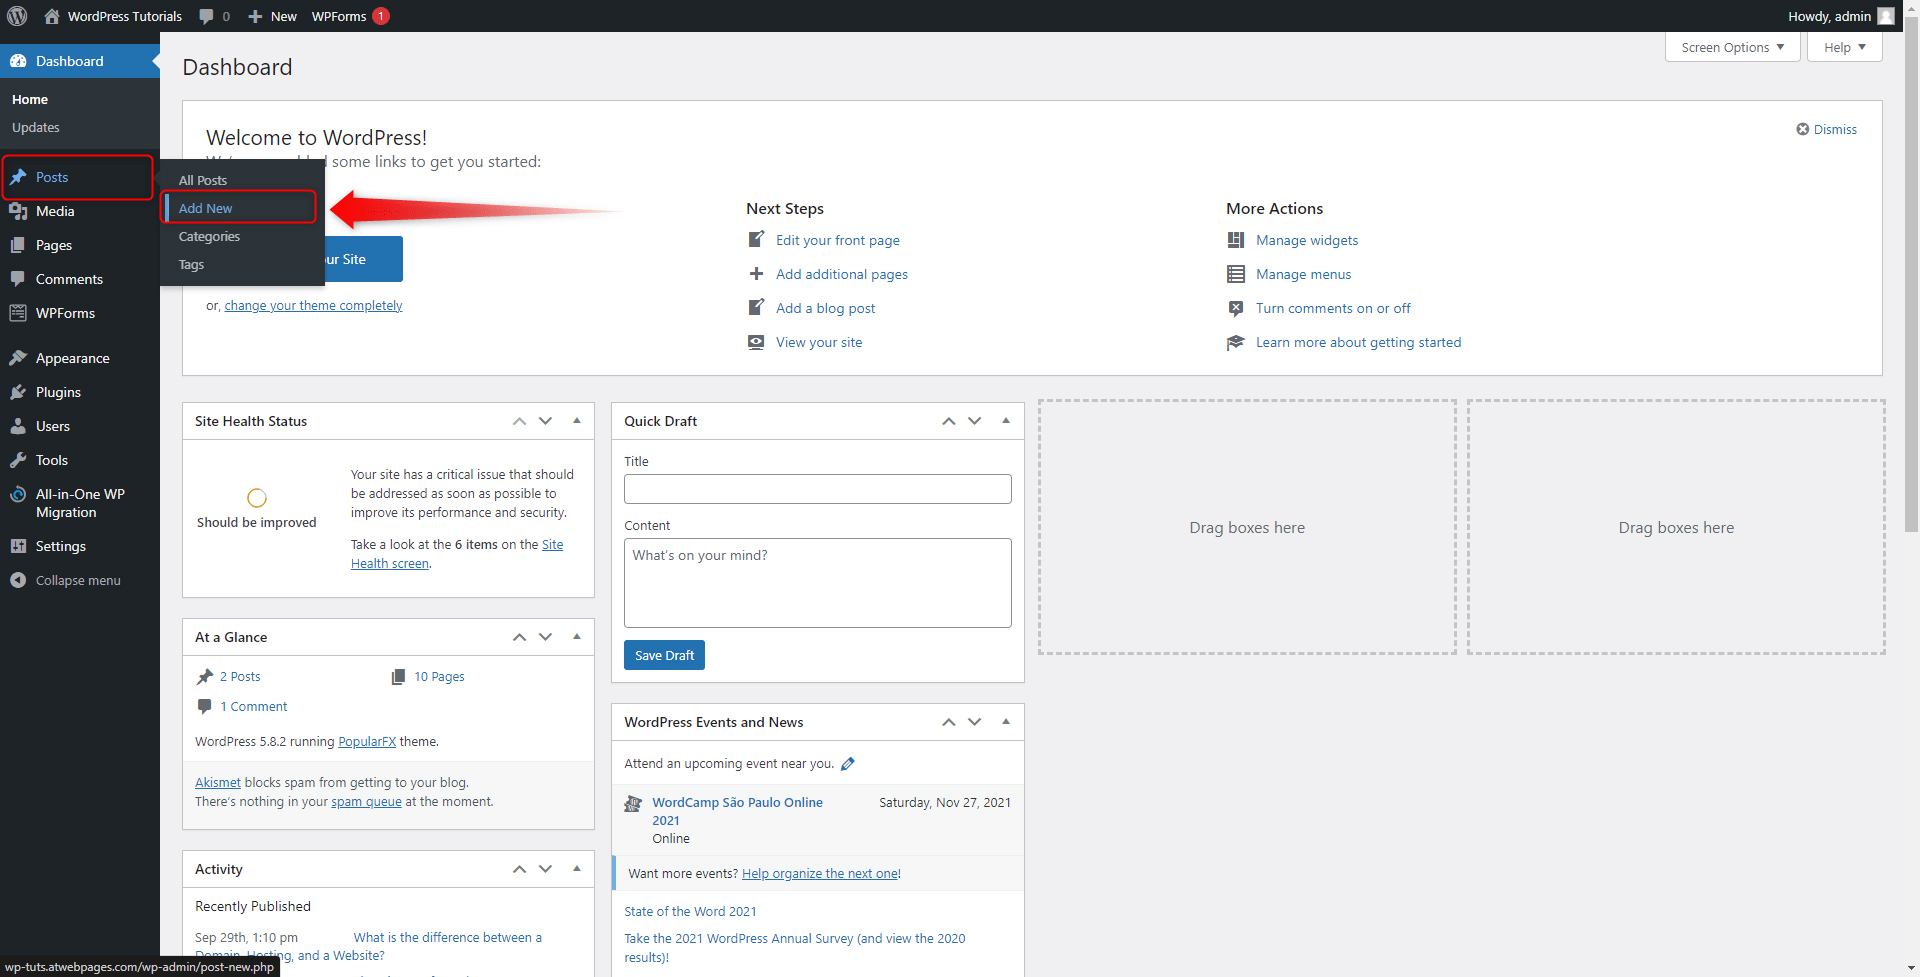
First, enter the Add New Post page:
This will open the Add New post creation menu. Have a look at the right section of the page. There you should find a Categories box with all your main and sub-categories:
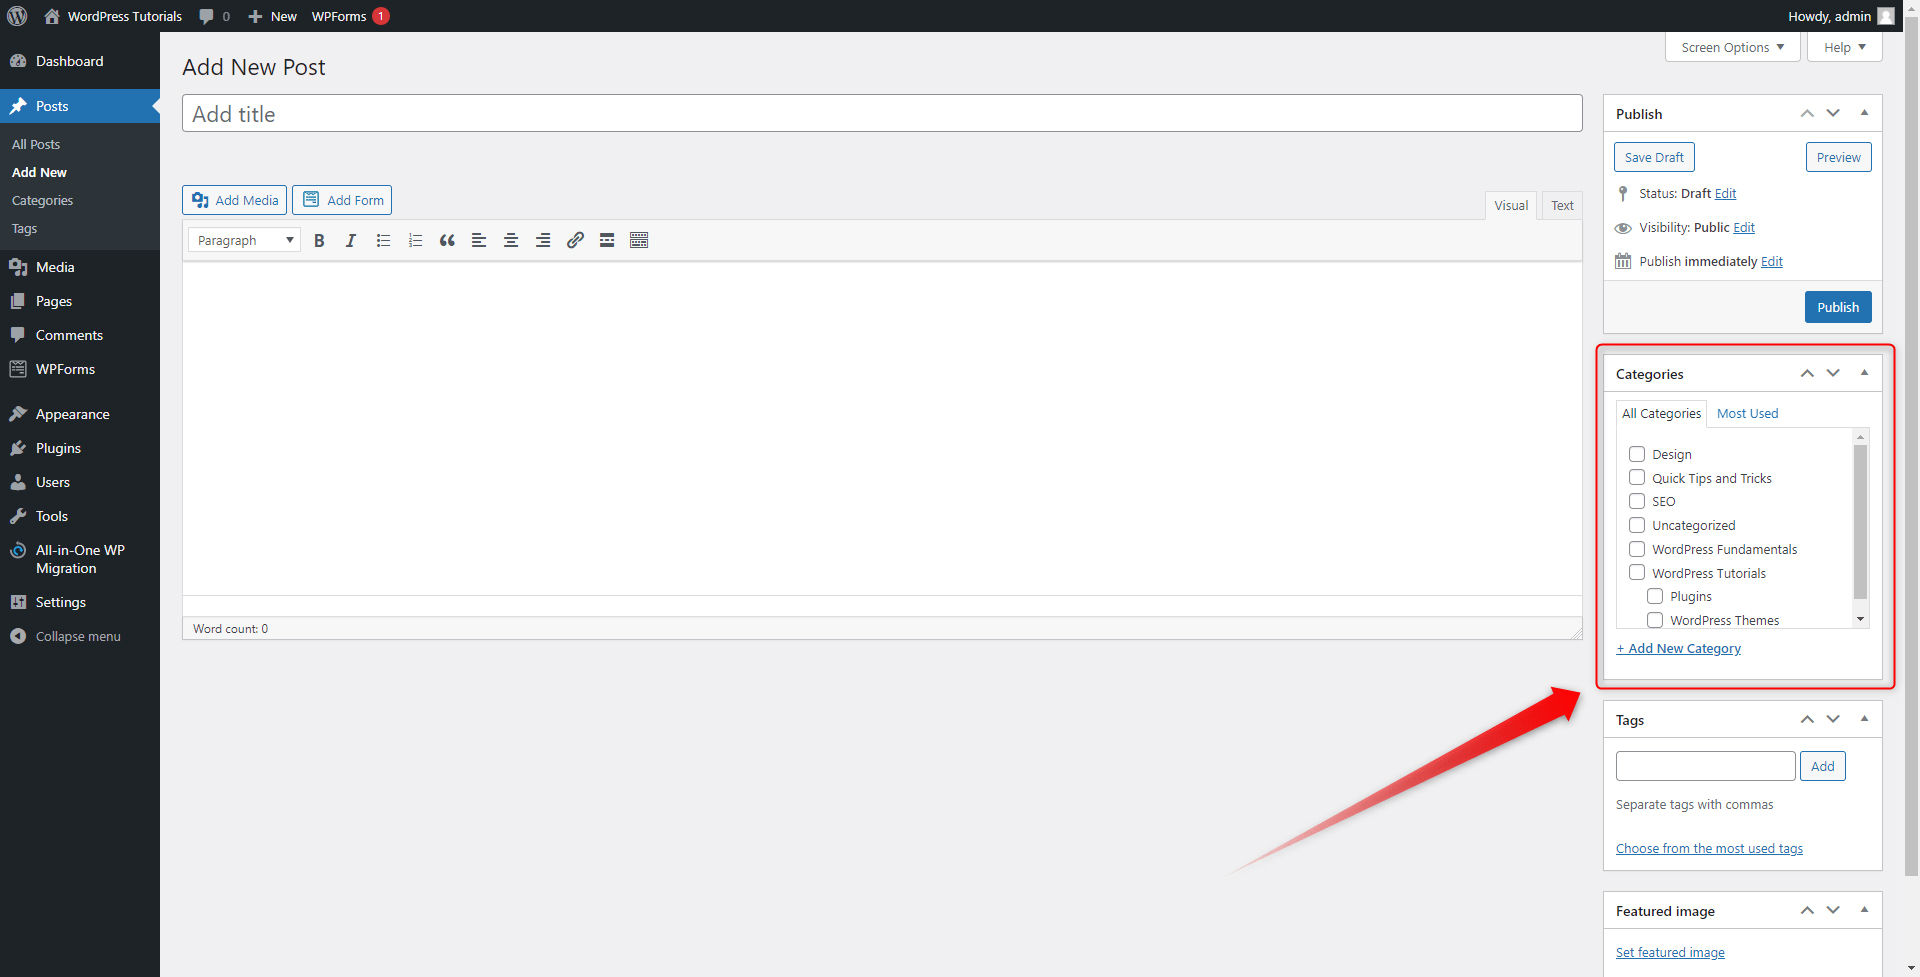
Within this box and below the list of all the categories, you should notice a blue + Add New Category button:
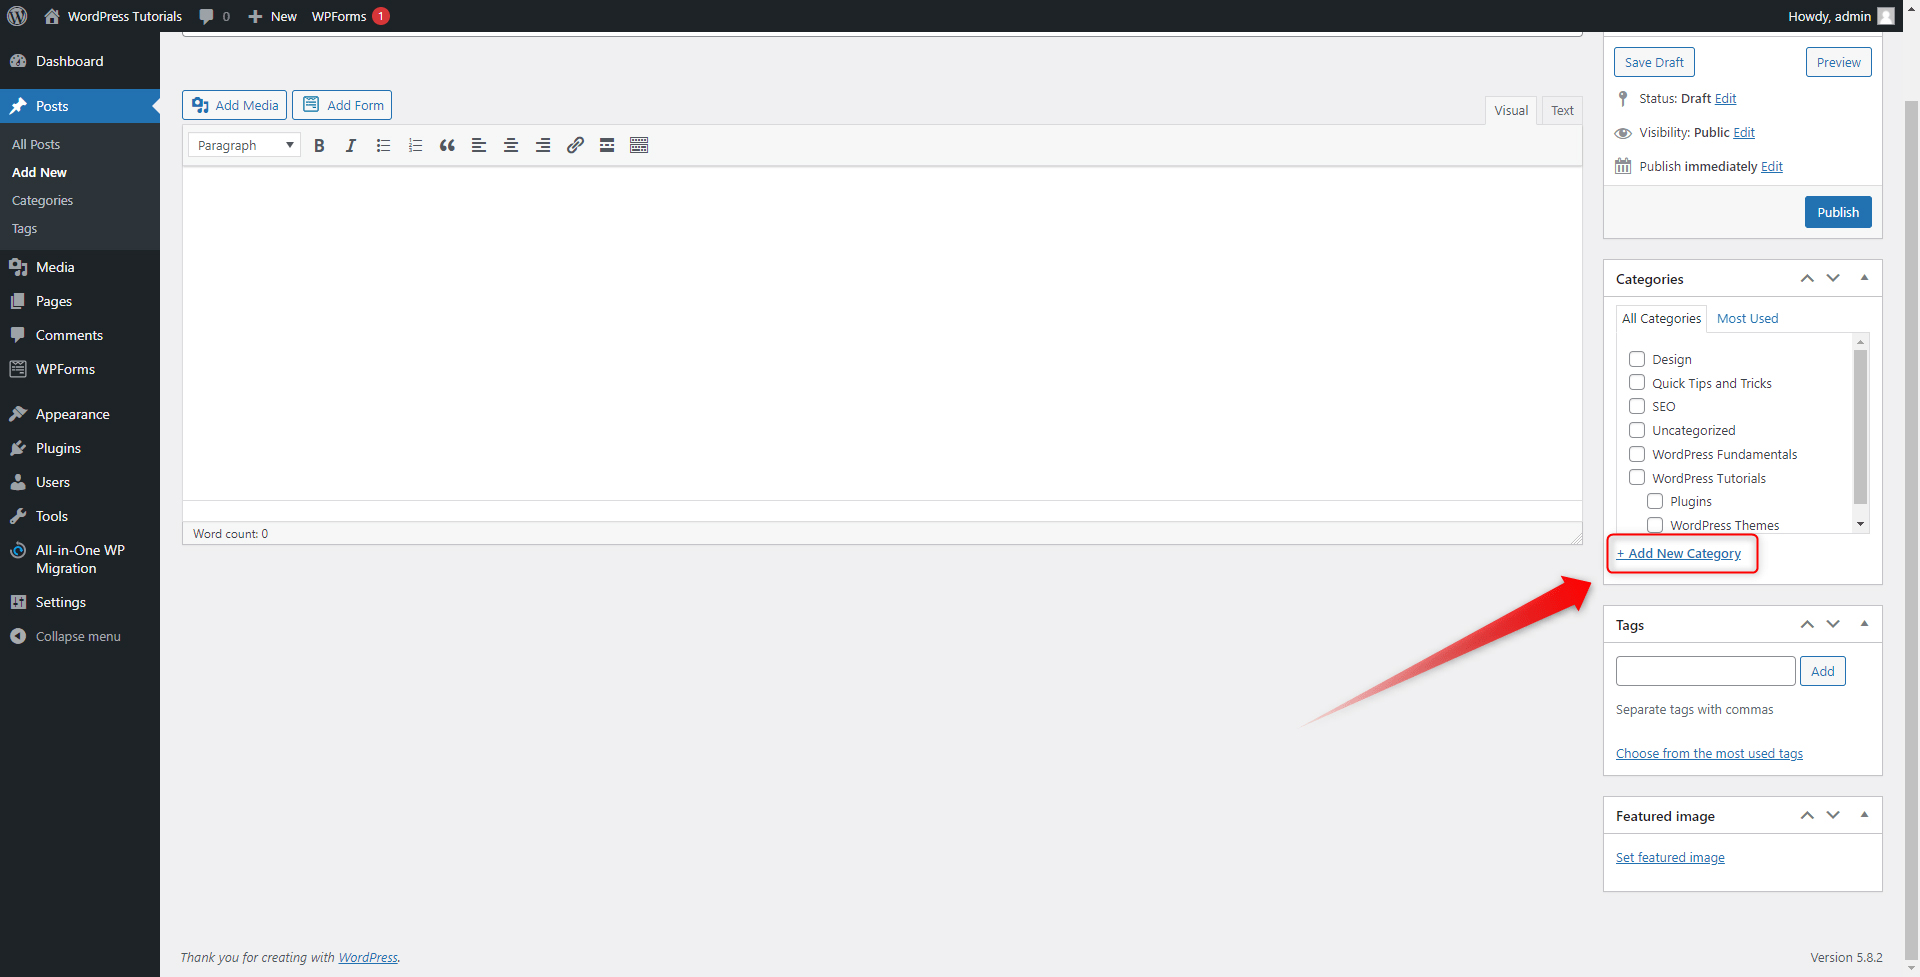
When you click it, a new menu with options will appear:
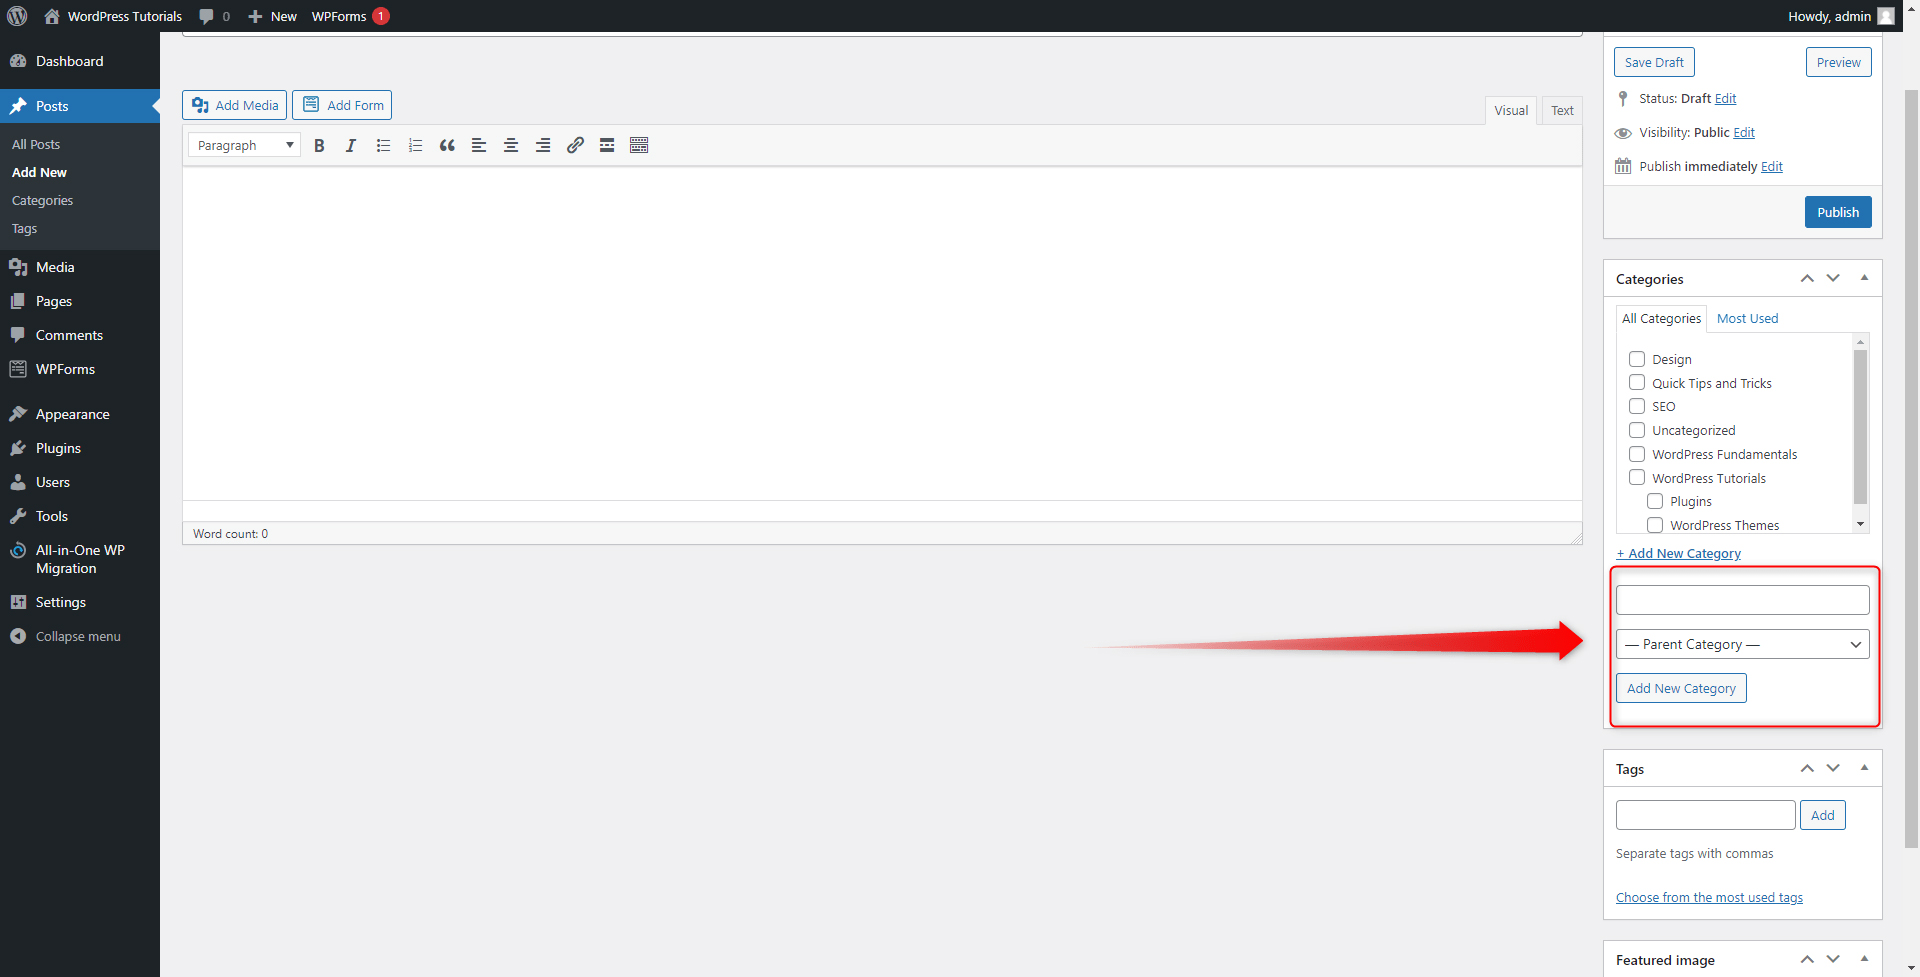
In the top field, you add the name of your new category, and via the bottom one you choose its parent category (should you wish to create a child category.)
In our case, we decided to add a new sub-category:
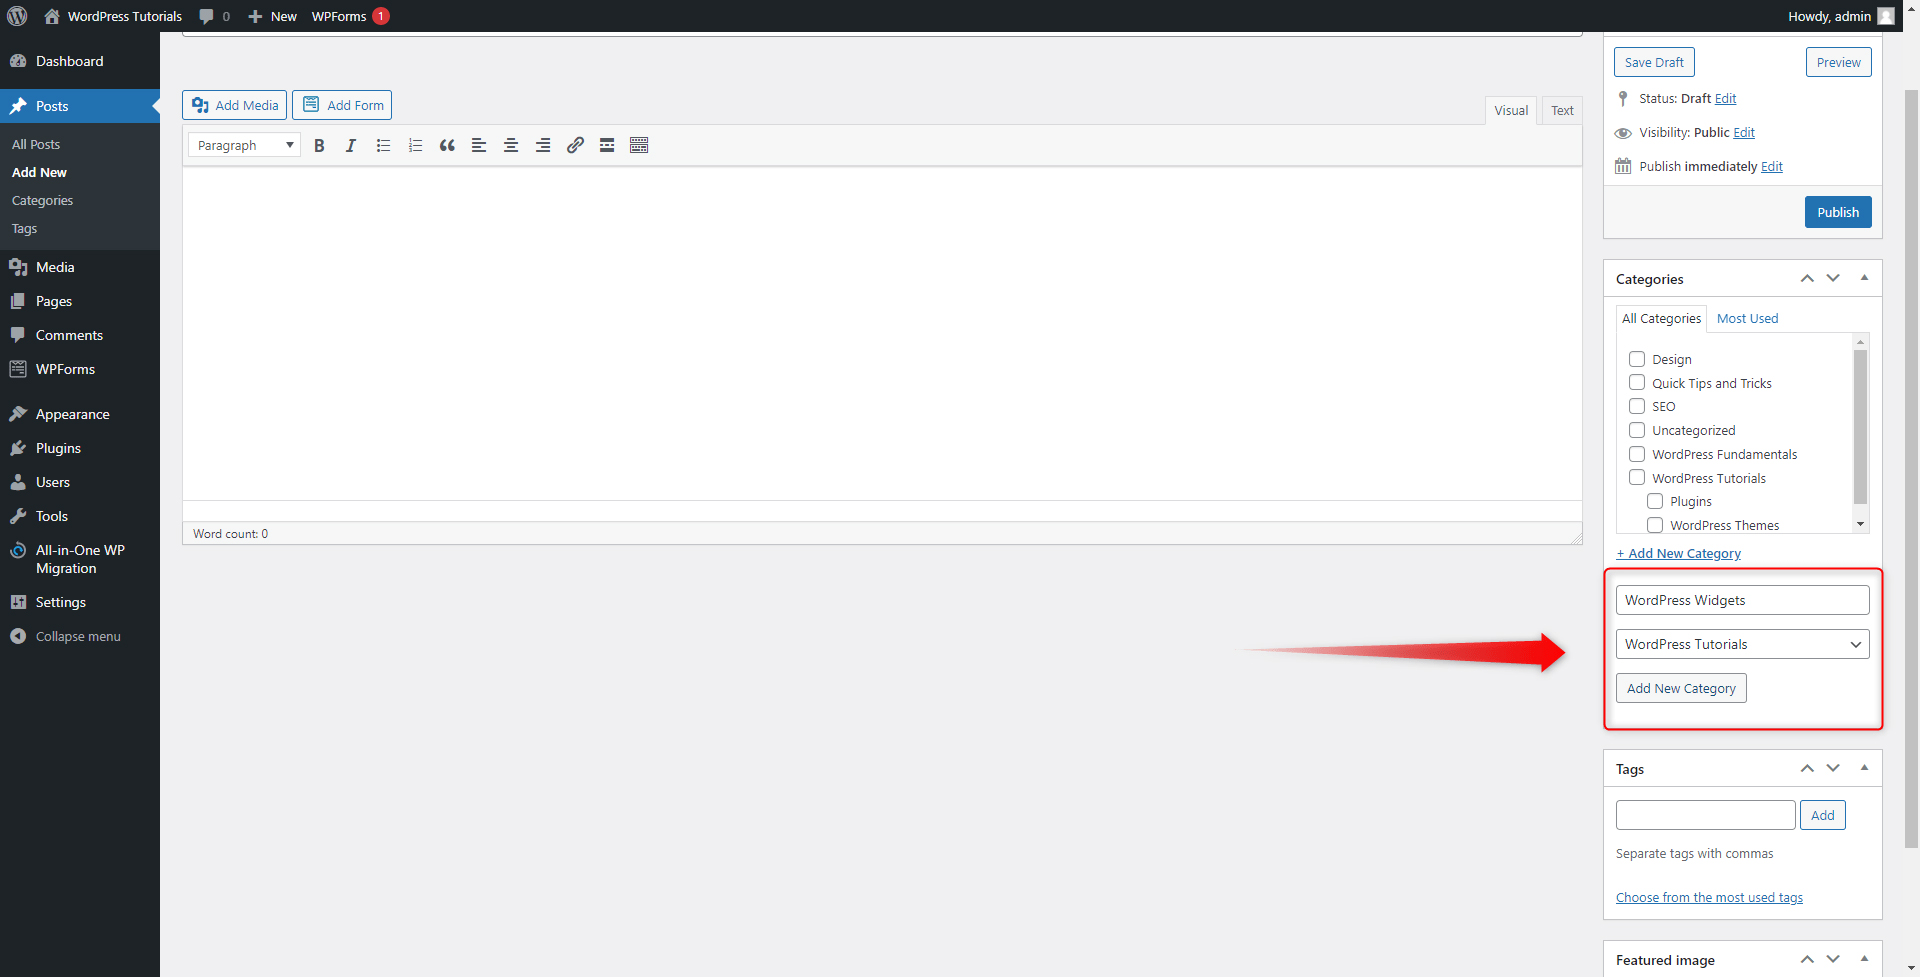
When you decided the name of your new category and whether it is a main or a sub-category, click on Add New Category. This will add it to the list above:

Now you have added a new category on the Post Creation page!
Keep in mind that by using this method, you won’t be able to add a Description and amend the Slug of your new category.
In the next section, we will see how to align a new post in a preferred category, and then we will see how categories can benefit a better SEO for your site.
How to Align a Post to a Category
There are two straightforward methods for alignment:
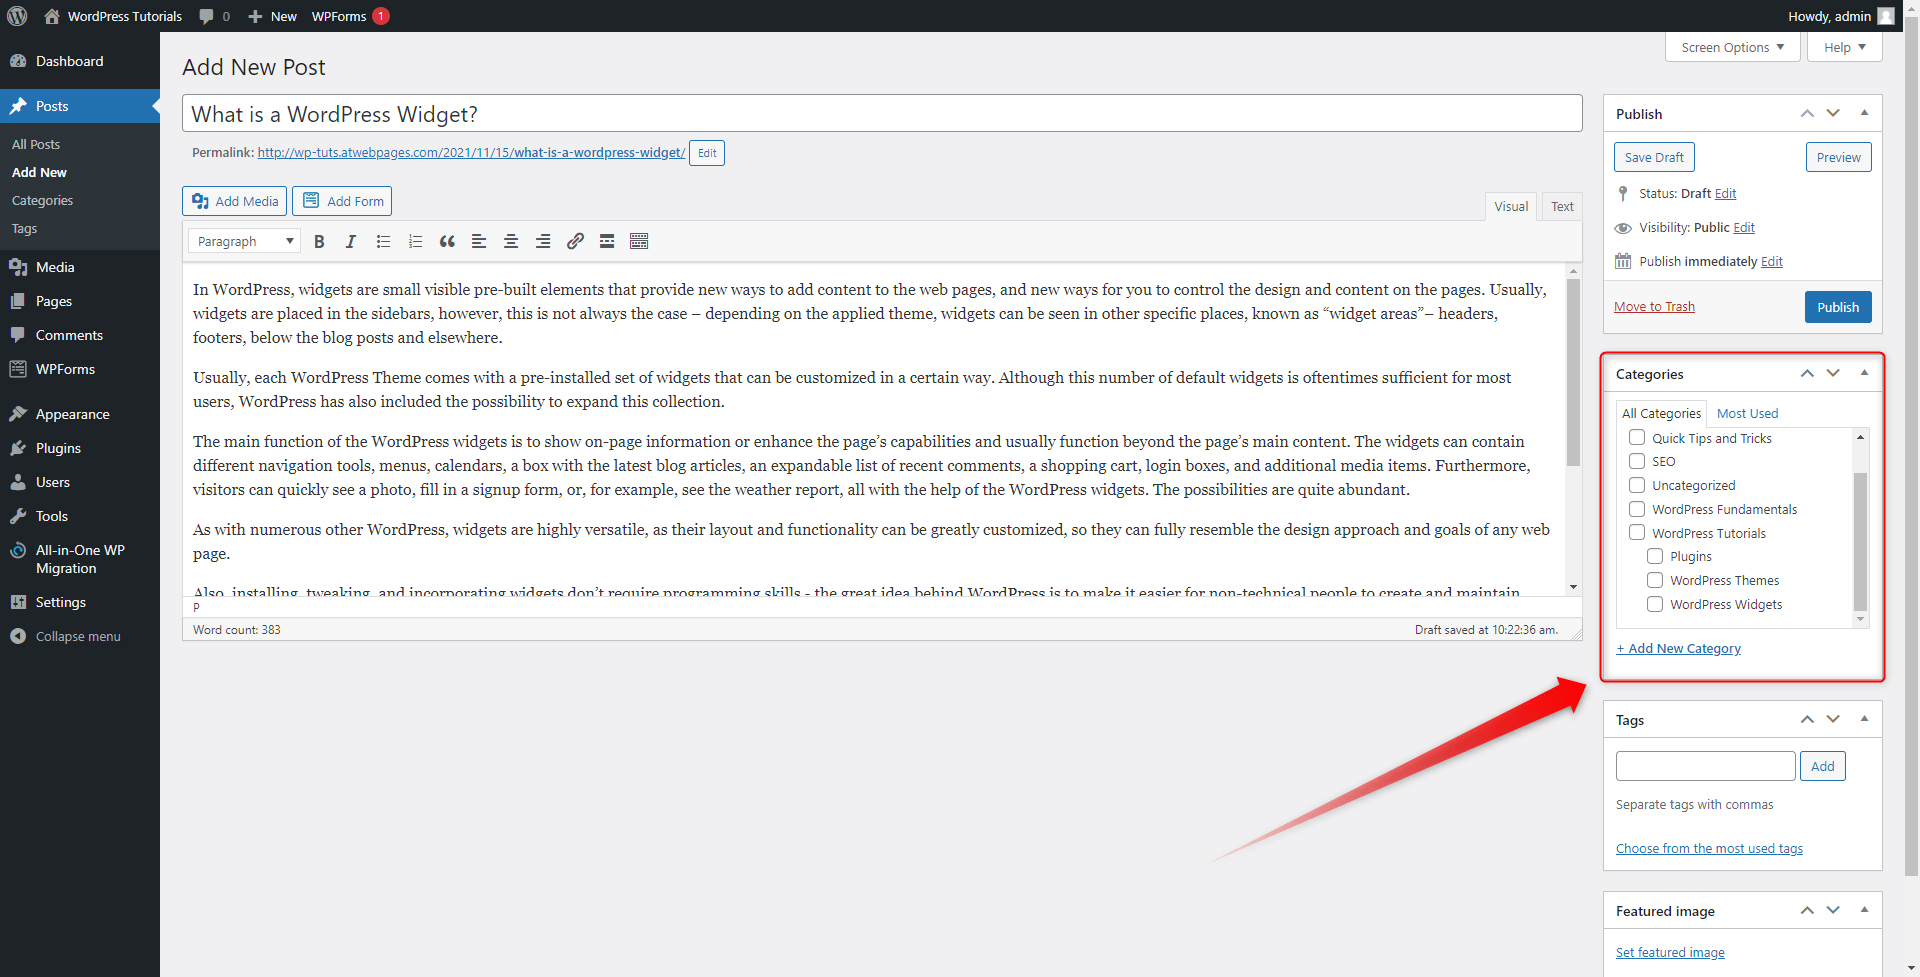
Method 1: Align a Post Within the Add New Post Page
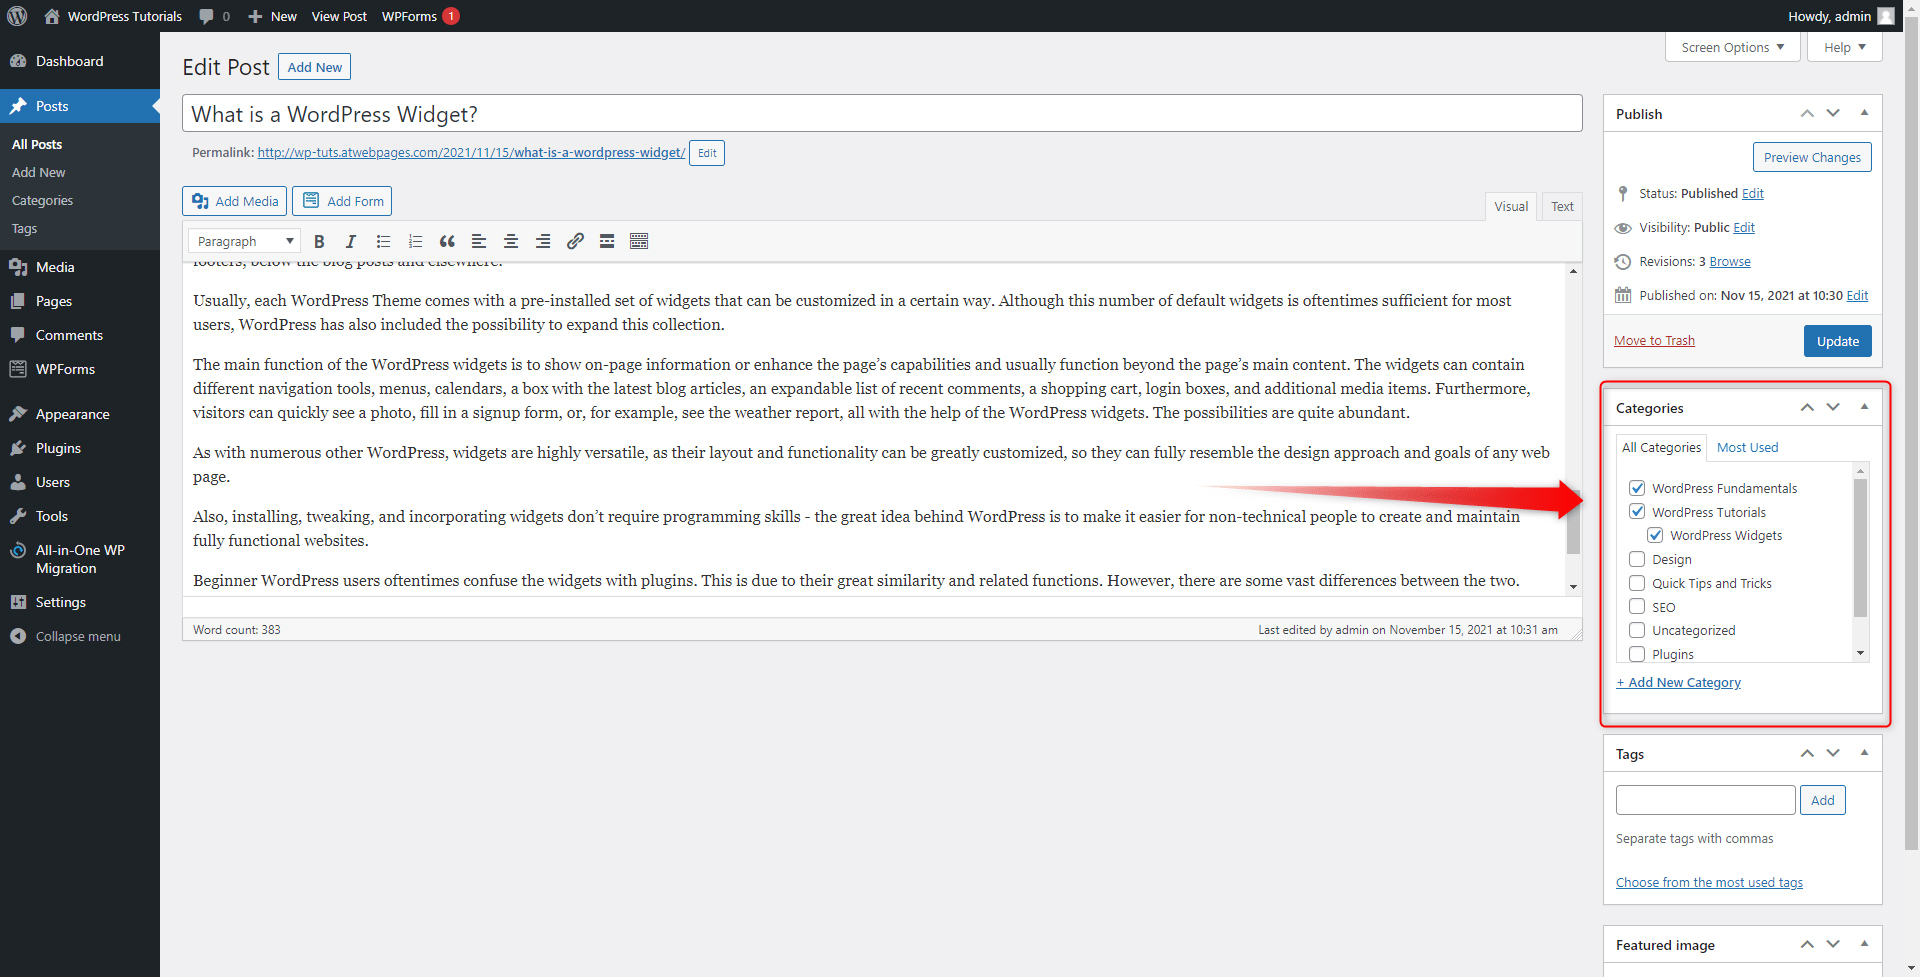
Enter the New Post page, from Dashboard->Posts->Add New. Then have a look at the right of the panel, where the Categories box should be placed:
Now, simply tick out the categories which you wish to contain your new post. In our case, these would be two main WordPress Fundamentals and WordPress Tutorials. Also, we will include the post in the sub-category WordPress Widgets:
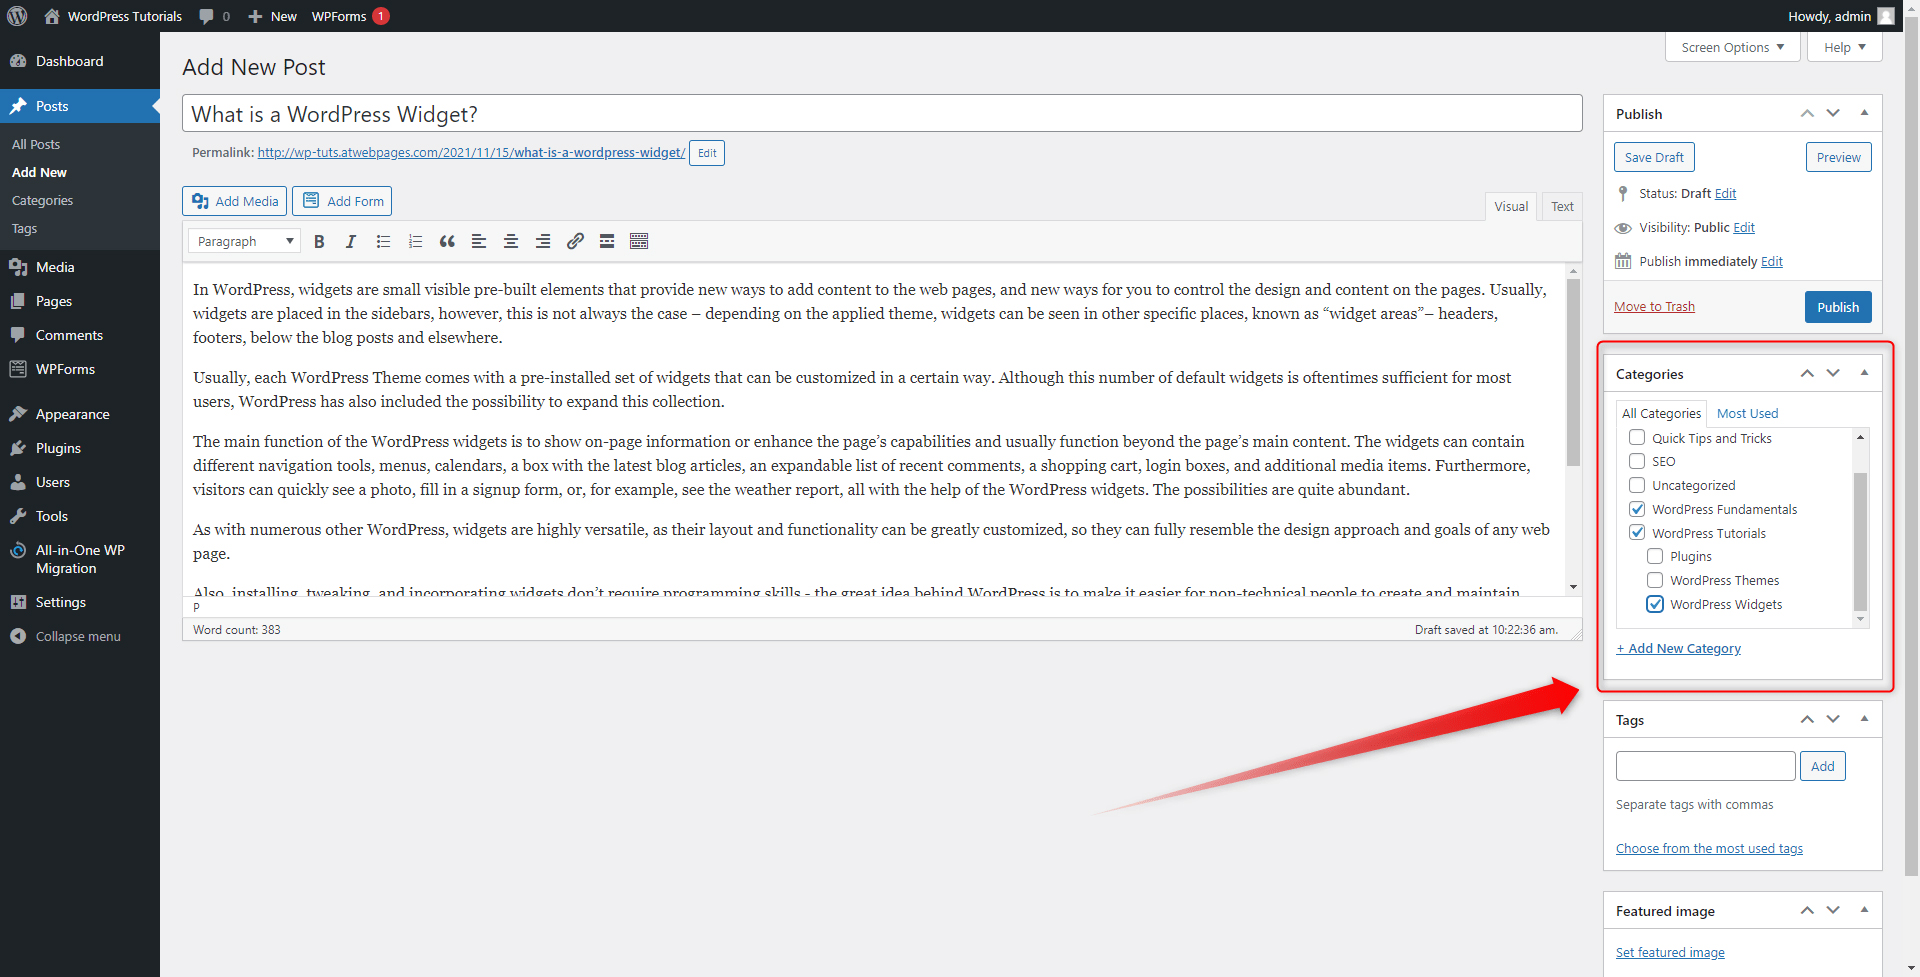
Now, you can either publish your post or save it as a Draft. For this example, we will publish it. When we do so, all the selected categories will appear at the top of the list:
Remember that you can align your post to as many or as few categories as you decide and do so as many times you decide.
Method 2: Align Posts in Categories Via the Quick Edit Menu on All Posts Page
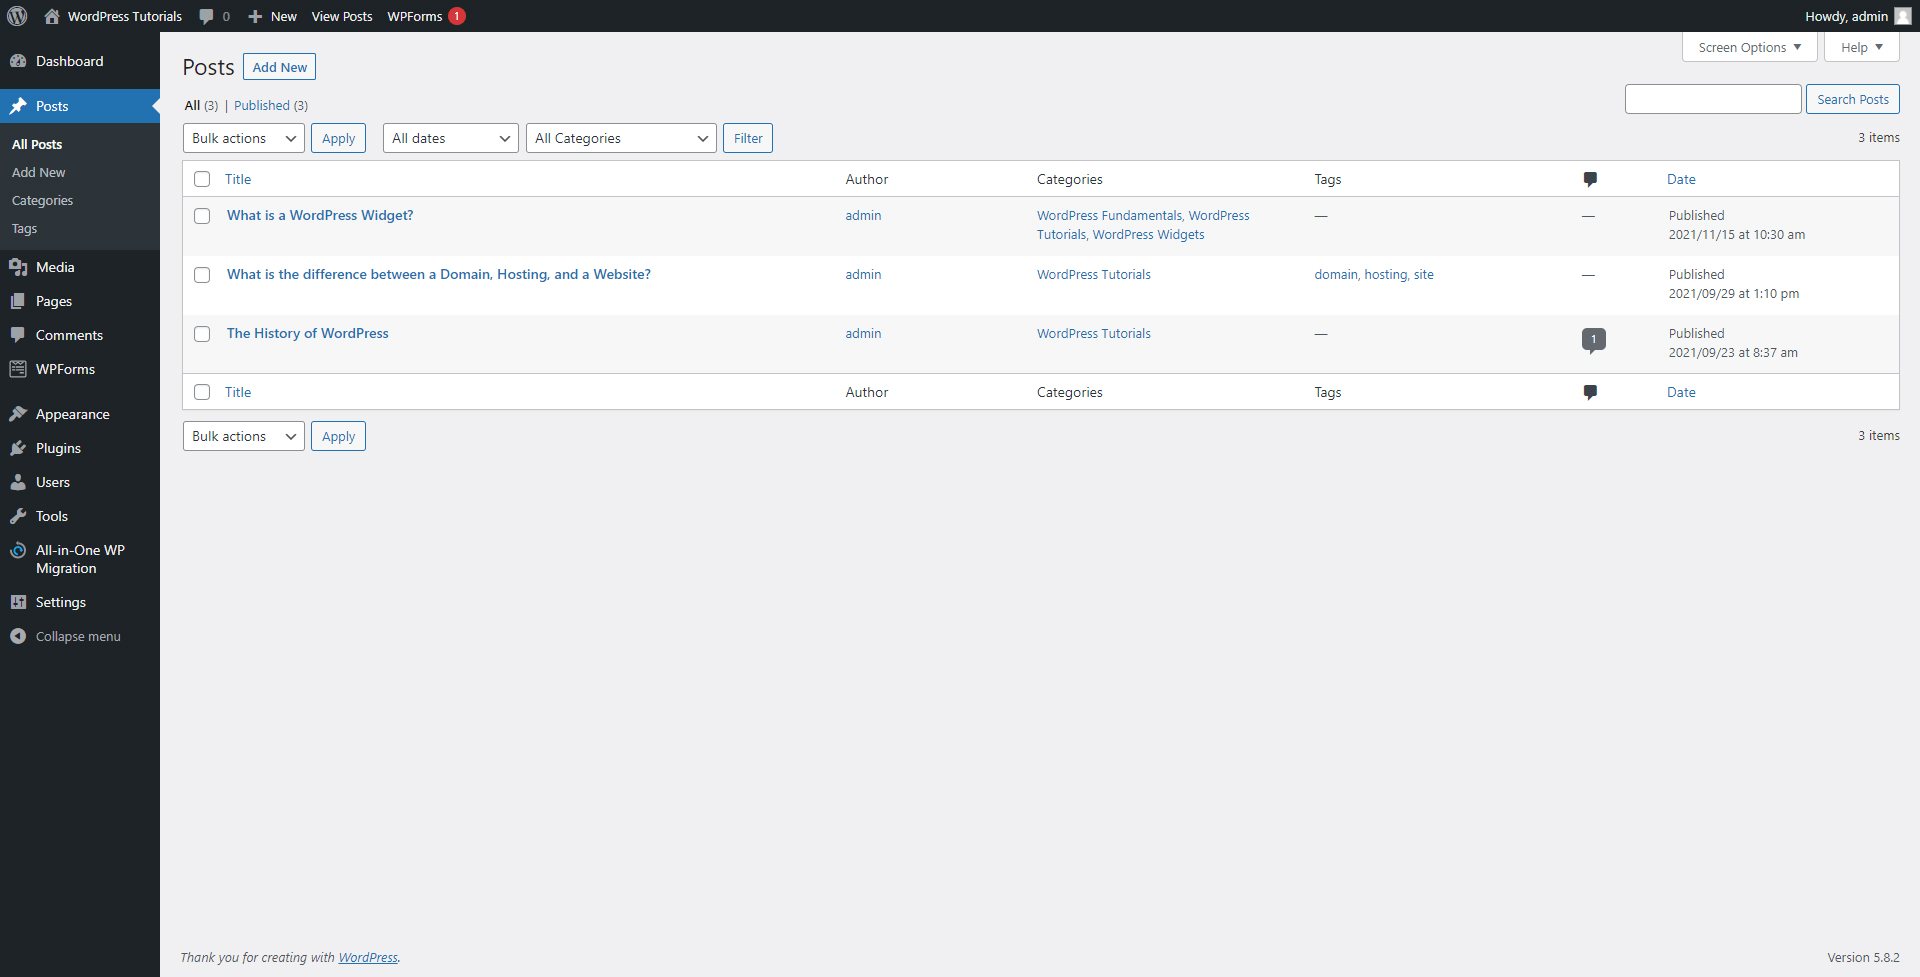
To enter this menu, go to Dashboard->Posts->All Posts. Here you will see a list of all your posts:
When you hover your mouse over a certain one, a menu will appear:
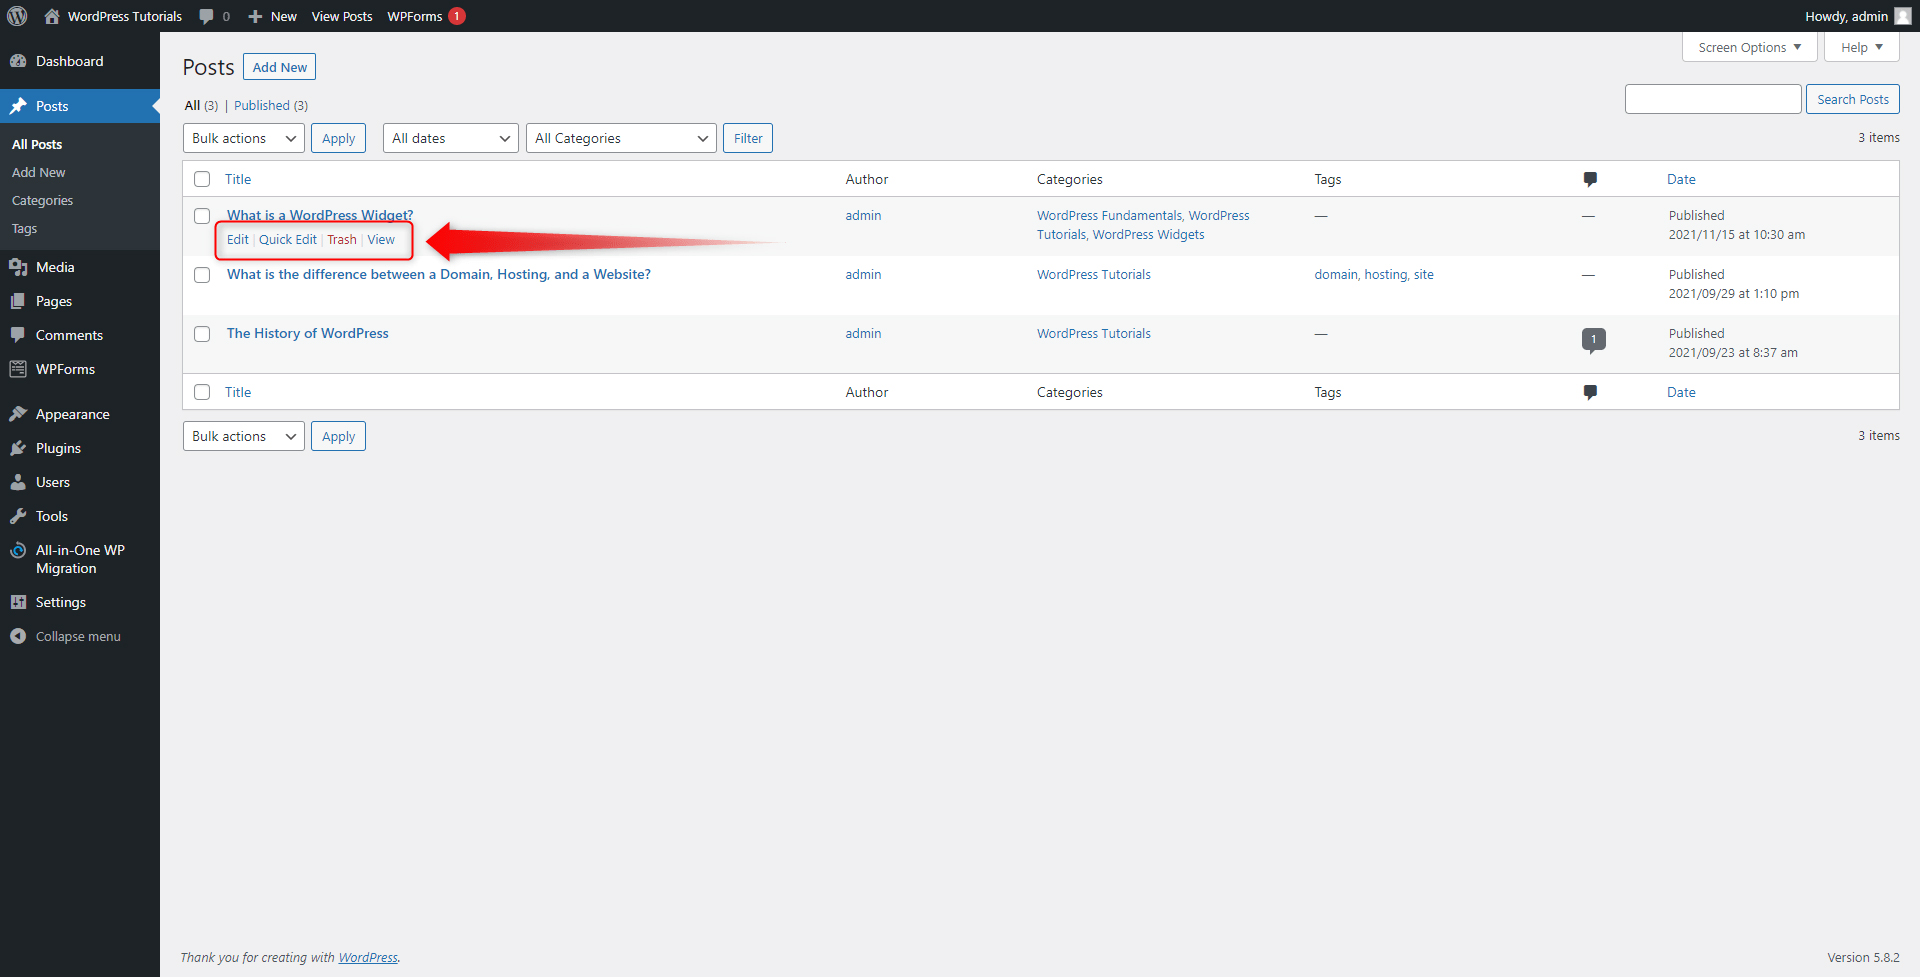
Click on Quick Edit. This will open a new box with options:
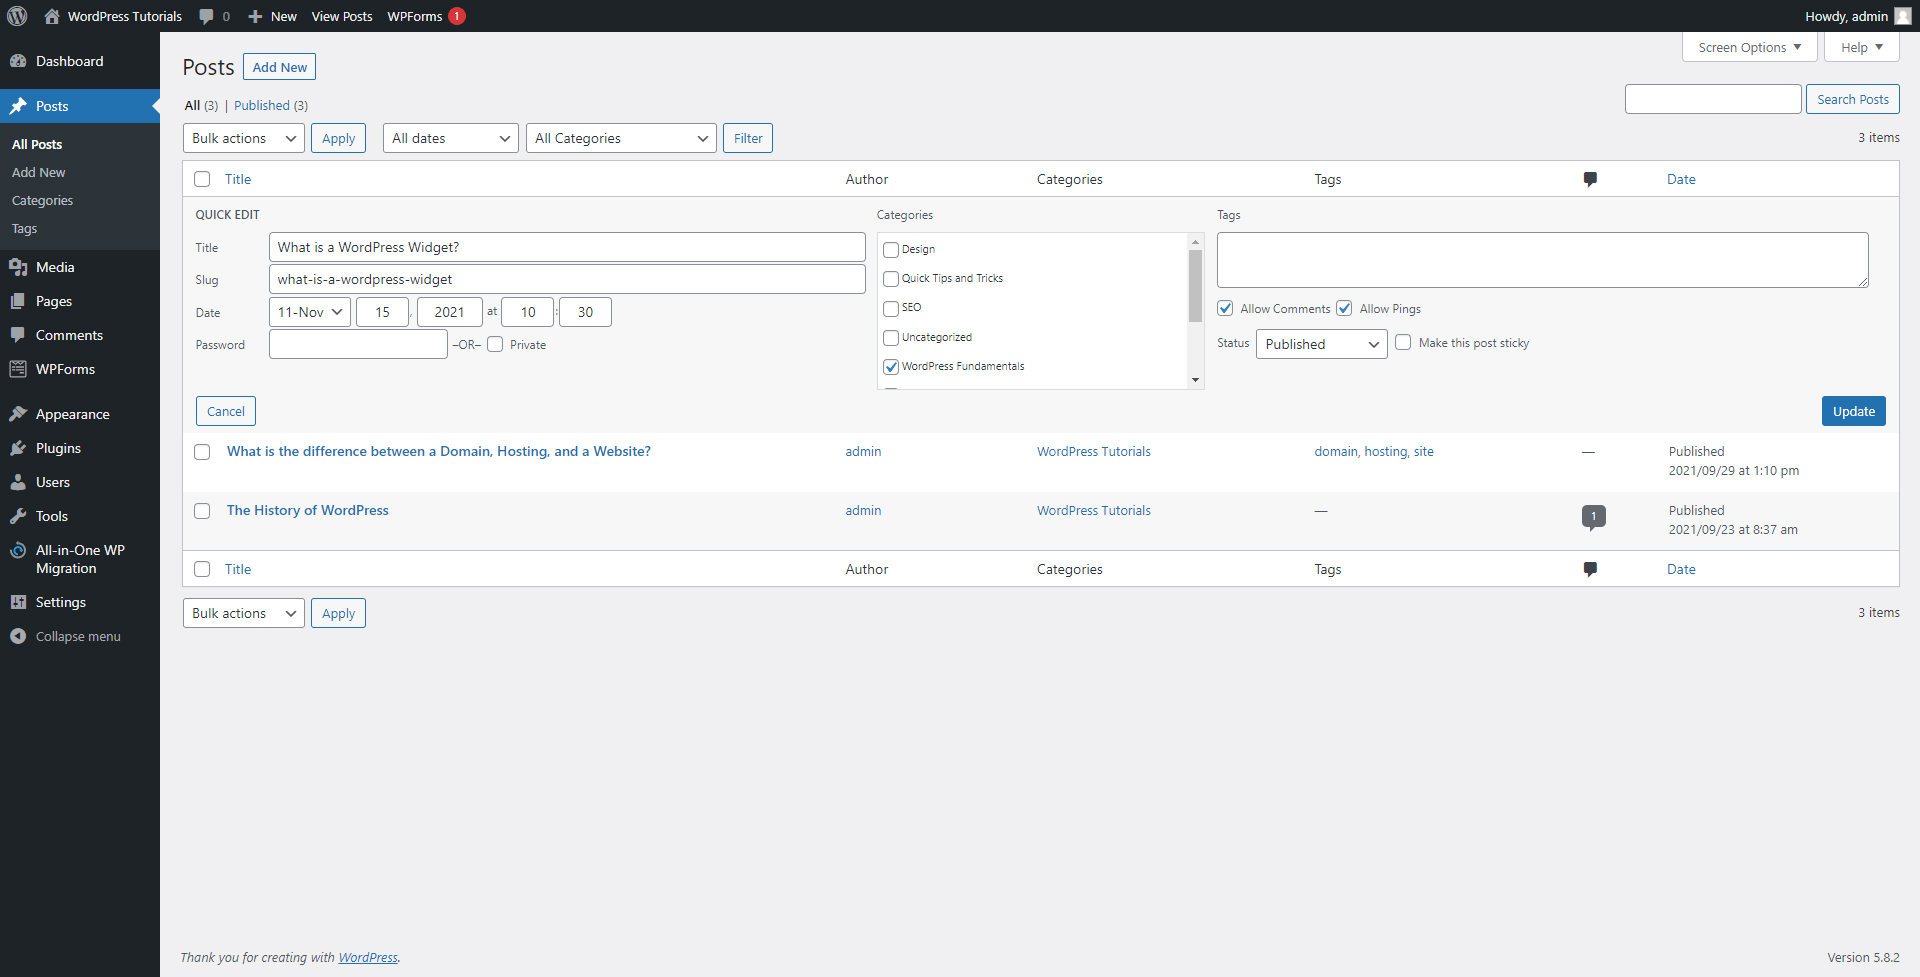
Along with other options, from here you can quickly align your post to different categories via the Categories box:
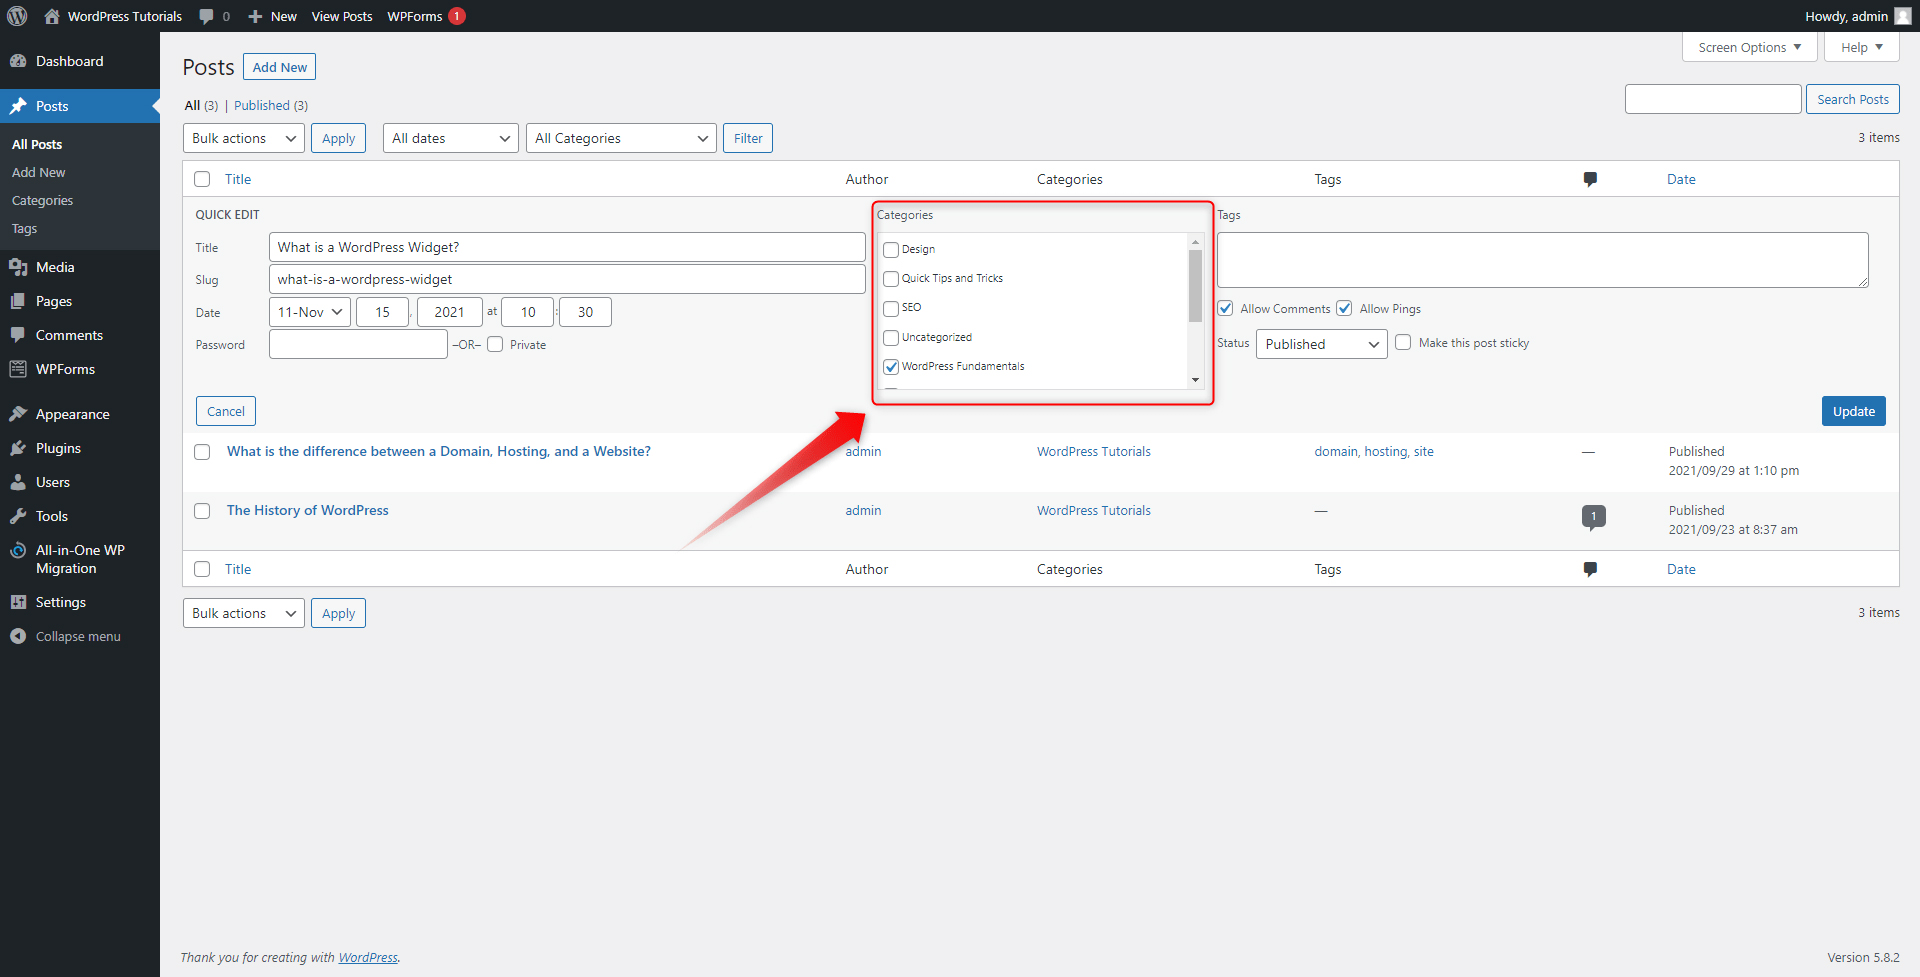
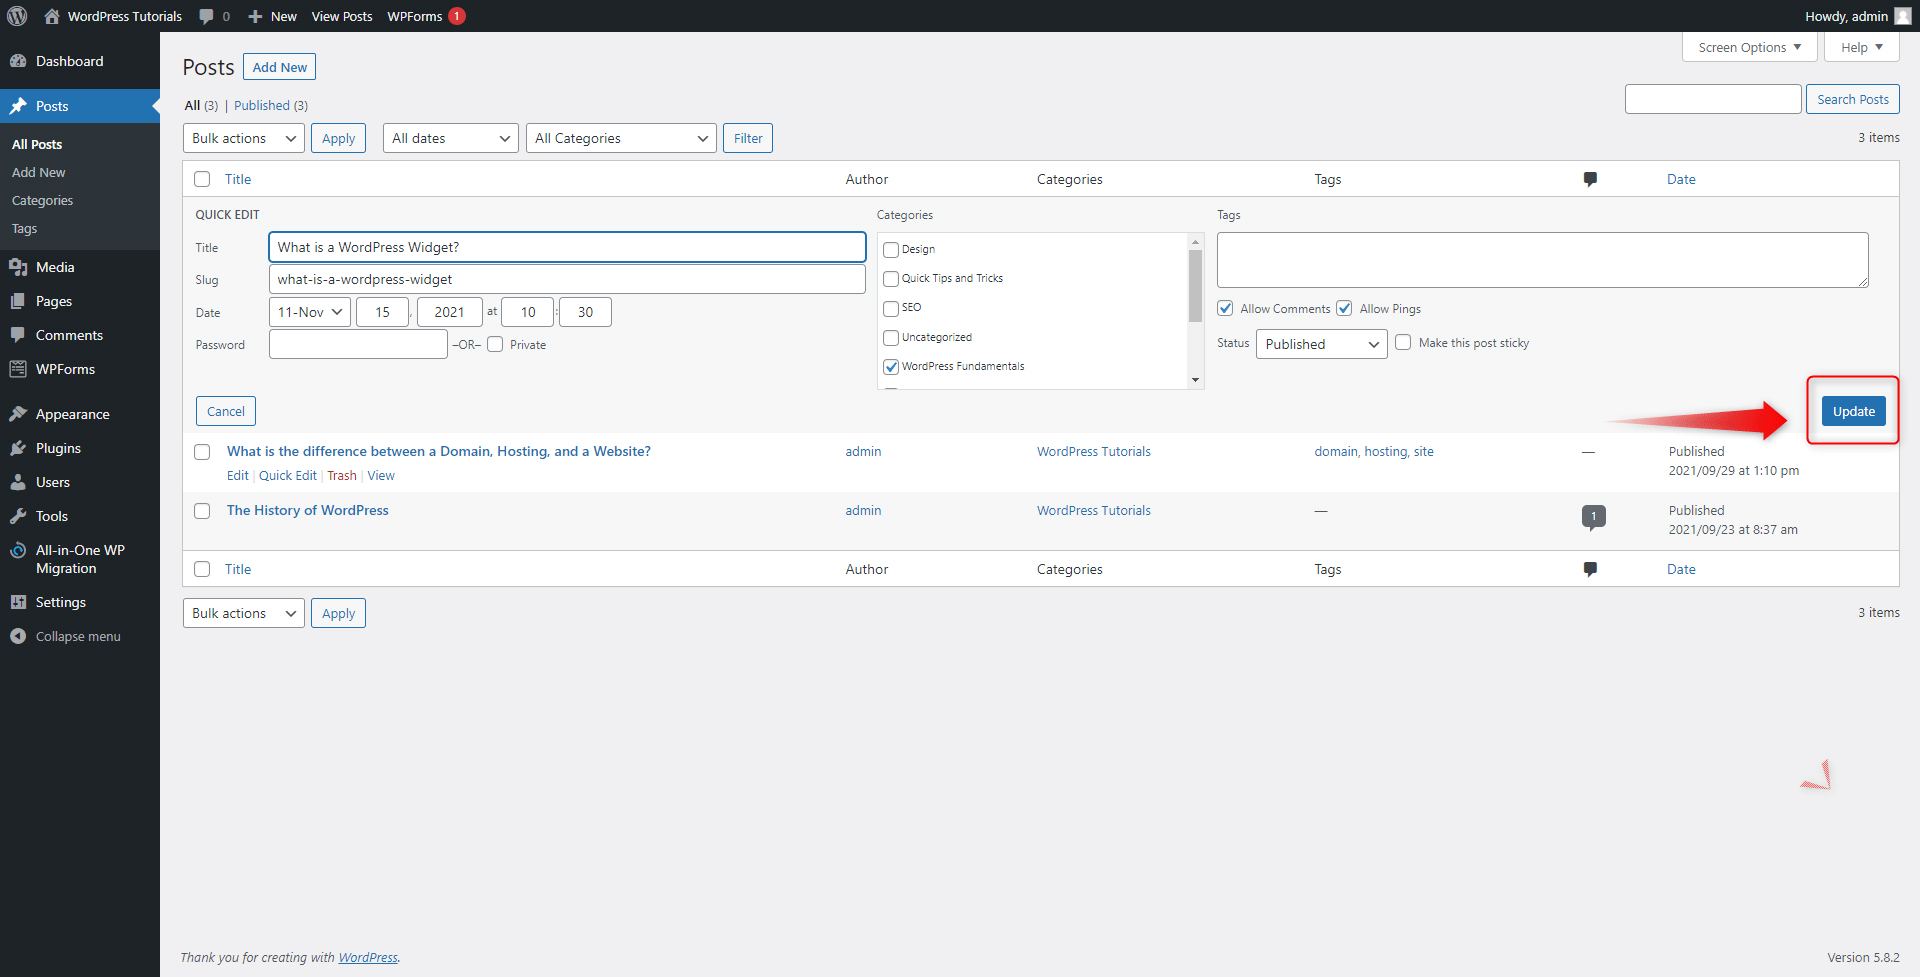
Simply add a tick to each main and sub-category that you wish to contain your post and then click on Update on the far right. This will ensure that your changes are applied:
Conclusion
WordPress categories are important, because as the number of your posts gradually expands, so does the need of implying order in the blog section for both you and your visitors. In the next two sections, you will find out how to do so by adopting two equally handy methods.
Along with distributing your content, you should also secure your pages. Add encryption with SSL Certificates and ensure a safe and secure browsing experience for your visitors. Contact us for more details!
Related: