The schedule option is part of the WordPress post components and allows you to set the precise time when the blog post will be automatically published in the future – either after an hour or in several months.
How to Schedule WordPress Posts
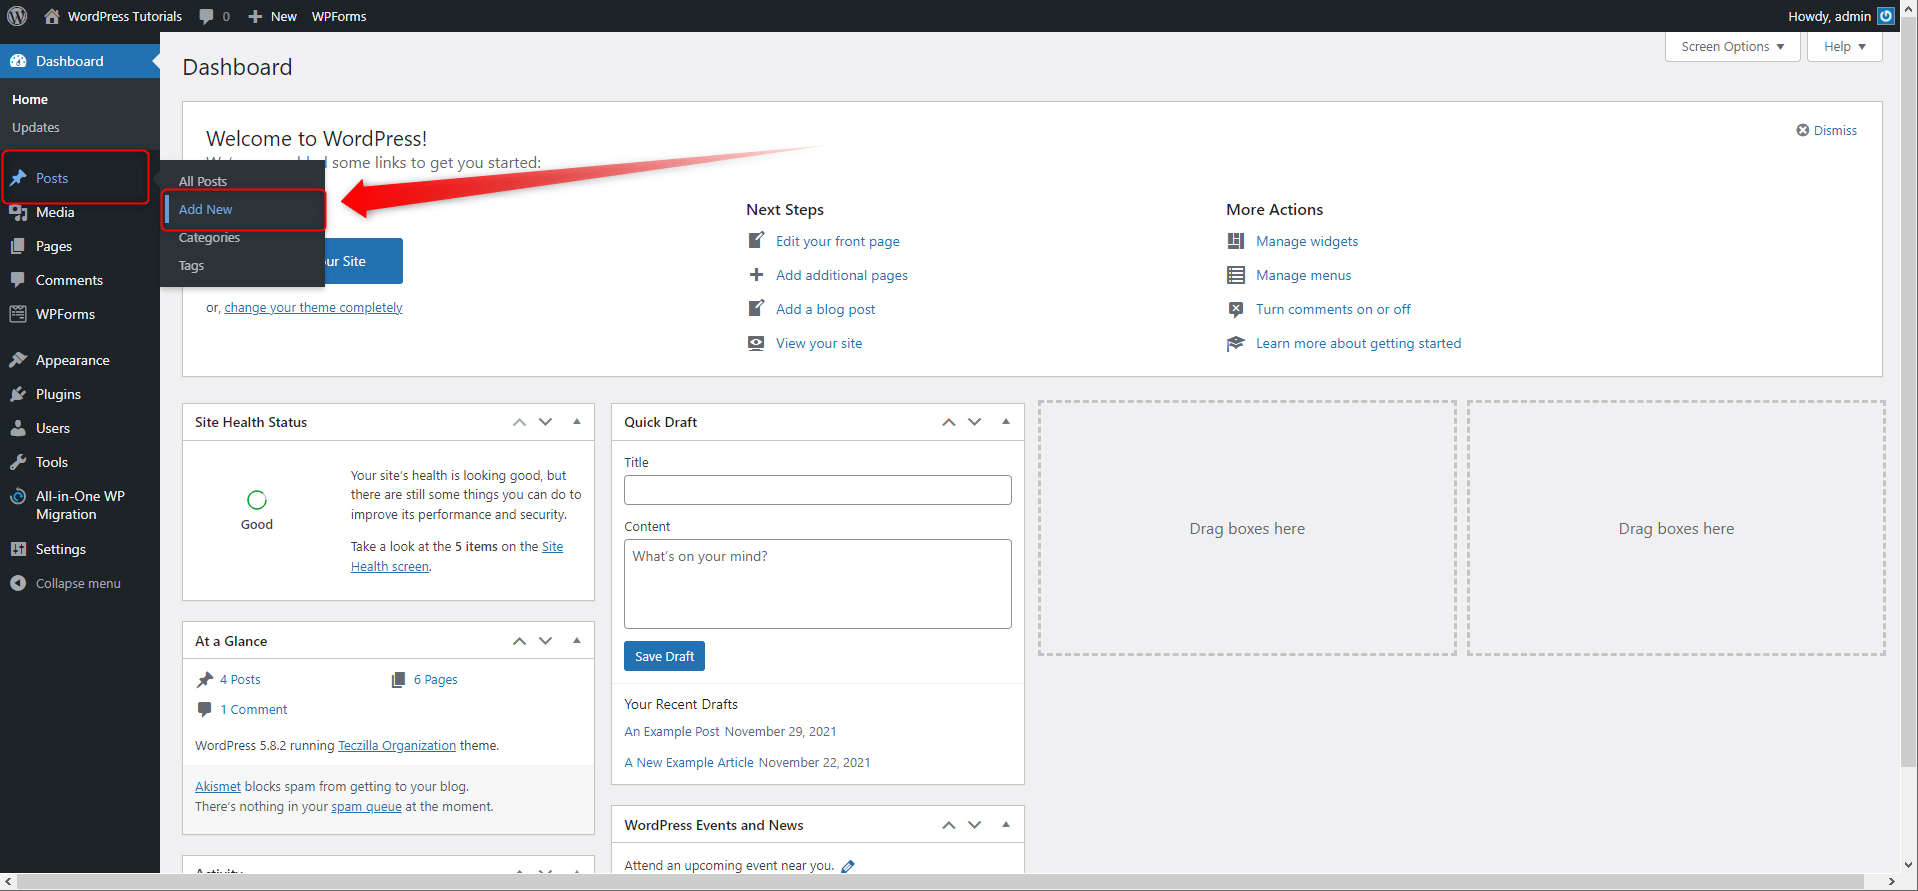
To access the scheduling options, simply click on the Add New button in the Posts menu section within the WordPress dashboard:
This will lead you to the New Post creation page. From here you can edit your new post and access the Schedule options:
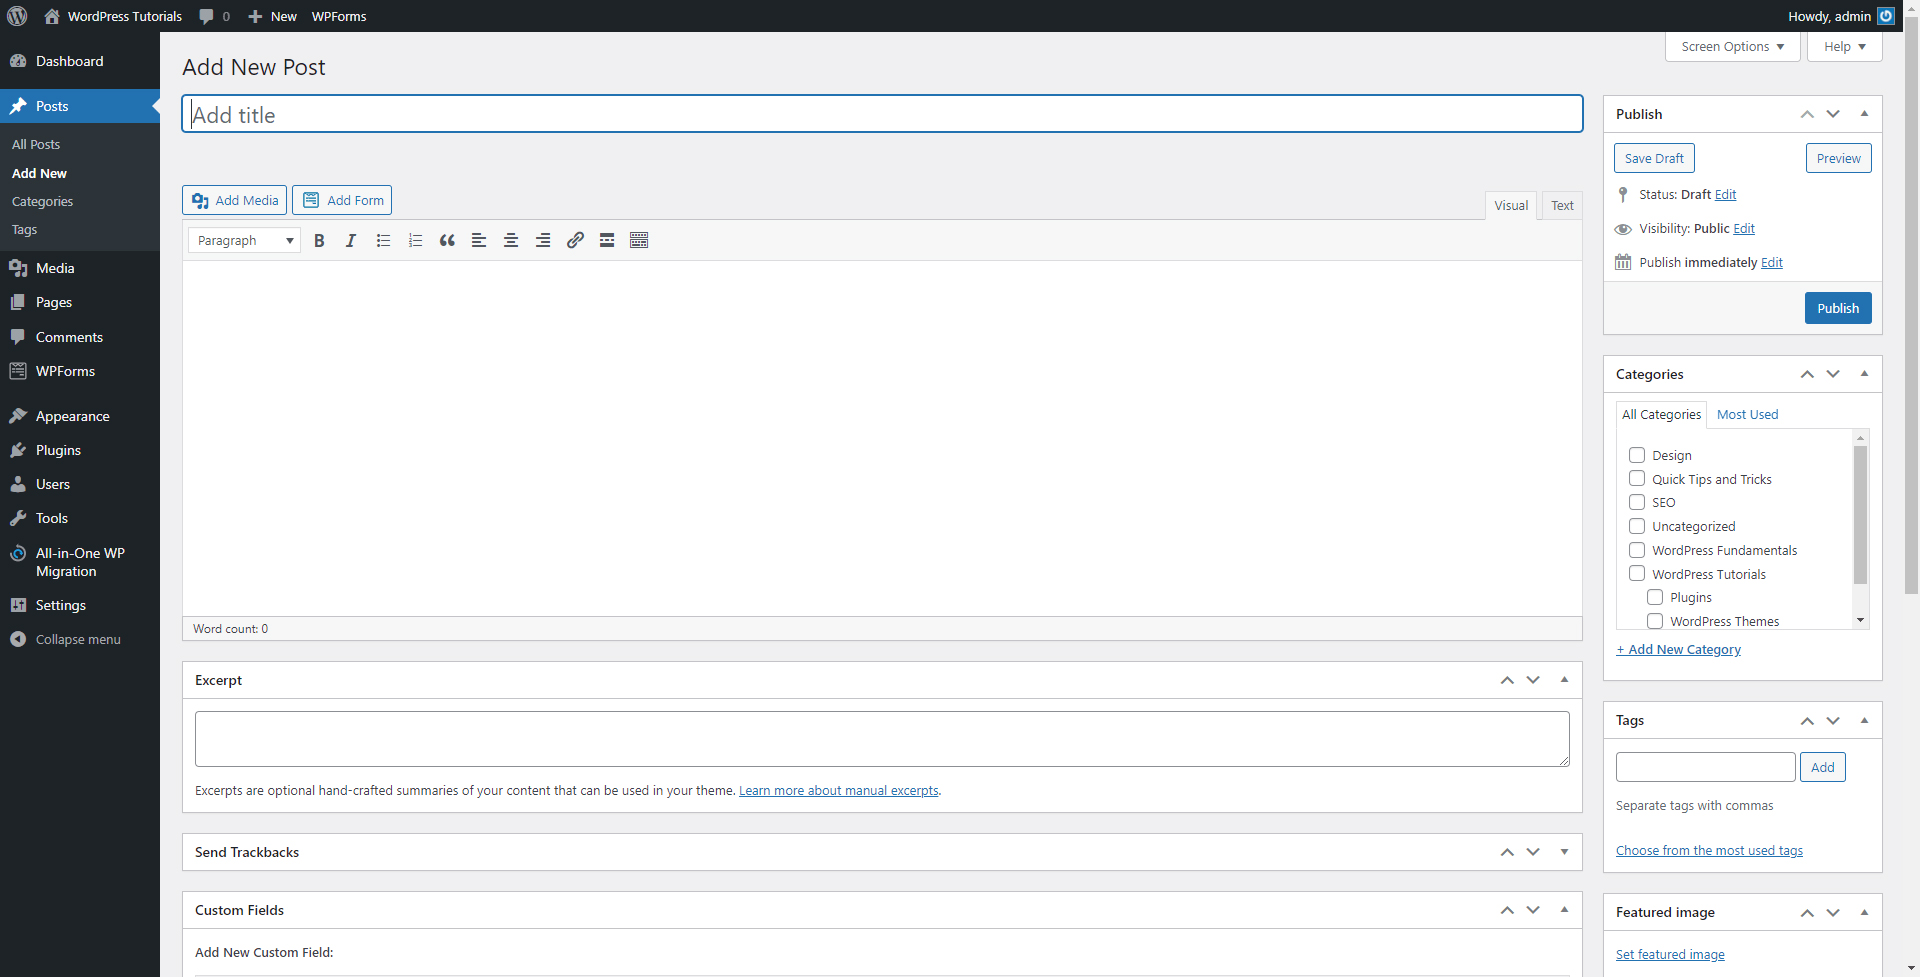
While on this page, locate the Publish box located at the right of the screen:
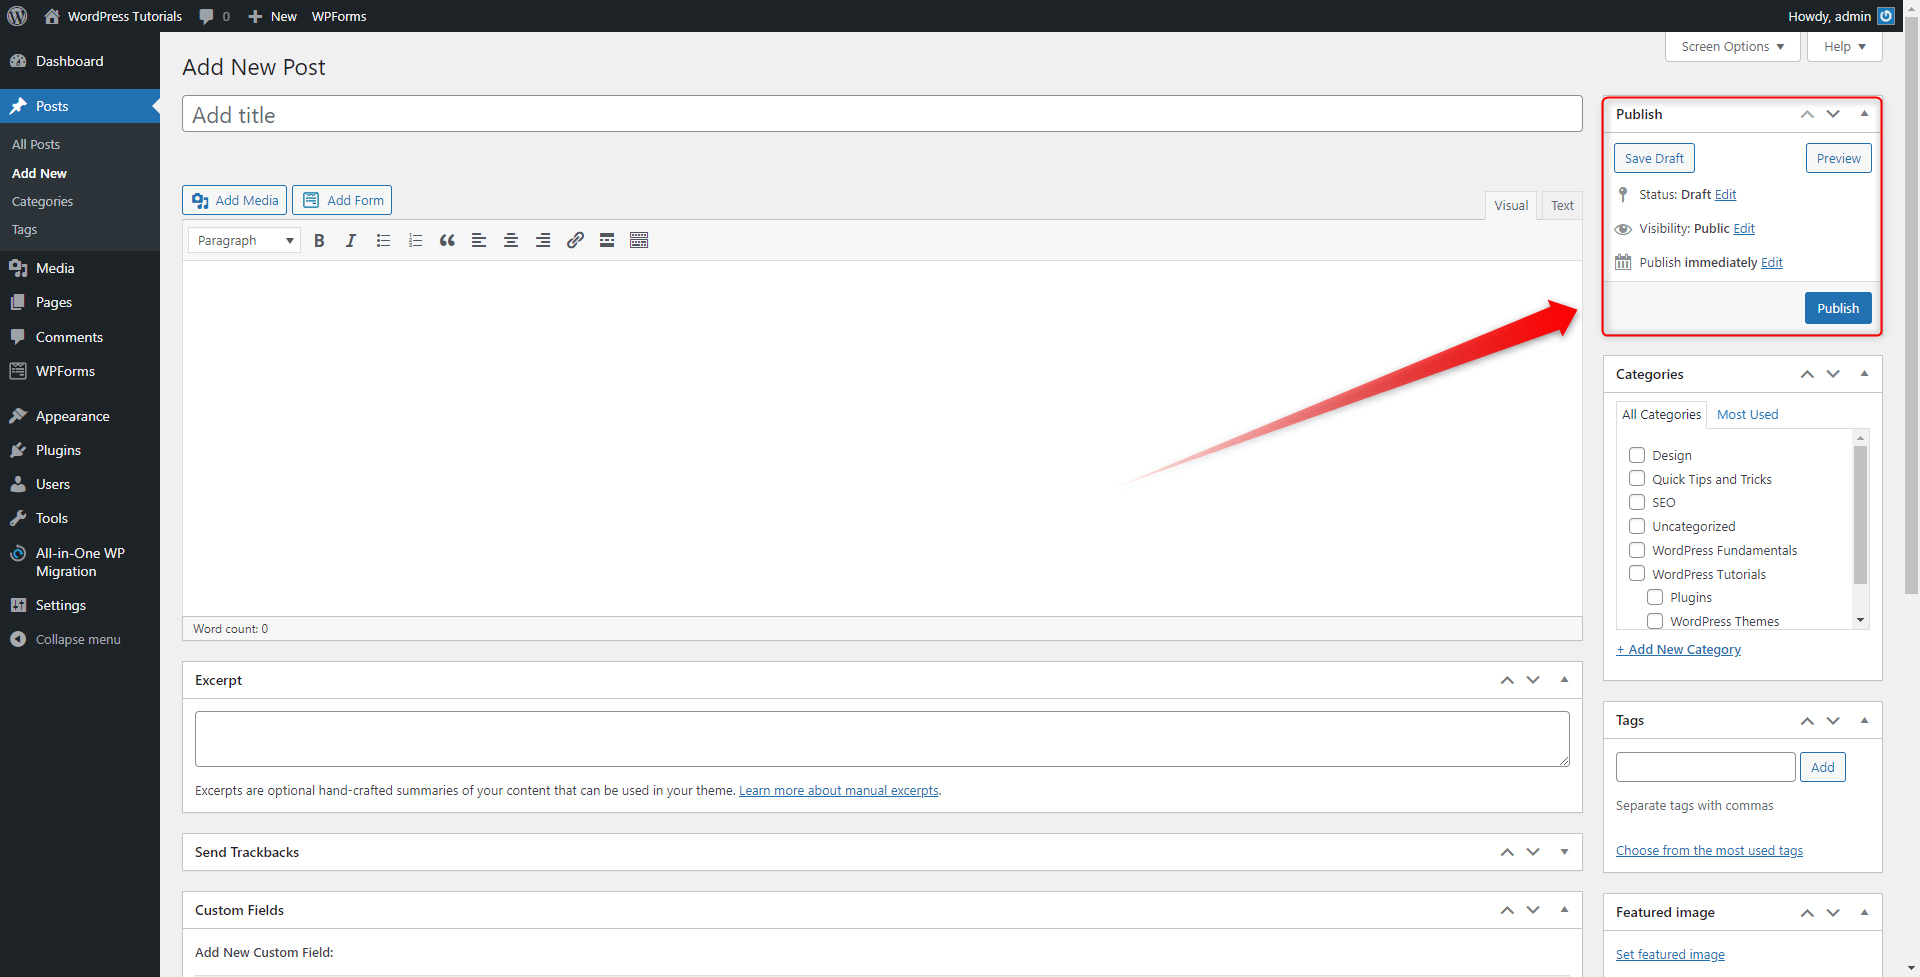
Within this box locate the Calendar icon and next to the Publish immediately text click on the Edit button:
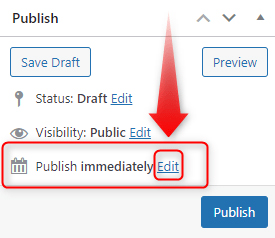
This will open the available schedule options:
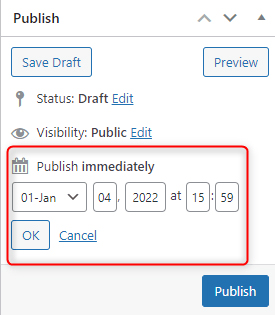
With all the available settings you can quickly set the precise year, month, day, hour, and minutes of the publication of your new blog post. When you have decided when this will be, click on the OK button to save the settings:
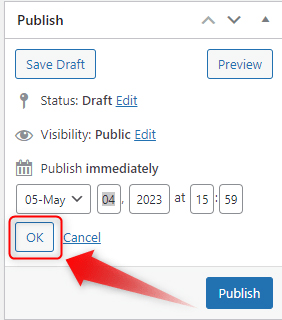
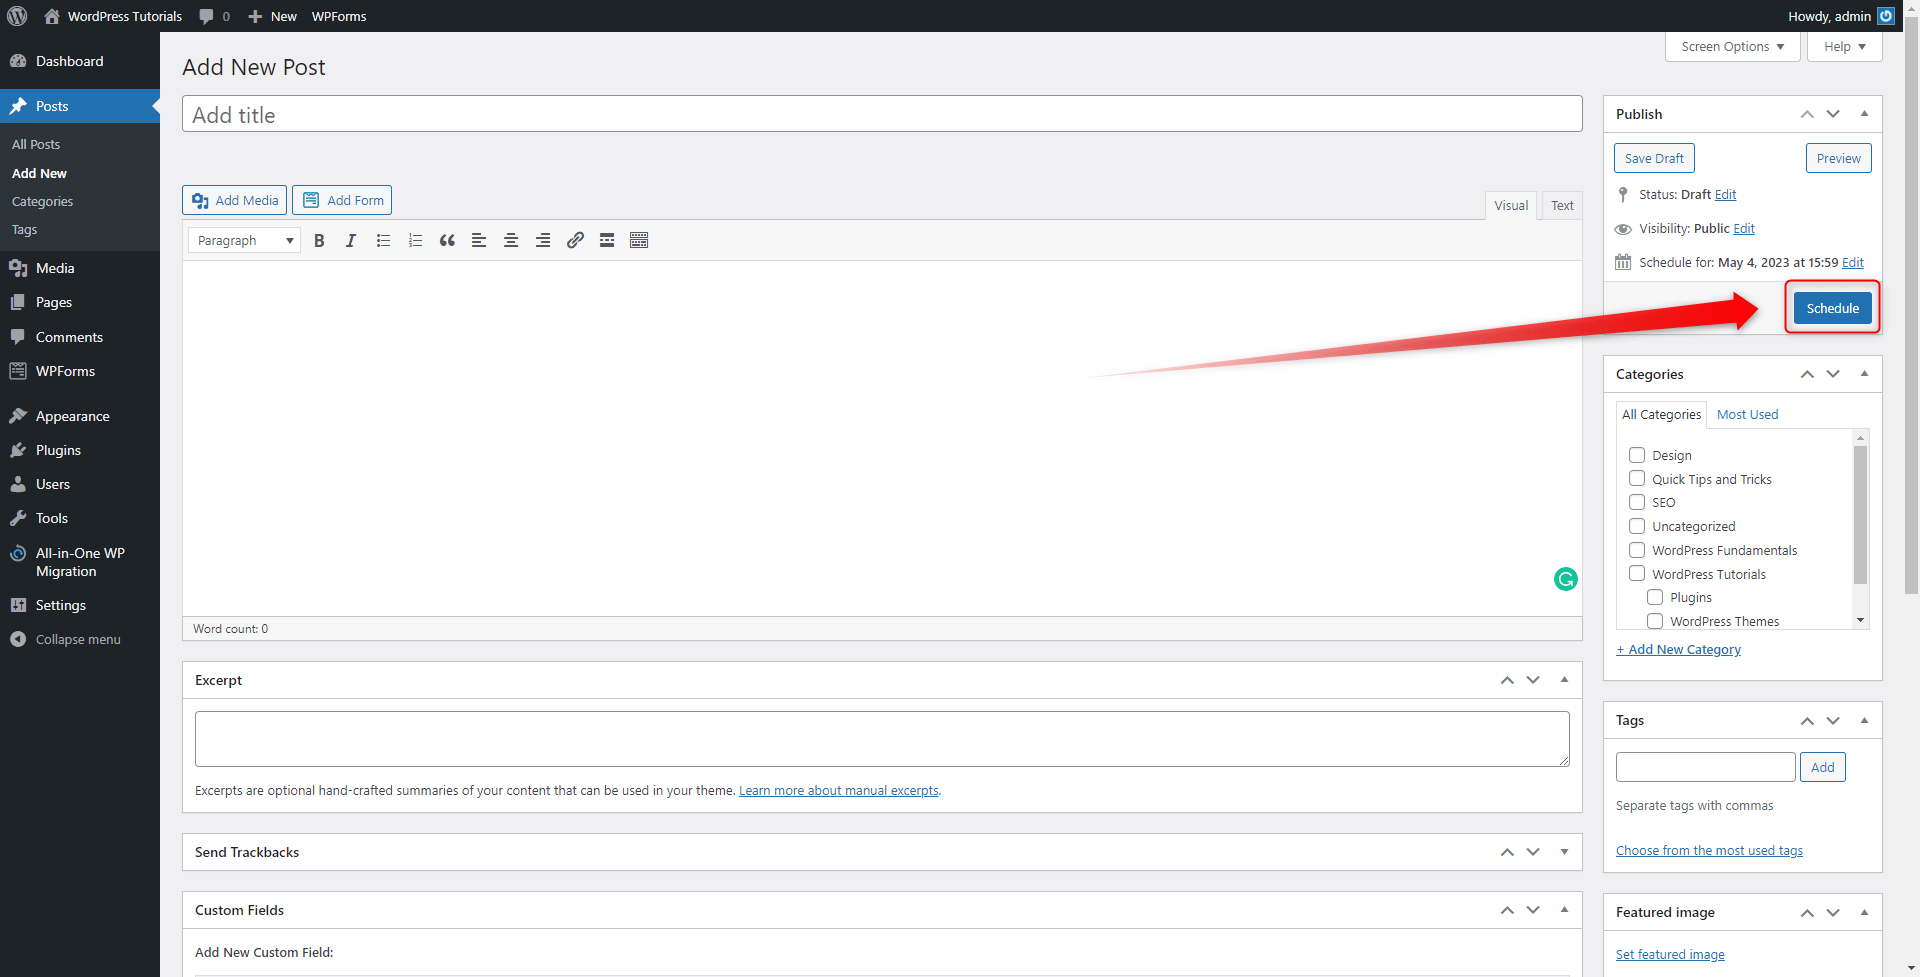
When you hit the OK button, notice how the blue Publish button turns into a Schedule one. When you click that Schedule button, WordPress will save your preferences and will automatically publish your blog post at the given time without any need to engage with the platform for any further action:
Conclusion
Knowing how to schedule your posts will provide you with more flexibility and efficiency for you and your team. Learn how to benefit from the feature and let WordPress do the job for you!
Improve your site-building skills with our comprehensive WordPress guide. Read everything you need to know about the platform and build a fully functional and beautiful website.
Also, check out how to remove dates from URLs, should you focus on publishing more evergreen content.
Related: