The WordPress widgets add new layers of customization to your WordPress website and contribute to beautiful and functional design, along with improved user experience. I
n this article, you will read how to customize your set of widgets.
If you are new to the topic, then read more about what widgets are and then proceed with this article. Also, check out our comprehensive WordPress guide that will help you create your first website.
How to Customize Your WordPress Widgets
Many widgets allow customization and thus showcase even more personalized content – for example, you can add dedicated text to your buttons or text boxes. Doing so requires only a few clicks here and there.
Via your WordPress Dashboard, go to Appearance->Customize: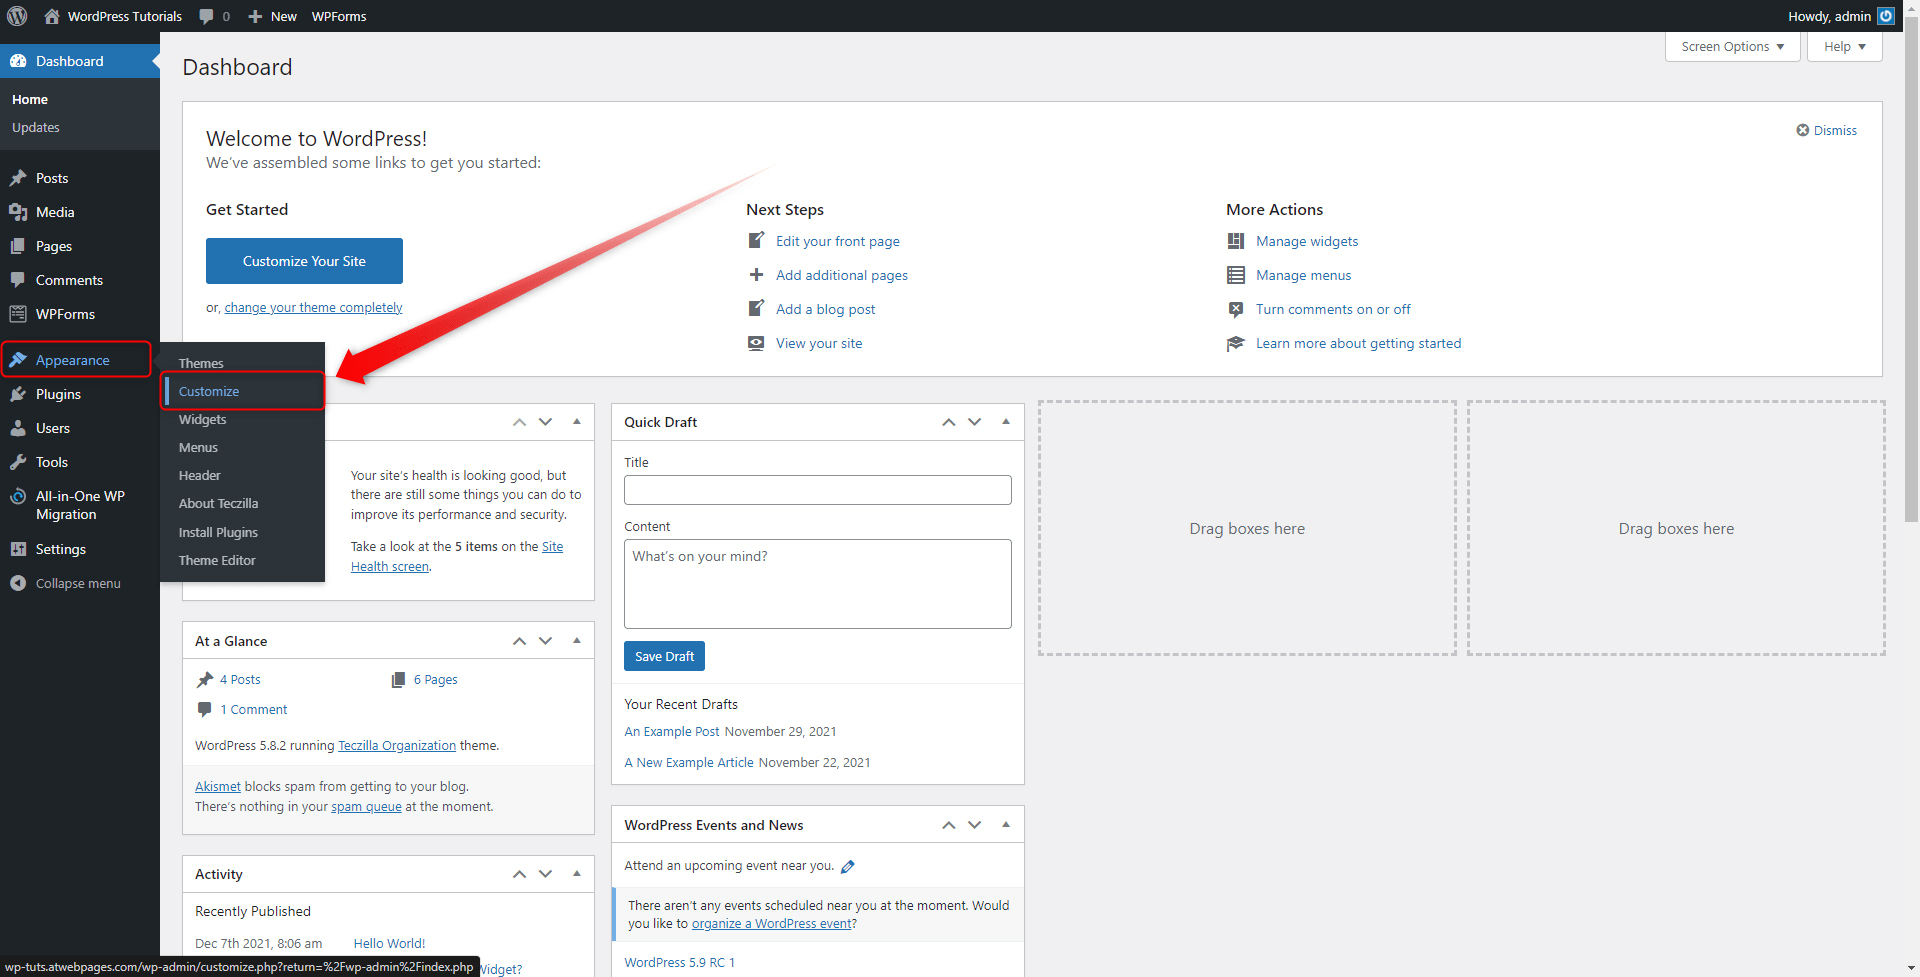
This will open your WordPress Theme personalization options. From there find and open the Widgets page: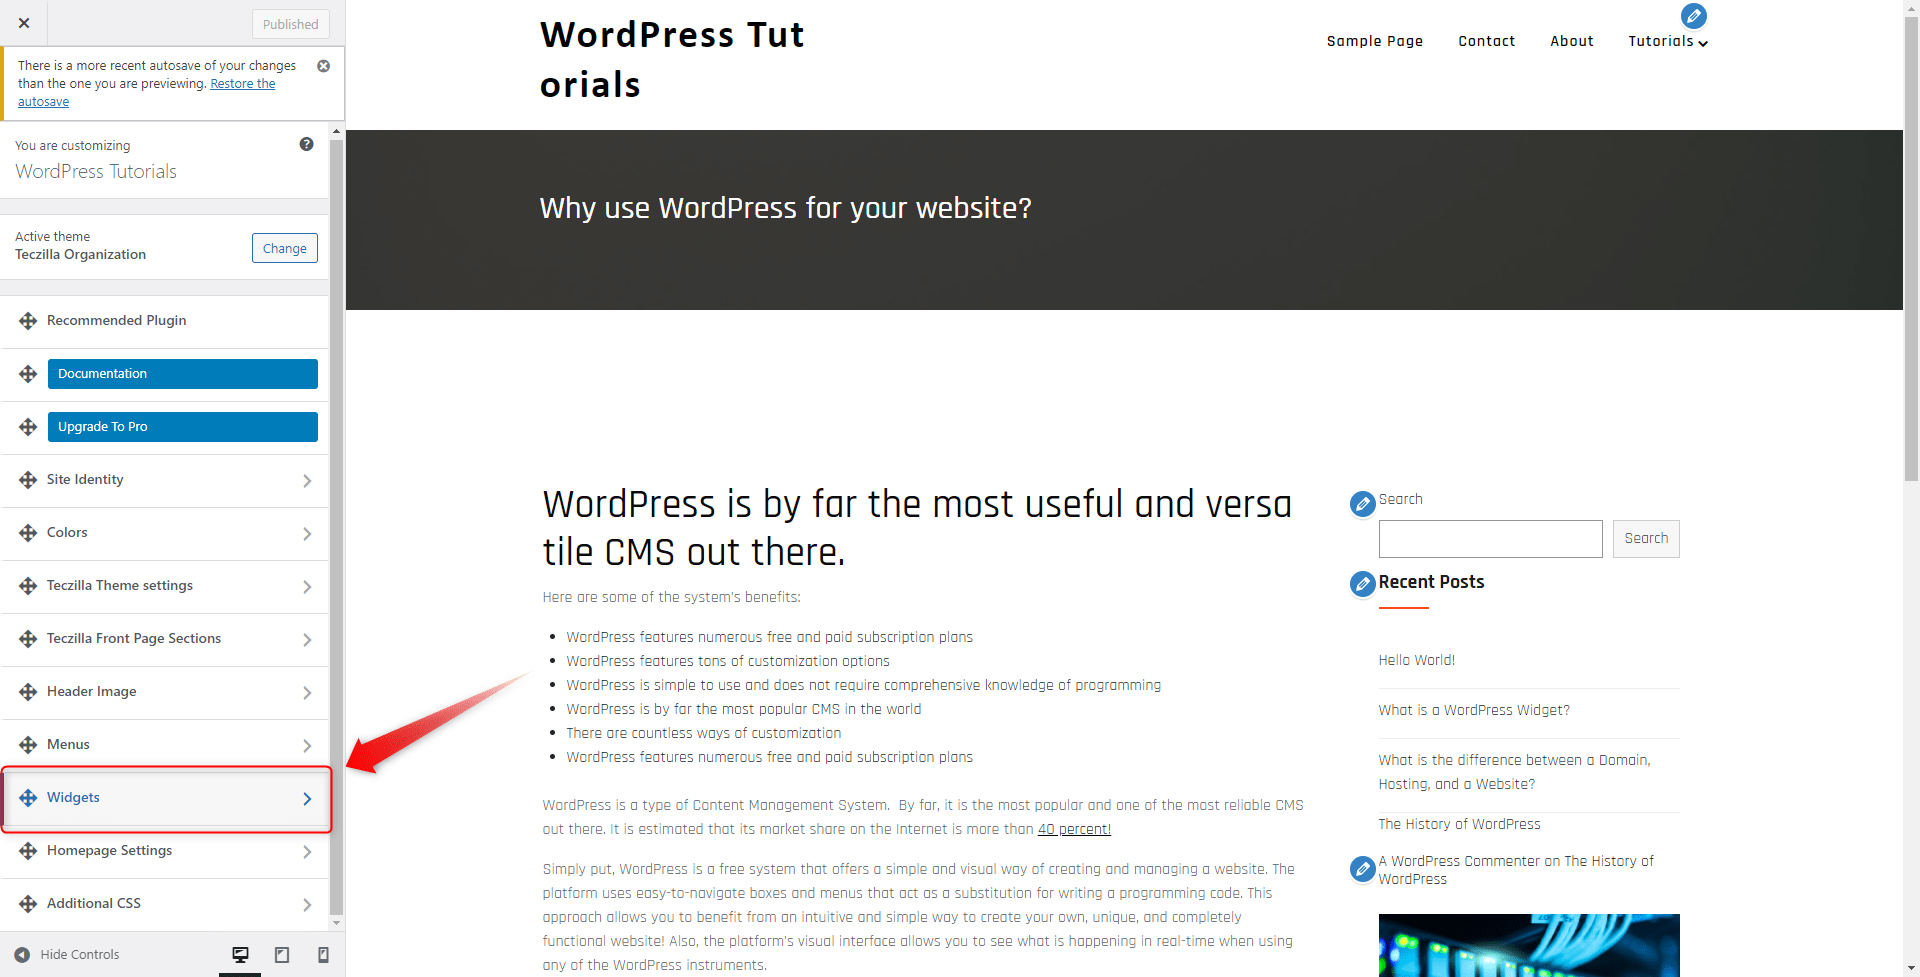
Once you have opened the Widgets page, have a look at all the options. On the left, you should see the available places where you can add widgets, and on the right of the screen, you will see several blue pencil icons. These show that this particular widget can be edited in a certain way: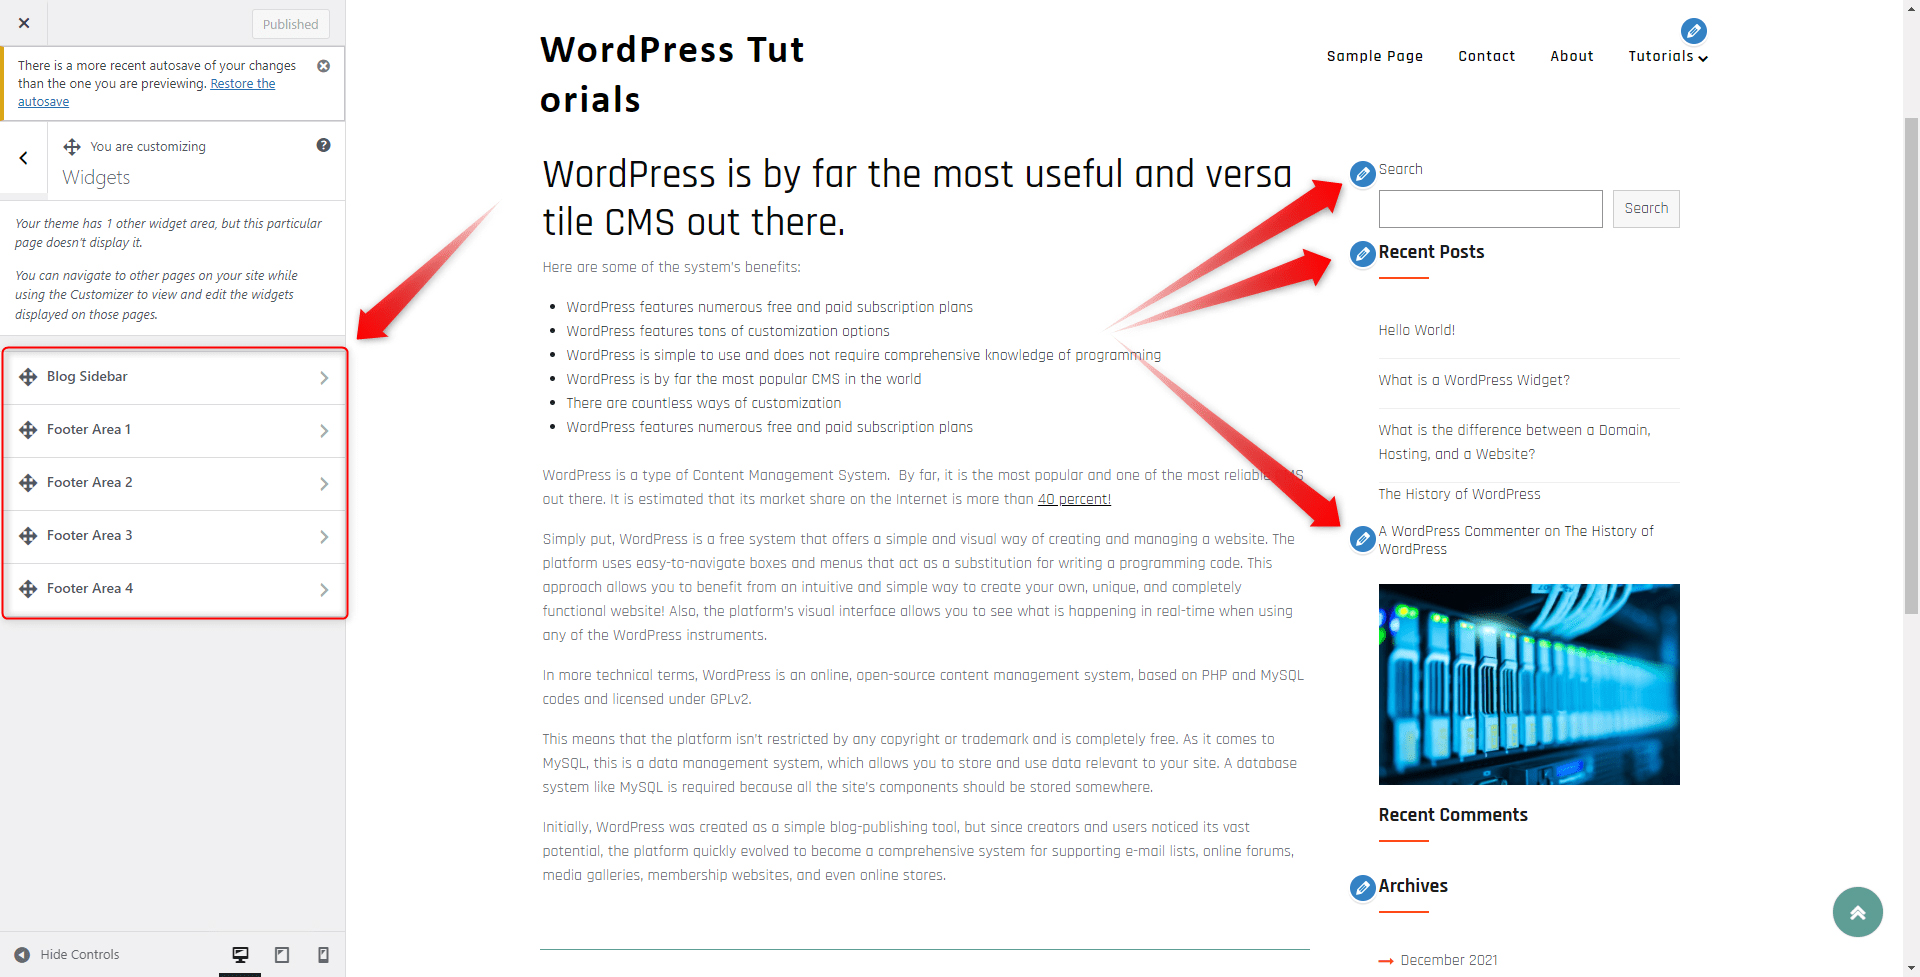
For this example, we will change the text in our Search Widget: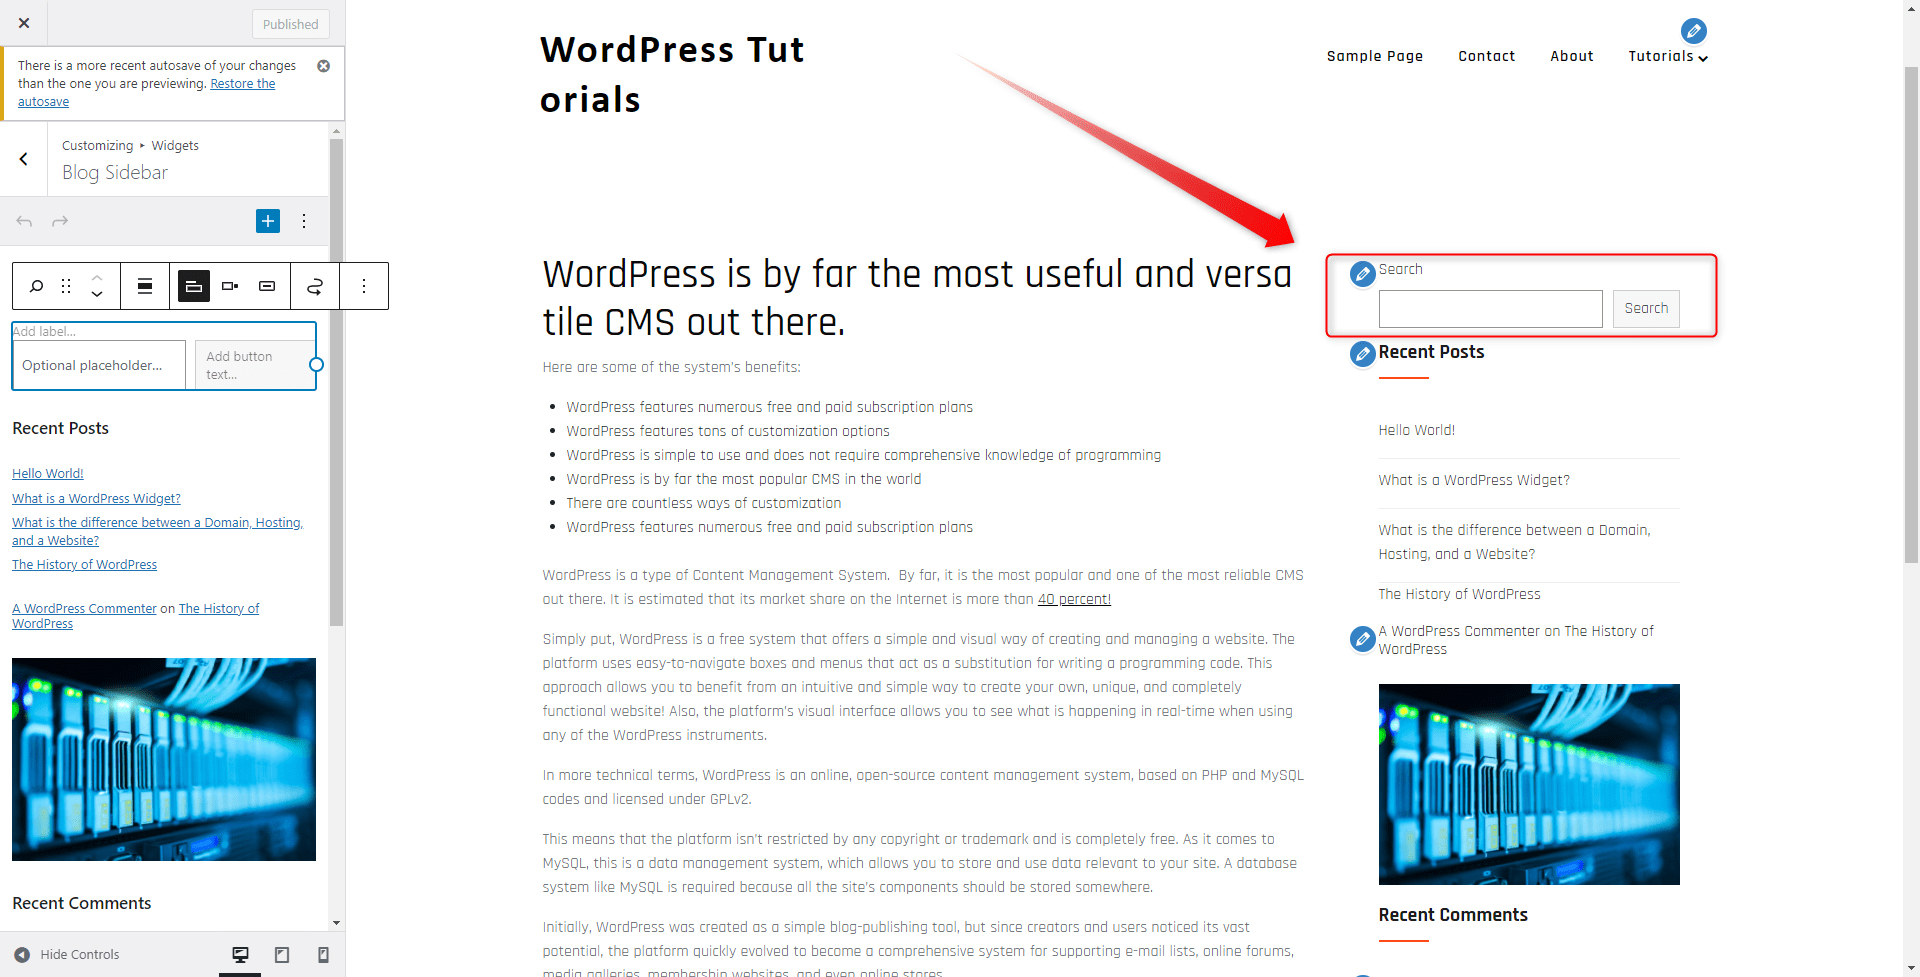
When we click the blue Pencil icon right next to the widget, a menu with options appears. There we can find an option to add a custom label: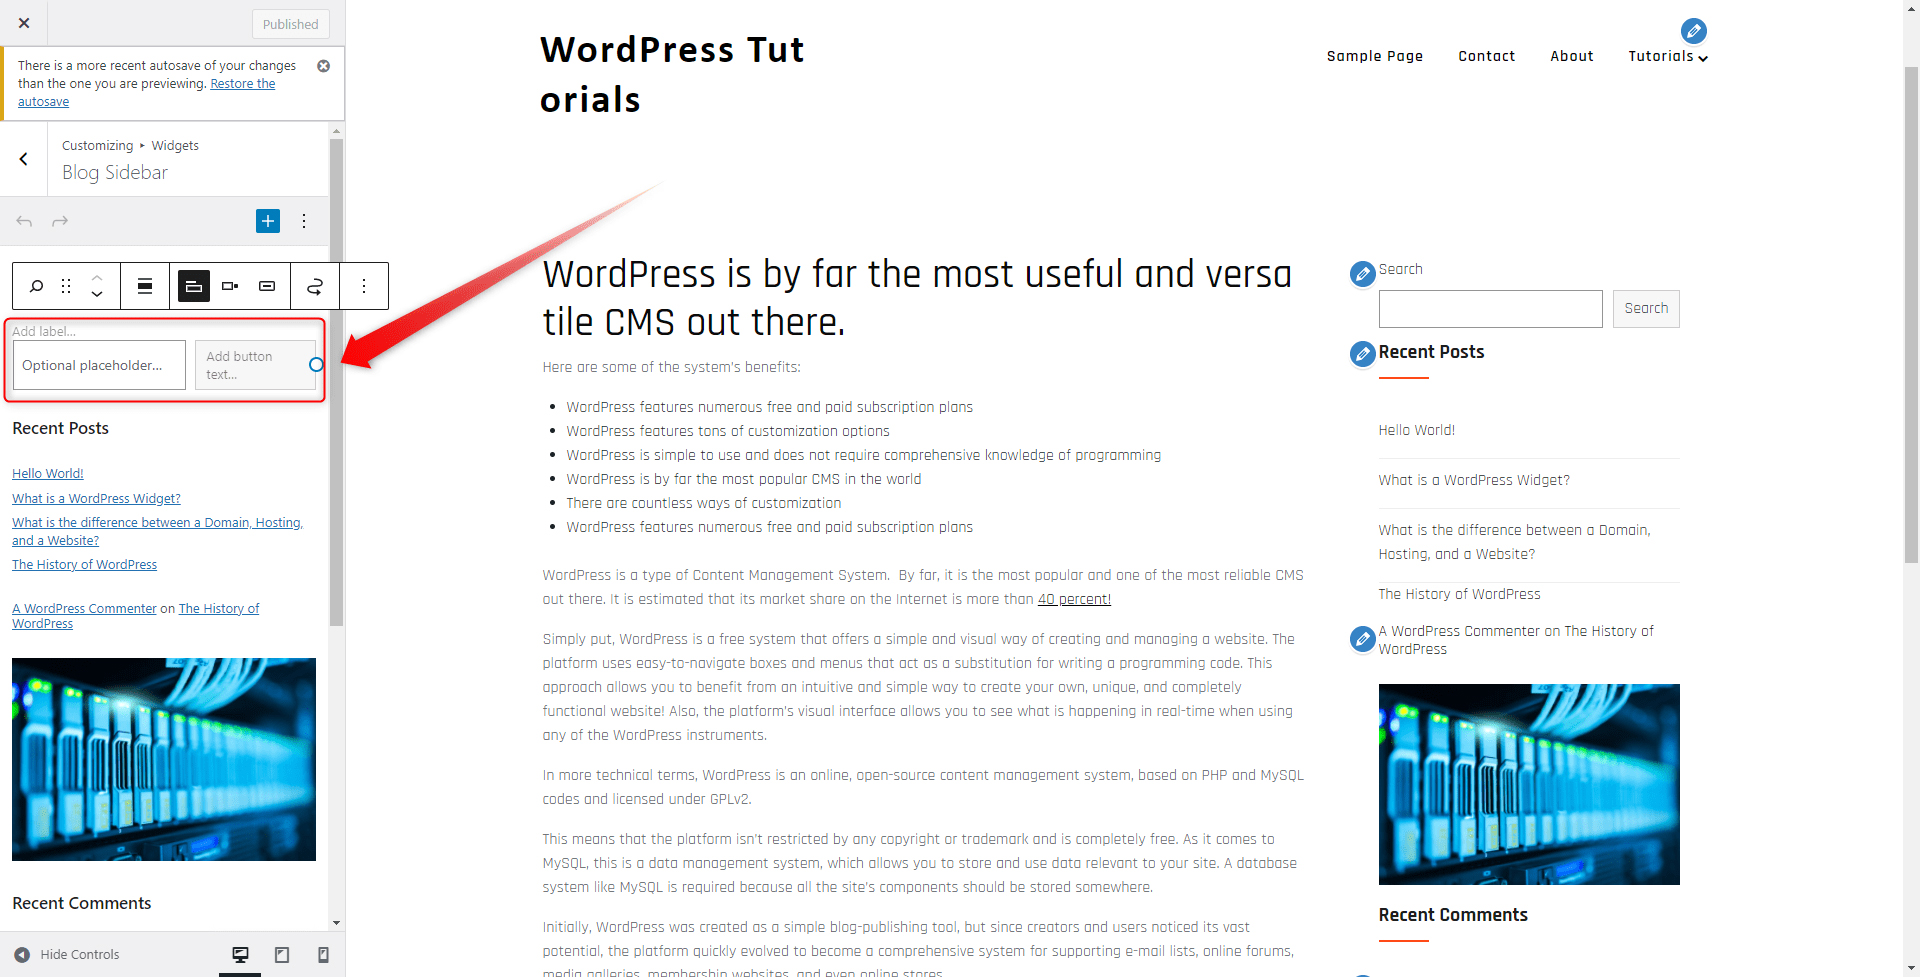
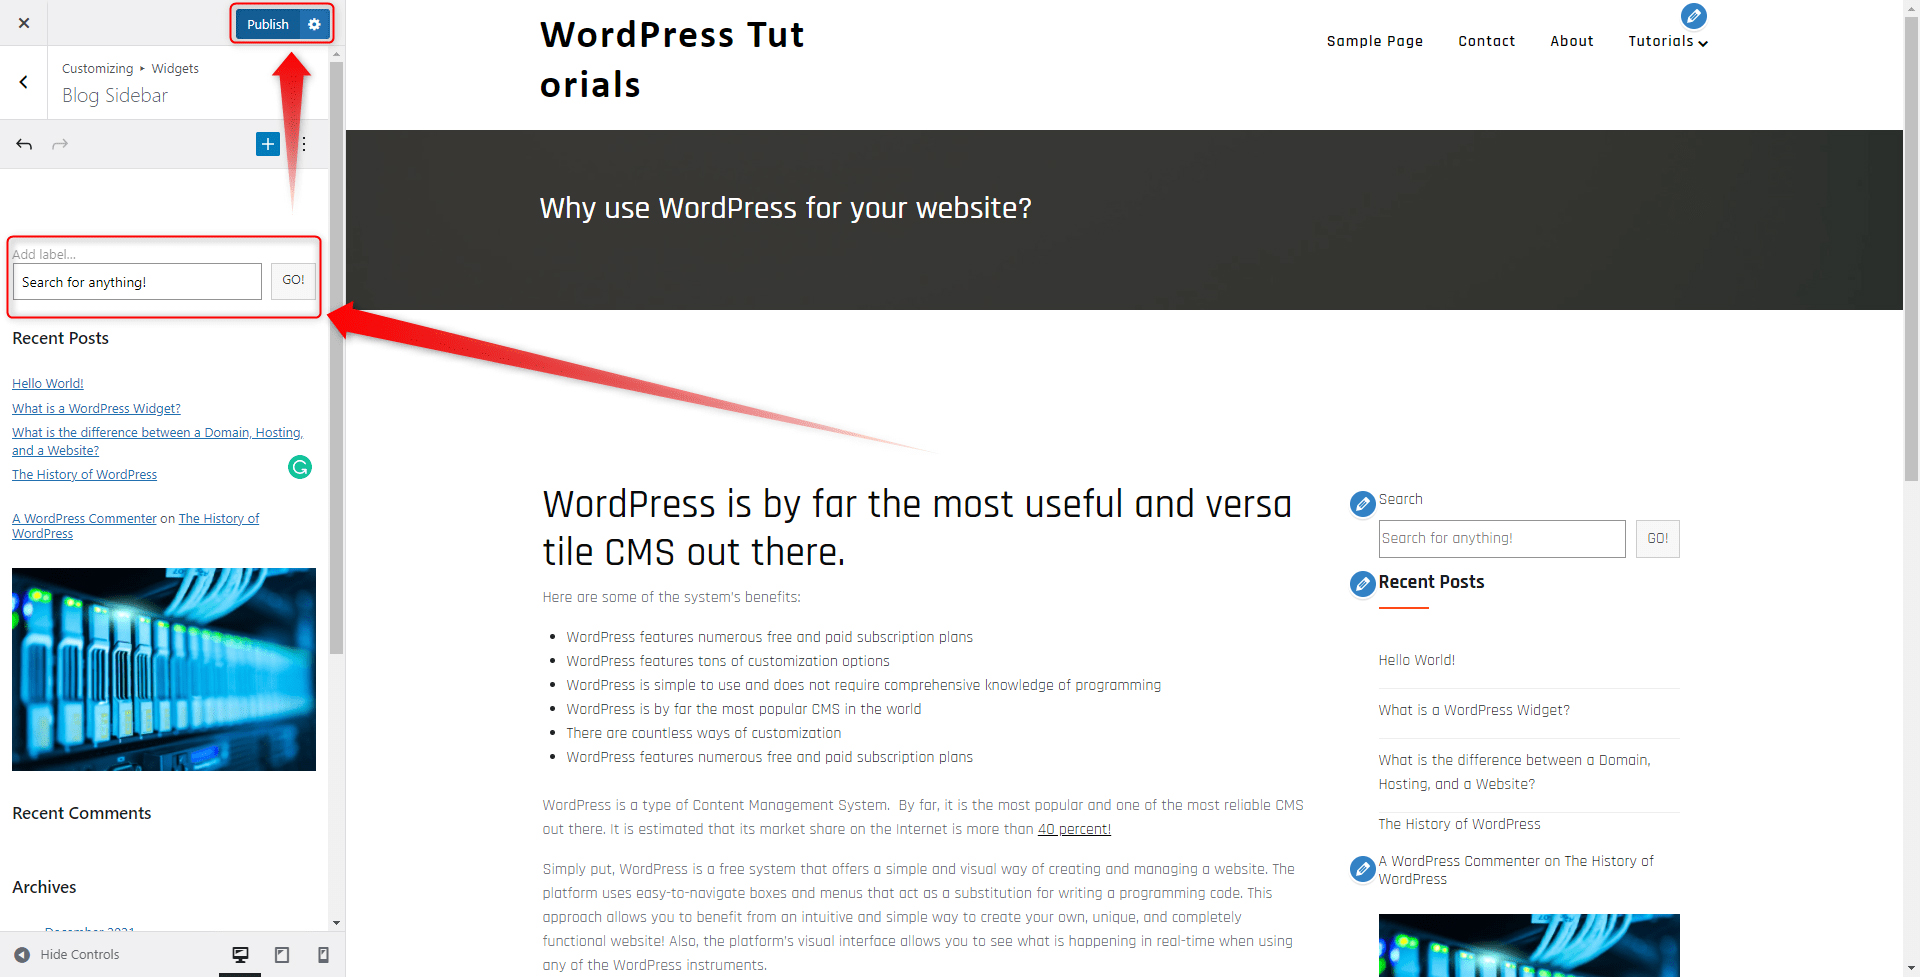
There we add our custom text and then hit the blue Publish button at the top left of the screen. This will apply and save the changes we’ve just made:
Once we’ve done so, we load our site to see how it looks: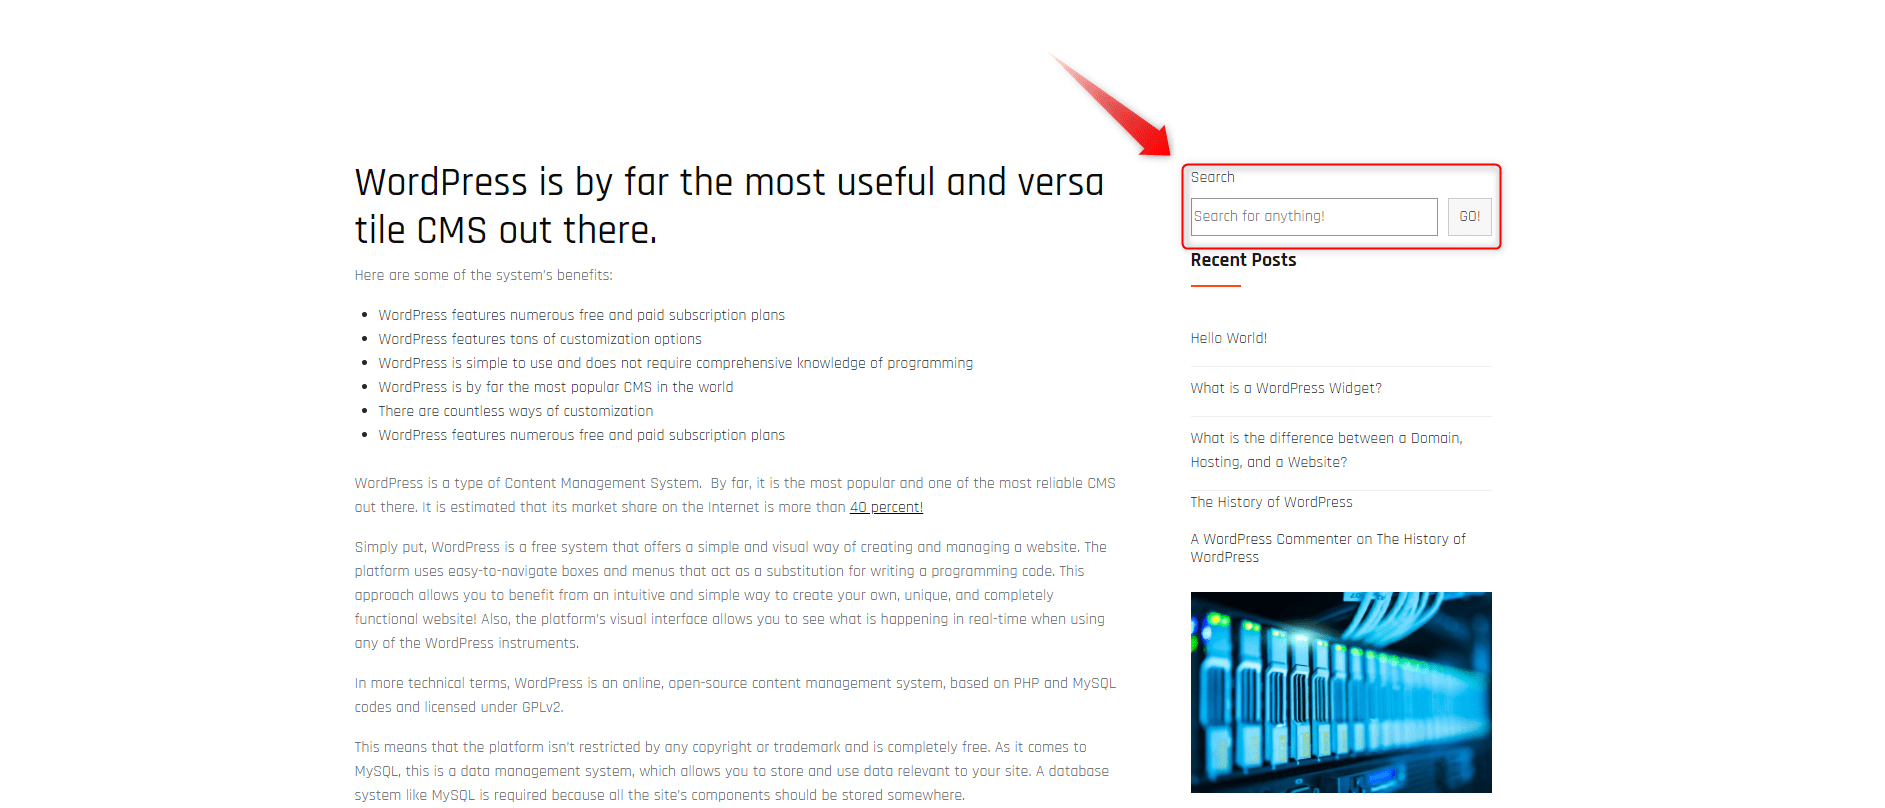
Conclusion
Customizing the WordPress widgets might well contribute to numerous site benefits, among which better user experience, more functional web pages, and also more traffic.
- What is a WordPress Plugin?
- How to Install and Activate a WordPress Plugin?
- How to Delete WordPress Plugins?
- How to Use Widgets on Your Site
- How to Make WordPress Menu Open in New Tab
- How to make WordPress SHow Widgets on Specific Pages
- How to Edit Footer Widgets in WordPress