WordPress tags are very handy when it comes to distributing your blog content. They not only add order to everything you upload to your WordPress blog but also can add a kick to SEO.
In our previous article, we focused more on explaining what WordPress tags are.
In this article, you will learn how to create tags for your blog section.
How to Create Tags in WordPress
Creating tags in WordPress is an easy process. In this section, we will show you two ways how to add some to your posts.
Method 1: Create tags via the Tags page in the Admin Panel
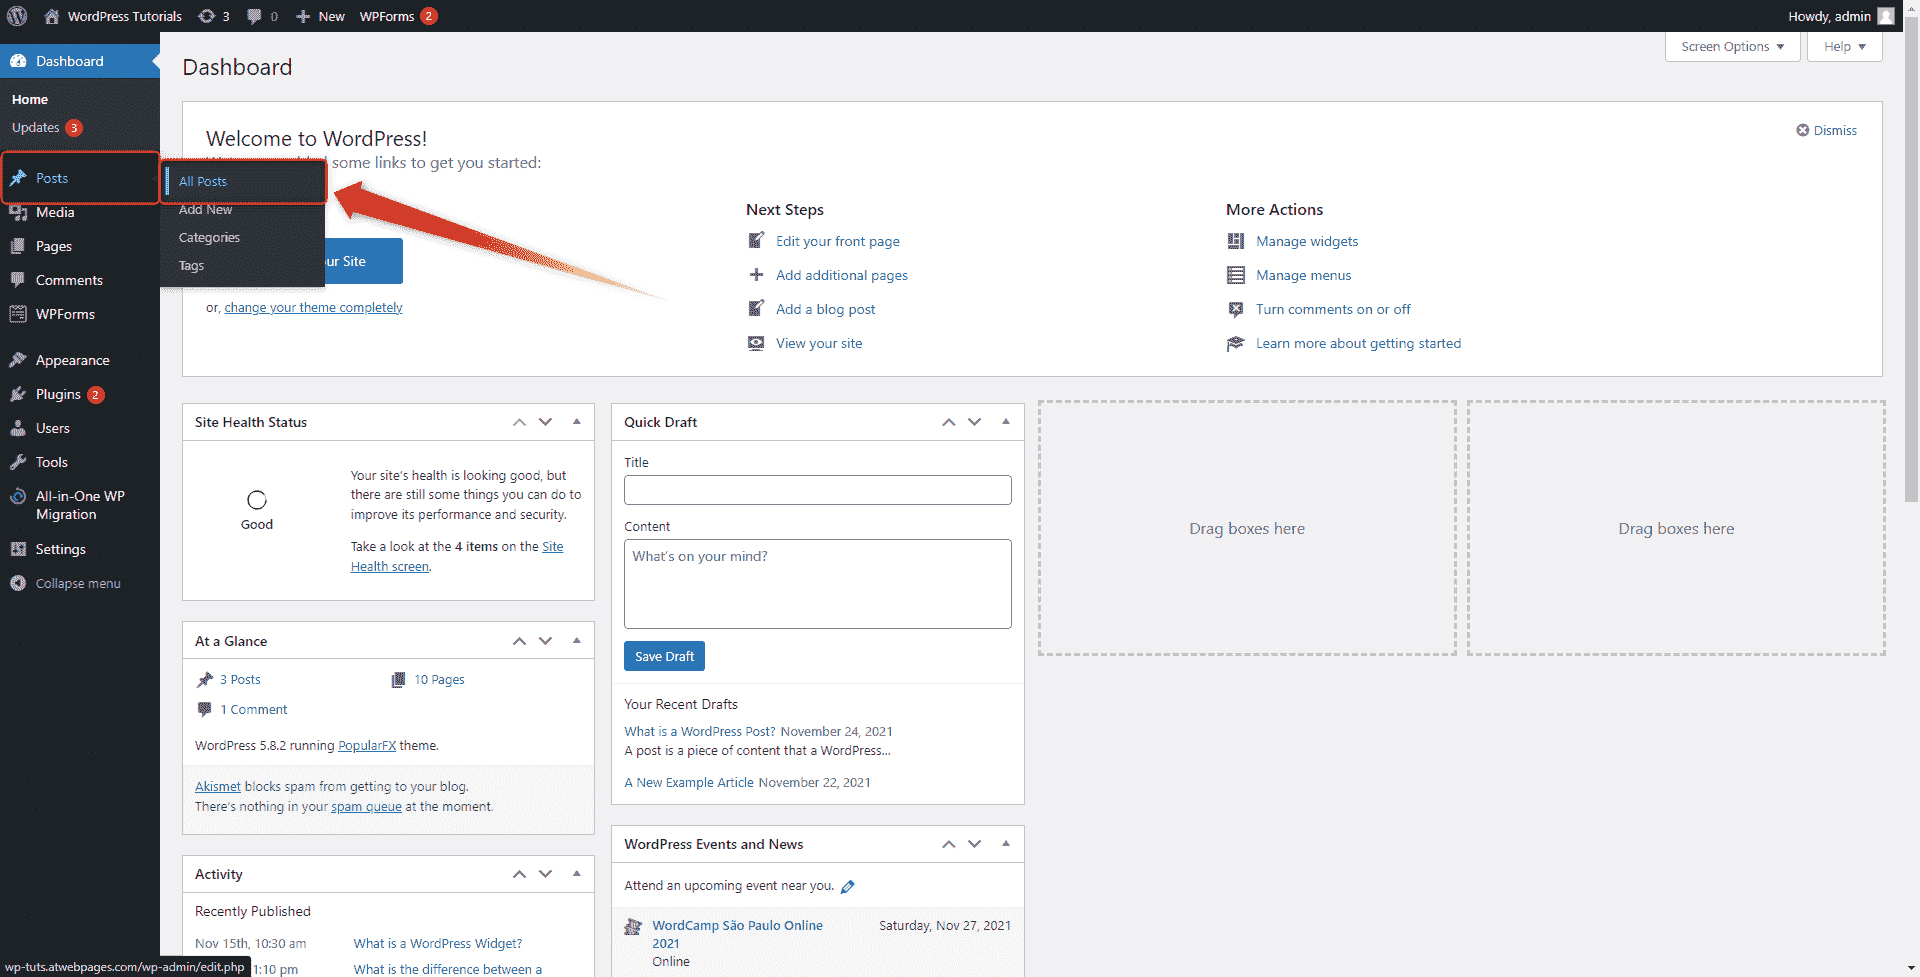
For this approach, you should first open the page that manages your tags. To do so, enter your WordPress admin panel and from the Sidebar, go to Posts->Tags:

This will open the Tags page:
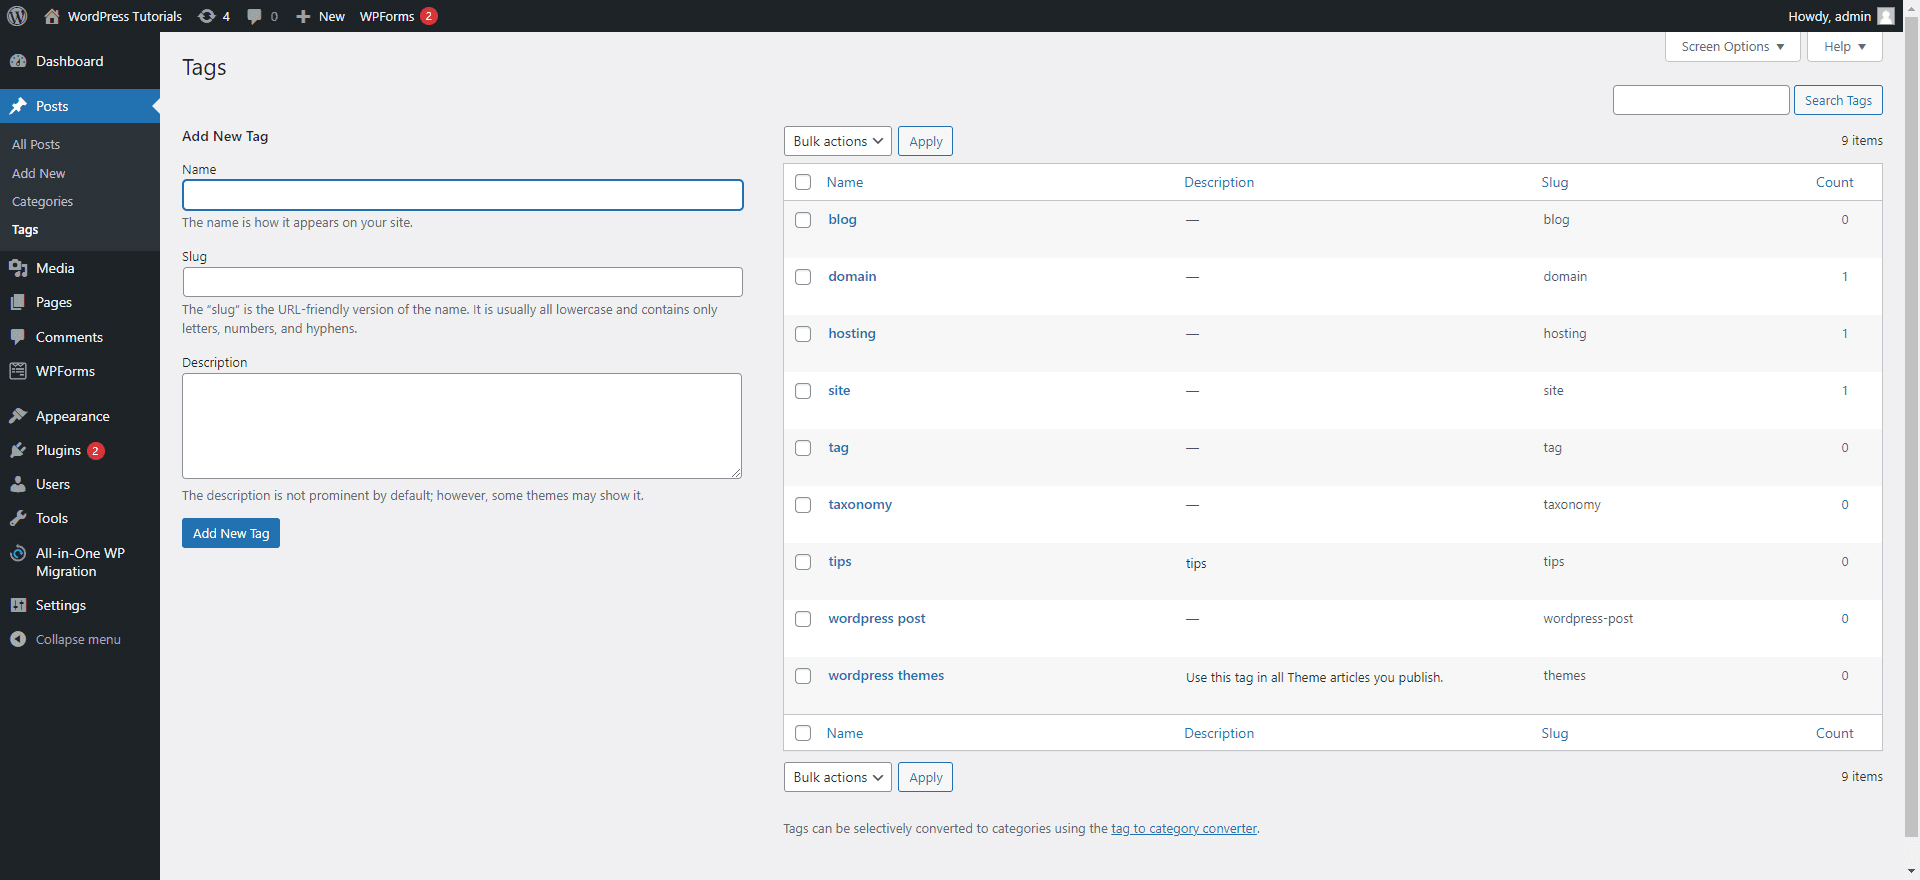
From here you can manage your tags – you can create, edit and delete them. Also, you can add descriptions, make a quick search, and take bulk actions. Let’s have a closer look at the page:
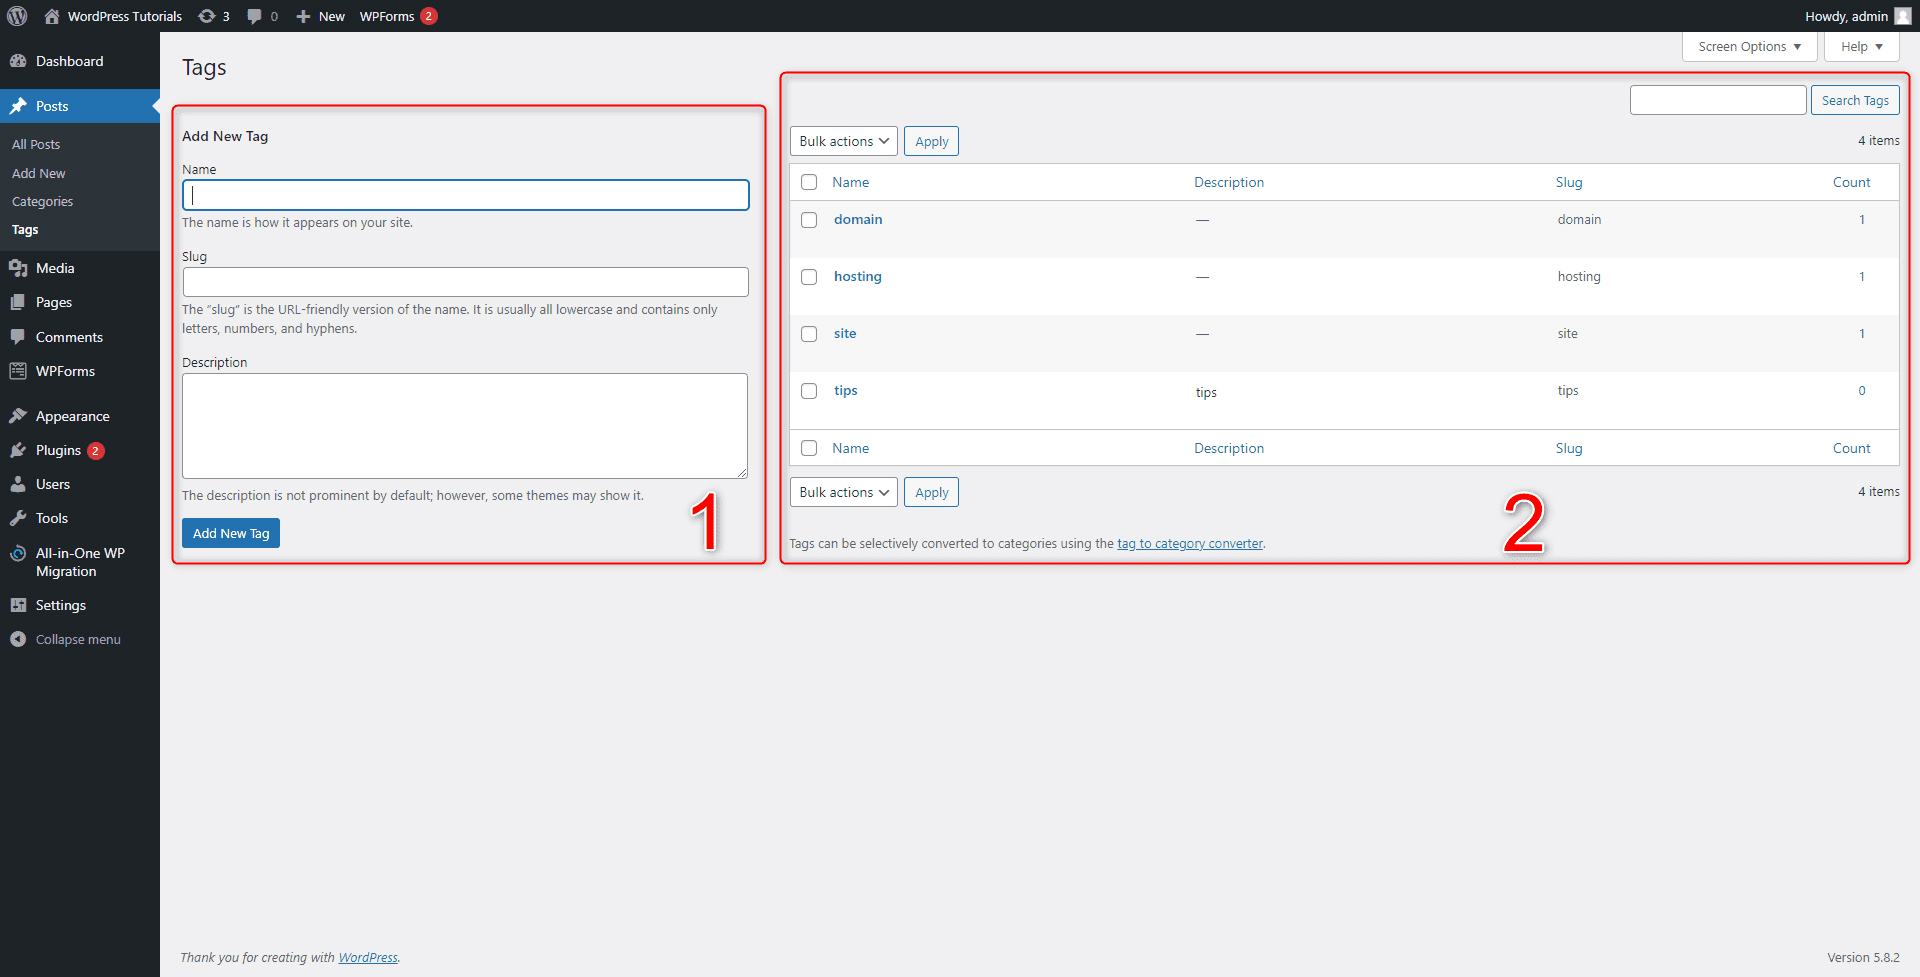
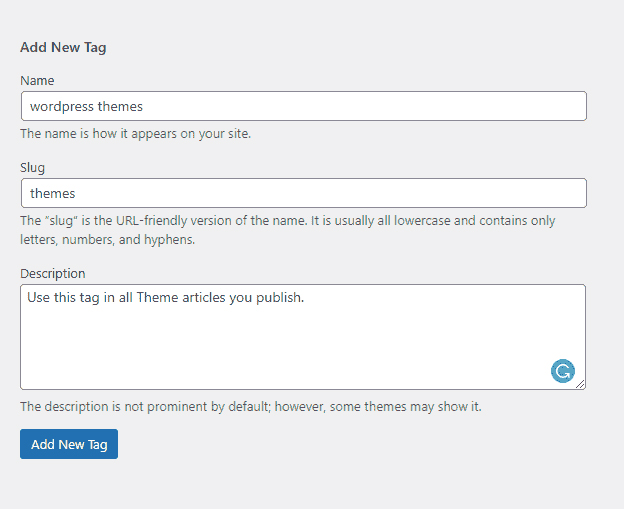
Section No.1 allows you to create new tags. You do this by typing down its name, slug and description:
- The Tag Name should be unique and descriptive. As a general rule of thumb, keep the names of your tags short, and try to use keywords as tag names, as this helps your visitors browse your content quickly, and it also helps with SEO.
- The Slug is a component of your permalinks. It always stays at the end (far right) of each link and points to the particular content on your site. Usually, WordPress creates default permalink structures, but it is advisable to change them into more eligible ones. In the context of your tags, you can simply use your tag name as a slug. This is a handy approach, as it keeps things neat and tidy, and can enhance SEO if you include a keyword in your slug section.
- The Description lets you add some clarification notes for your tags. For example, you can type down when you should use this particular tag and what were your initial goals when creating it. This field is not mandatory to fill, but keep in mind that adding a few explanatory words can be convenient when your tags become large in numbers.
Here’s how we filled in this box:
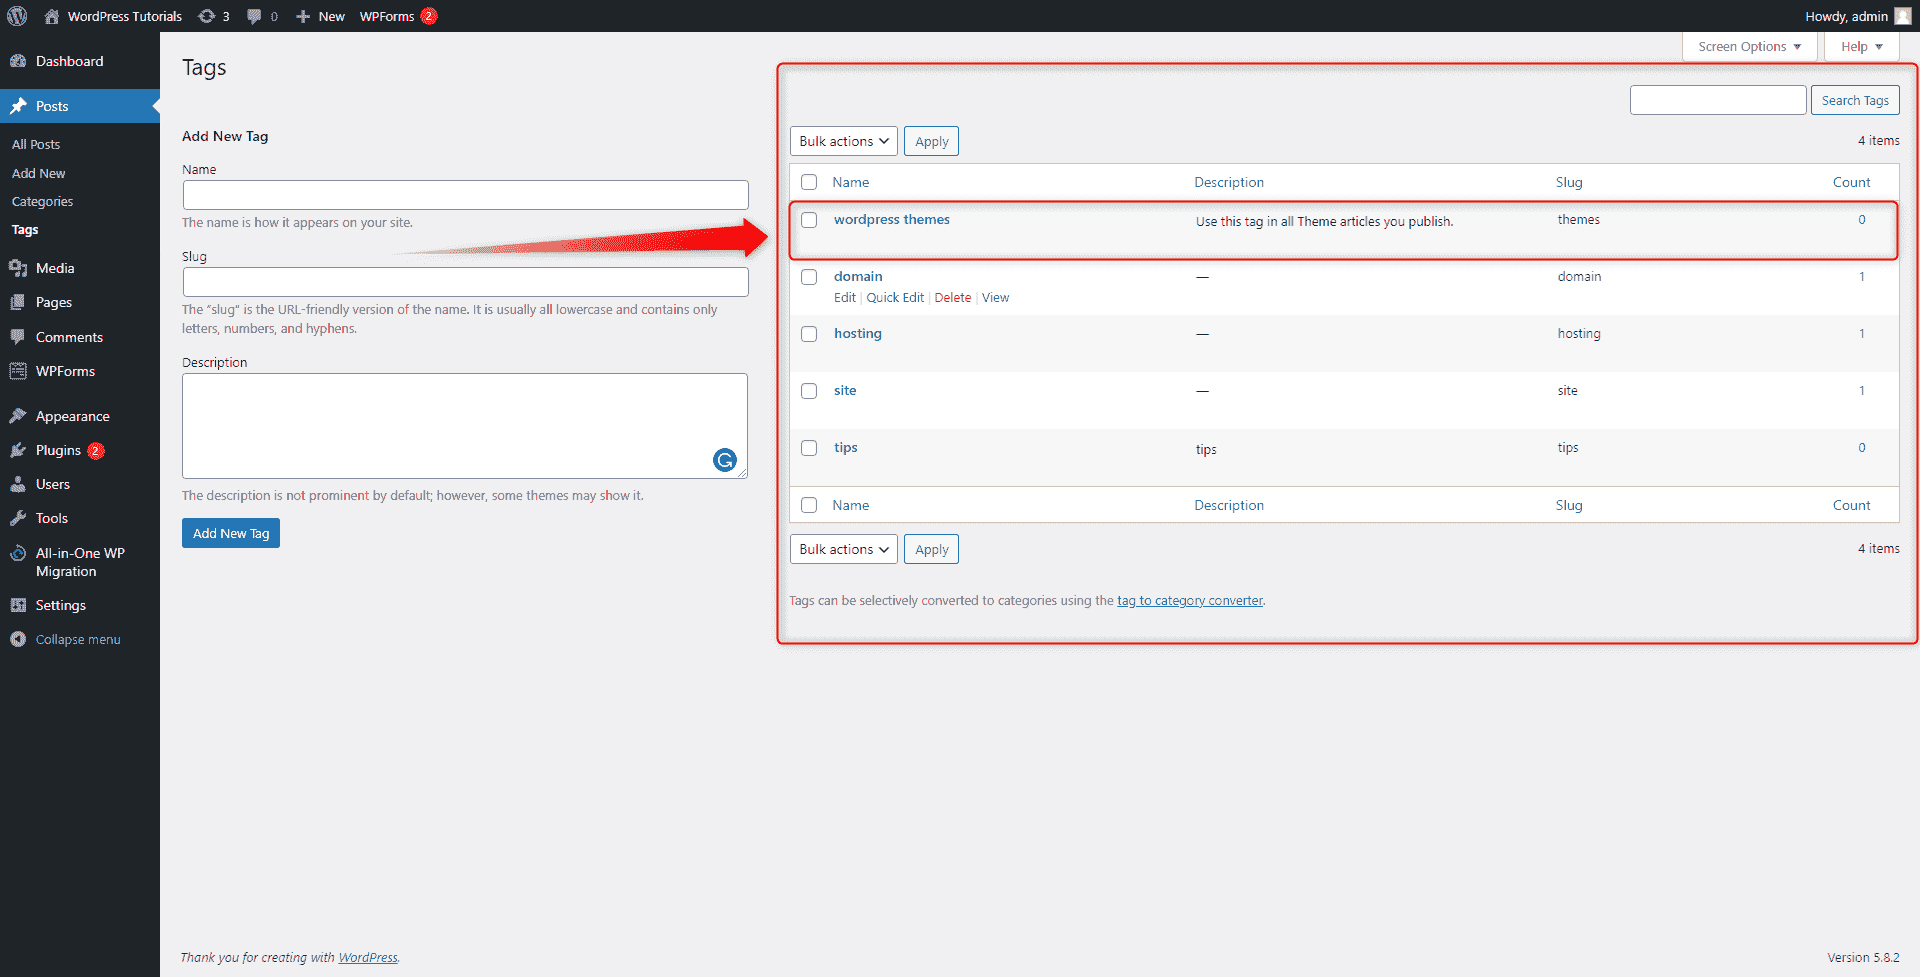
Then press the blue Add New Button. This will create your new tag with the credentials your typed in and will automatically include it at the top of the list in Section No.2:
Now that we’ve mentioned section No.2, it is time to have a closer look at it. This box contains a list of all your tags and information about them. Here, you can also find quick information about the overall number of your tags, their descriptions, how many times they have been used in your articles, what is their slug, and a search box.
Also, this is the place from where you can edit and delete your already created tags. To do so, simply hover your mouse button over the name of a particular tag and a menu will appear. For this demonstration, we will edit our “domain” tag:
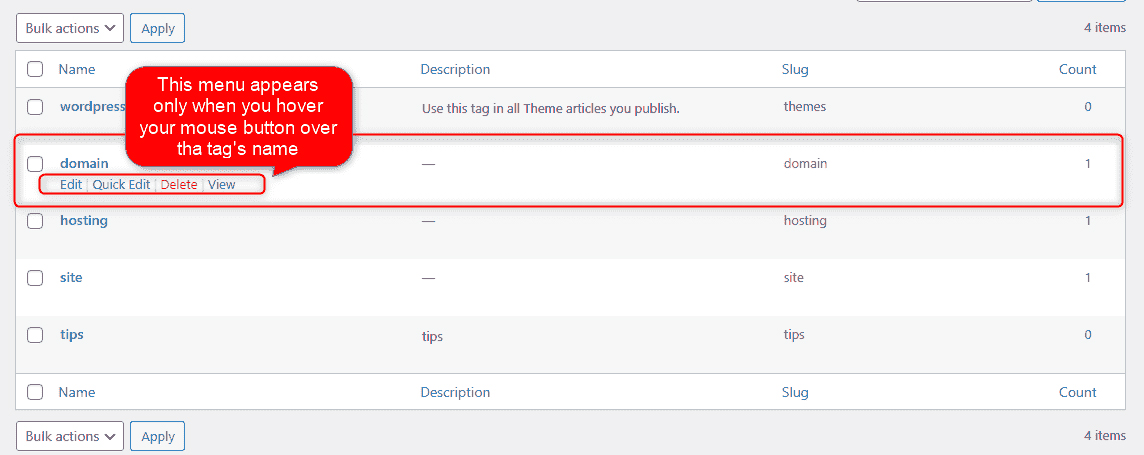
Let’s have a closer look at each of the menu options:
- Edit opens a new window in which you can add or delete details to your tag. This page also allows you to delete the tag:

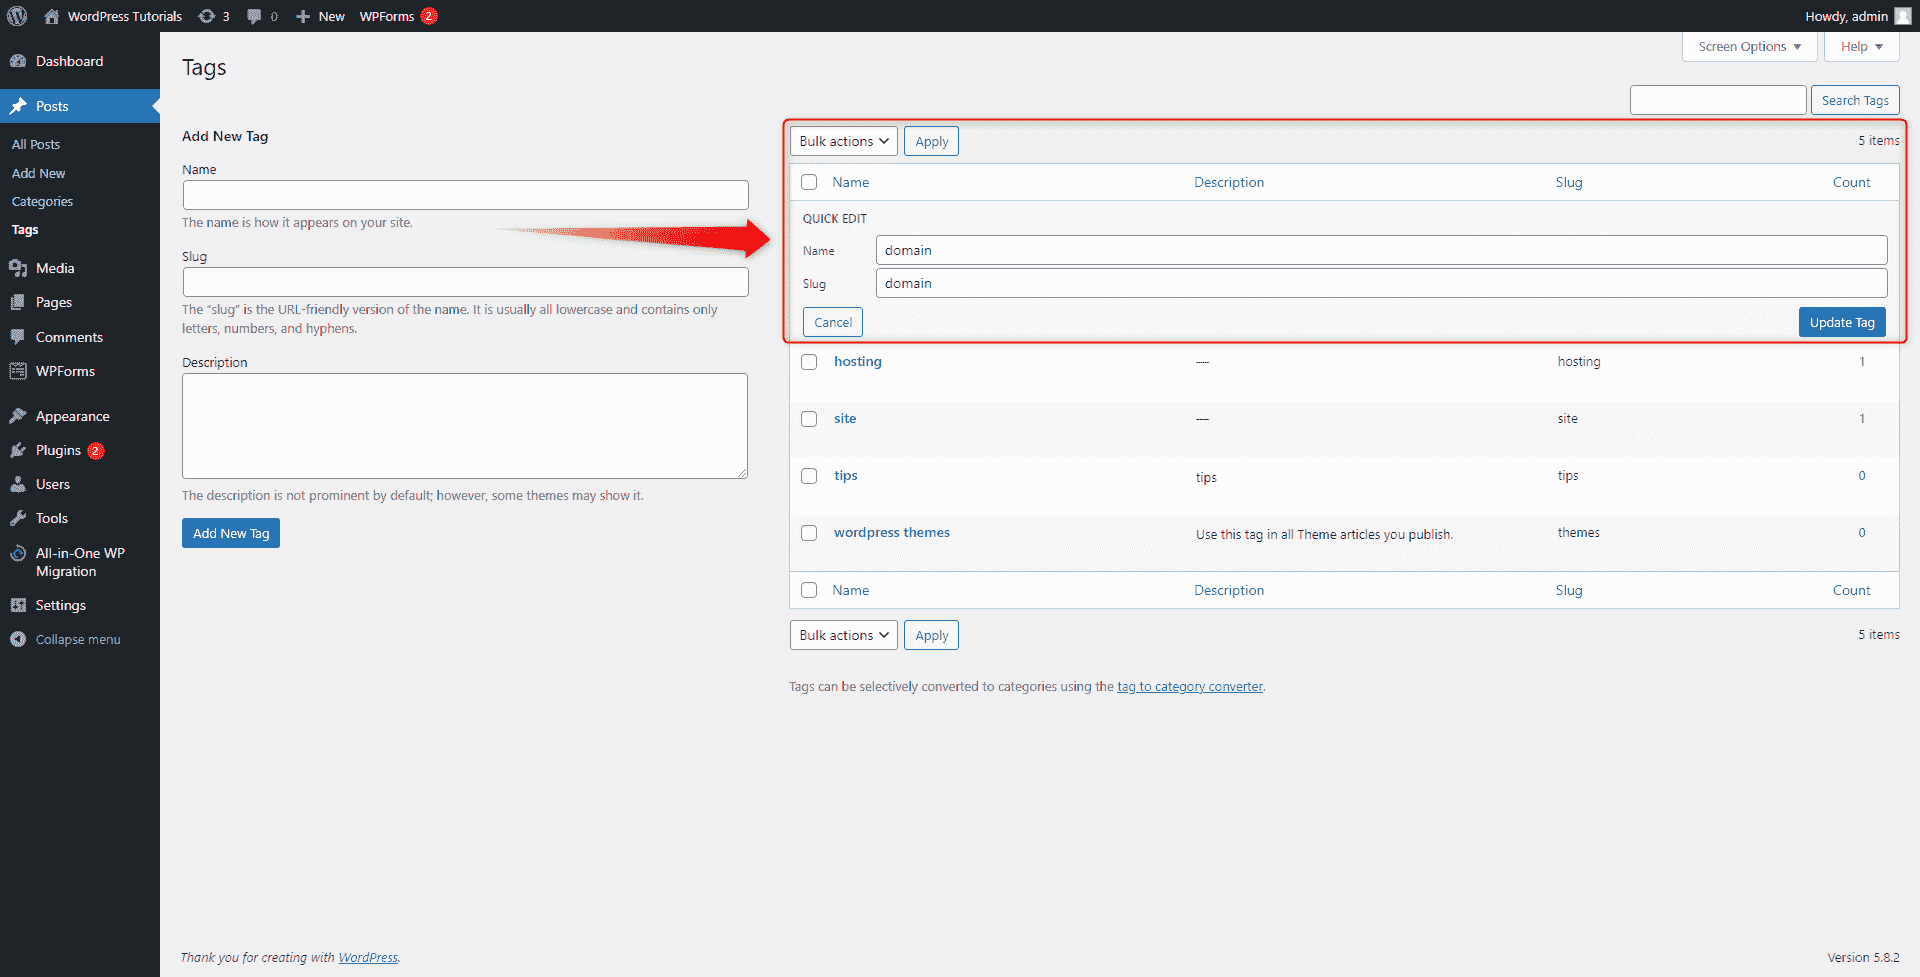
- Quick Edit allows you to change the name and slug of a given tag without opening a new page:
- Delete allows you to quickly delete the tag.
- The view opens up all articles that contain this particular tag.
Method 2: create tags from the Add New Post page:
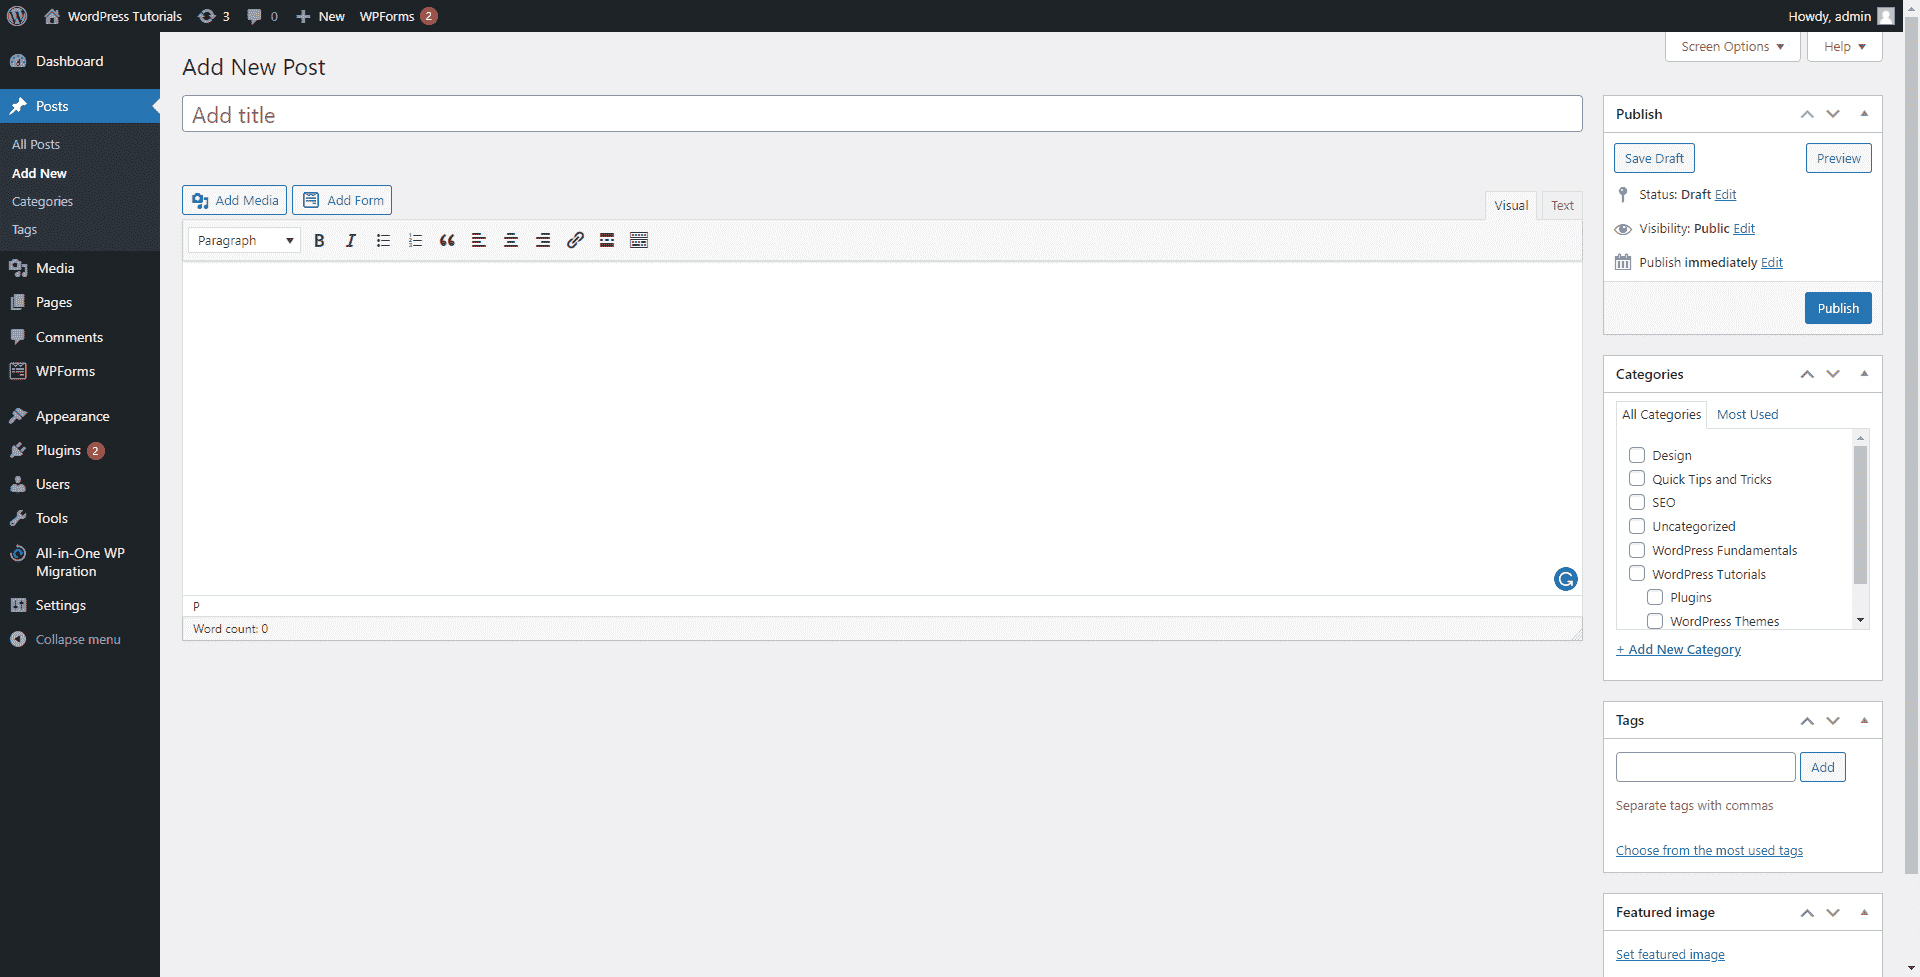
For this method, you should go to Posts->Add New through your WordPress dashboard:
This will open the new article creation page. From here you can fully manage your article and add tags:
For the purpose of this example, we created a primary article and already customized it a bit – we’ve modified the permalink, added a featured image, distributed the article in our preferred categories, and now it is time to create some tags:
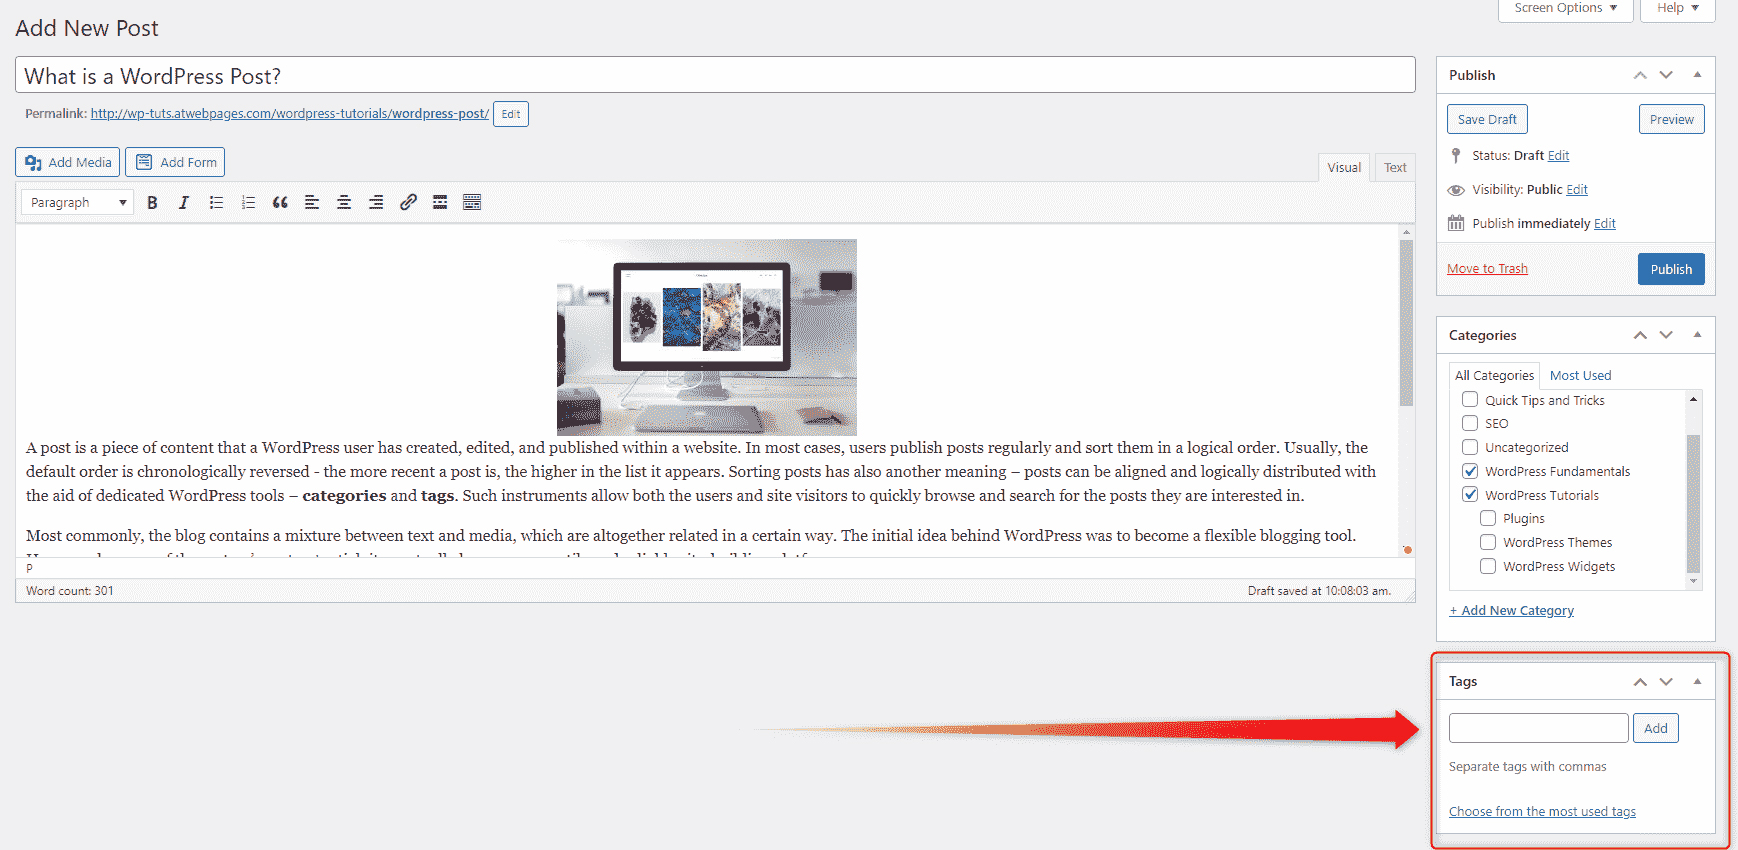
To create and add tags, locate the Tags box on the right of the screen:
To create tags and simultaneously add them to your article, simply start typing them in the dedicated field. When you are finished, click on Add:
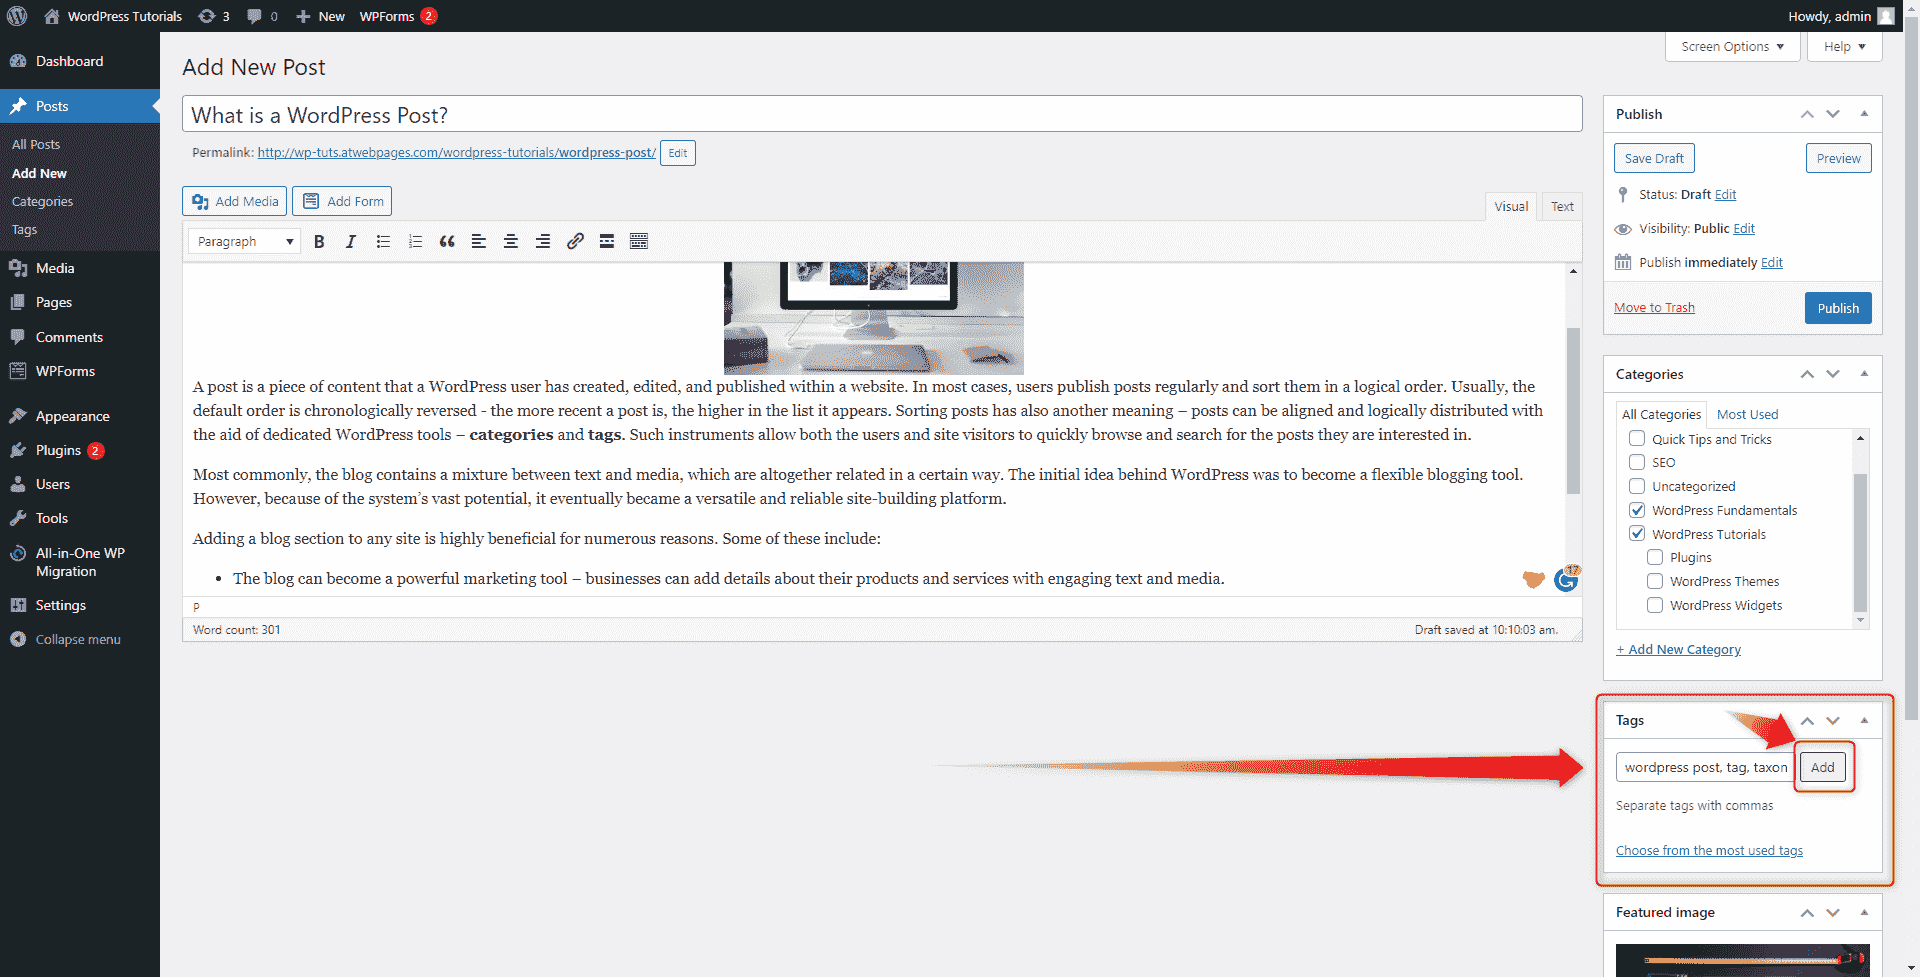
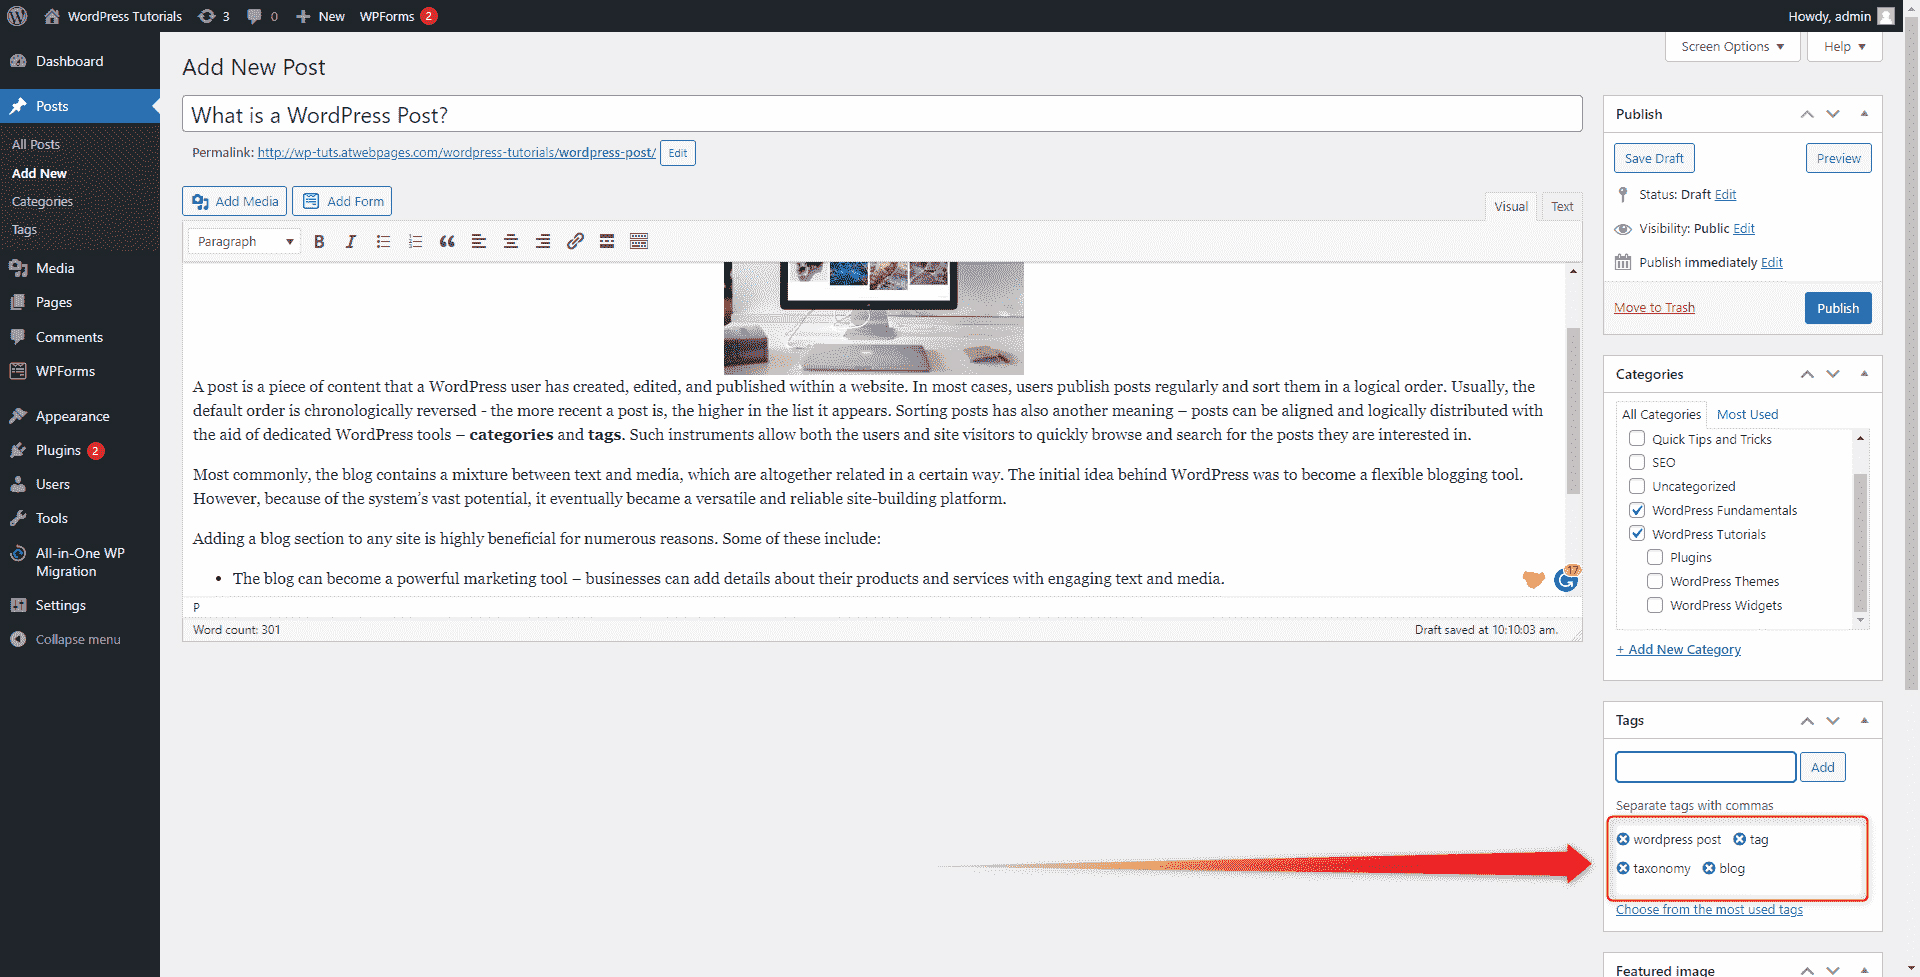
This will automatically add all the tags you’ve typed down:
Conclusion
Using tags is very handy, as they greatly contribute to your organization of blog content and also can add a great kick to SEO. Also, tags are handy for your site visitors and can contribute to more satisfied visitors and even more customers.
Also, if you are new to WordPress, learn how to build a website with our comprehensive WordPress guide!
Related: