When WordPress runs into an issue, it displays an error message. Such is the case with errors 400 Bad Request, 401 Unauthorized, 404 Page Not Found, and 429 Too Many Requests.
This is also the case with 403 Forbidden error message.
The common thing between all these types of messages is that they are all a part of the HTTP 4xx group of error codes. Number 4 indicates that this is a client-based issue, and the following numbers give more insight into where the root of the problem is.
When it comes to 403 Forbidden issues, this message indicates a special type of problem – the server containing the web page you want to open doesn’t allow access to this resource.
In the following paragraphs, you will read how to fix the problem.
How to Fix 403 Forbidden Error in WordPress
To know how to fix the problem, we should first learn what causes it.
Most commonly, the Forbidden error message is prompted by:
- A corrupt .htaccess file
- A technical issue with some of the installed WordPress plugins
- Problems with file permissions
However, before we proceed, it is also worth trying to clear your cache to see whether this will fix the issue – sometimes too many cached files can cause various errors and technical inconveniences.
Another fast method is to use a recent backup copy of your website. This is a very convenient way to get your pages up and running without delving too much into the technical matter.
However, if these two approaches do not fix the problem, then it is time to try out more methods.
Method 1: Delete and Create a new .htaccess file
The .htaccess file is placed in the website’s root directory within the hosting server and allows WordPress to interact with this server.
Sometimes this file can get corrupted and force WordPress to display various error messages such as the 403 Forbidden.
To see whether the problem is rooted within this file, we will delete it and generate a new one. The idea is simple – if there’s an issue with the old file, then the new one won’t prompt WordPress to display any error messages.
Let’s see whether this is the case.
first, log in to your ZETTAHOST hosting panel.
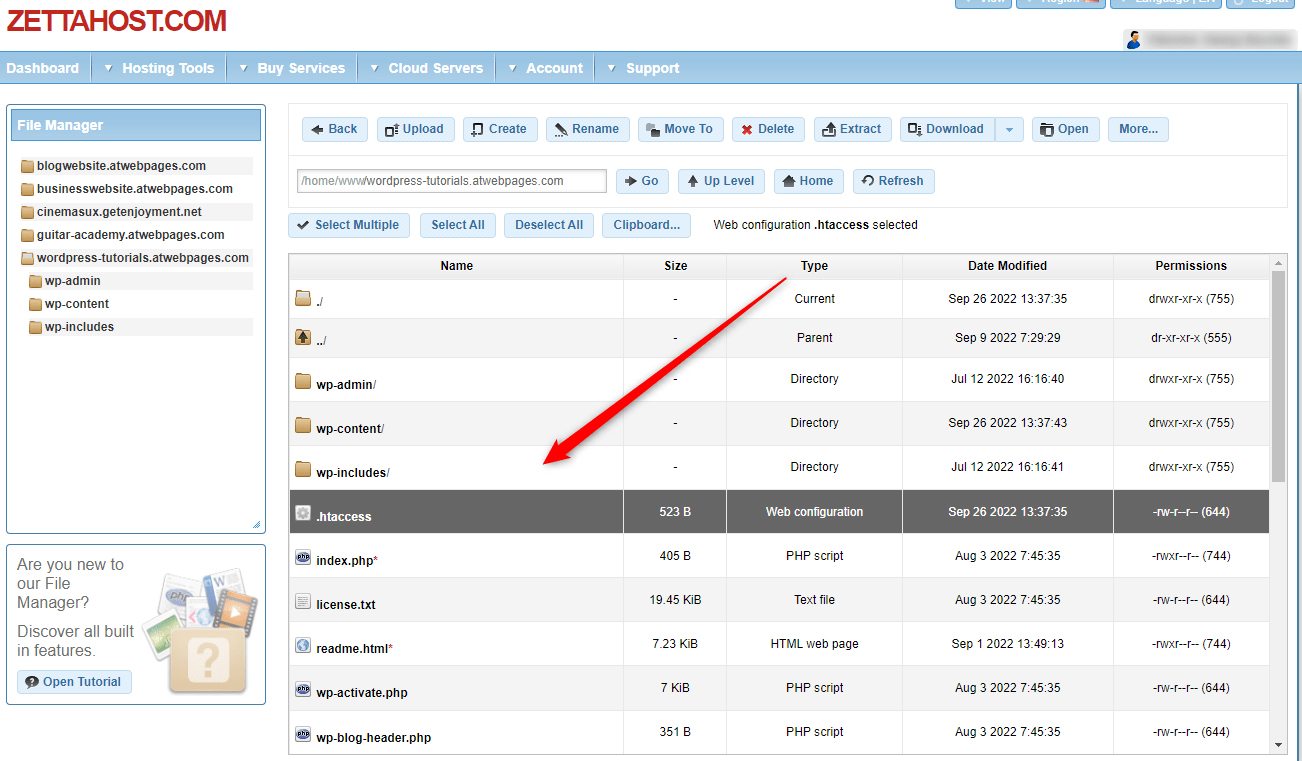
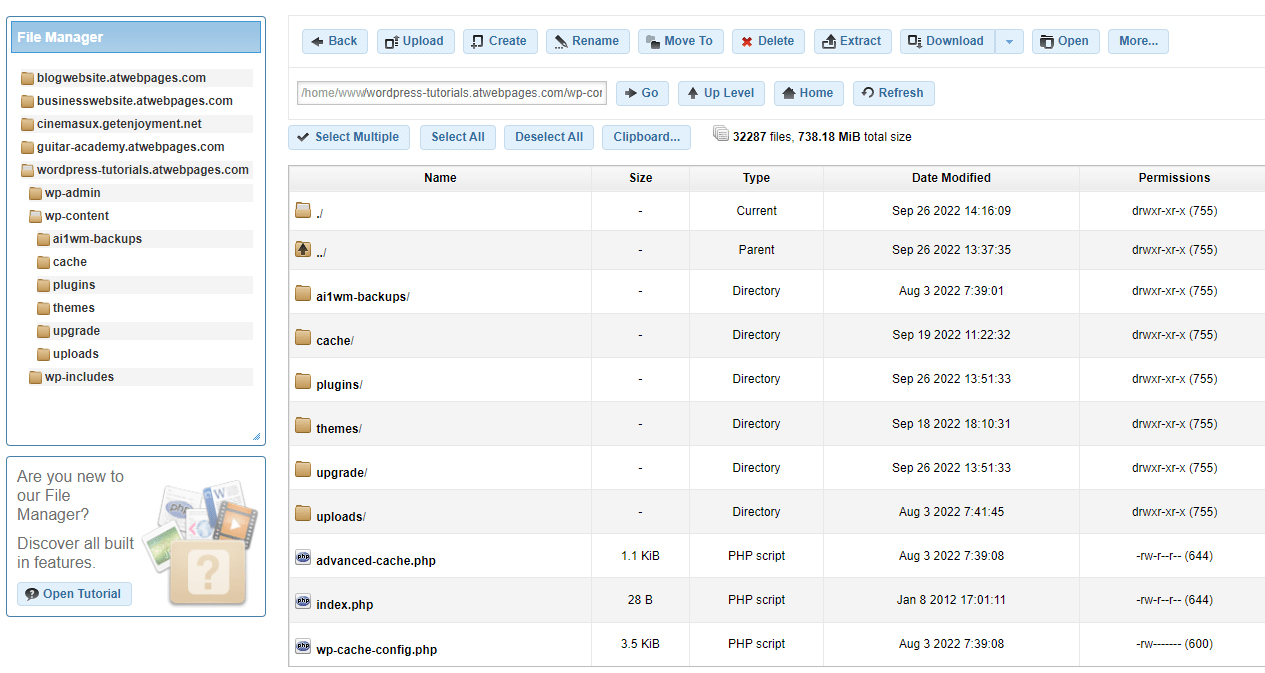
Then, go to File Manager->your website folder. There look for the file:
Download a copy of the file on your computer. This is a safety measure – should an unexpected issue occurs, we will re-upload it at once.
To download the file, right-click on the icon and select download:
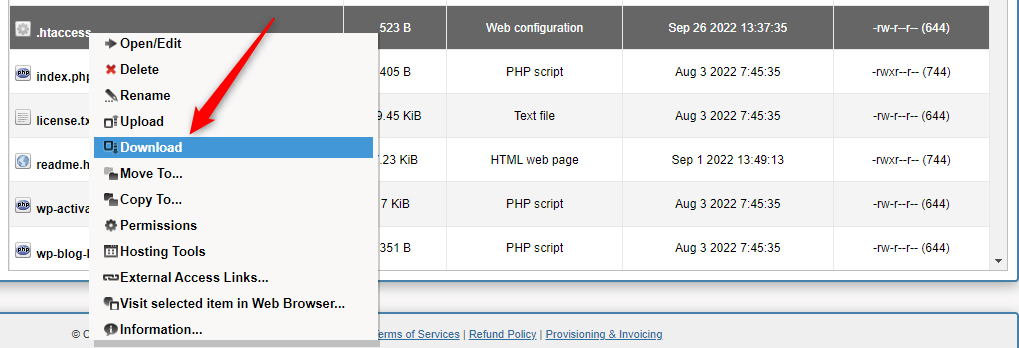
Then, right-click again and this time delete the file:

Now it is time to generate a fresh new .htaccess file.
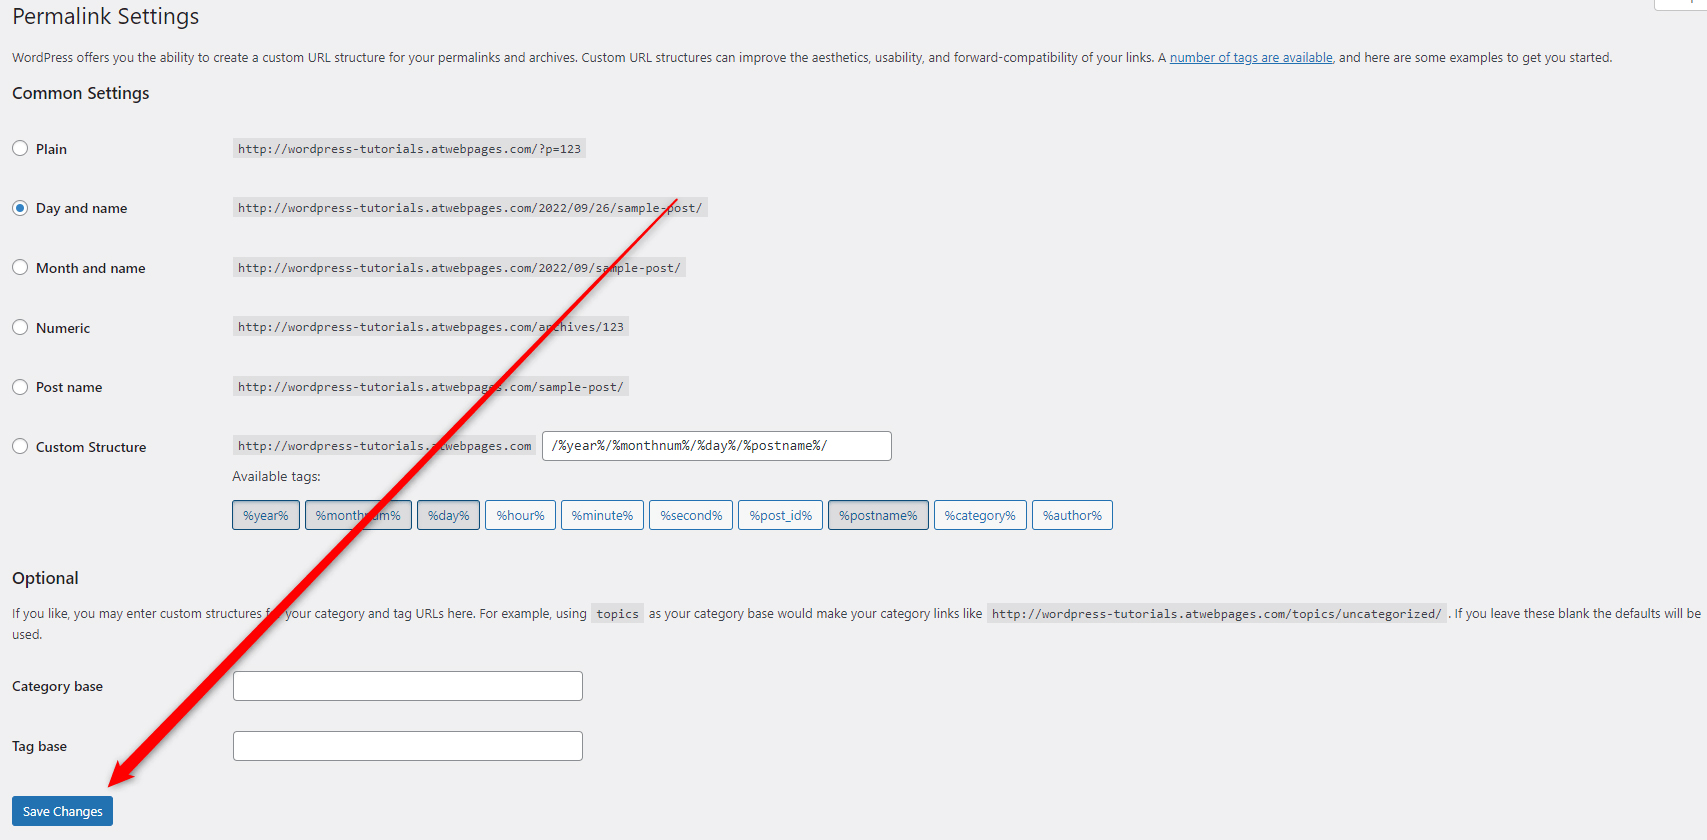
To do so, enter your WordPress admin panel and from there go to Settings->Permalinks:
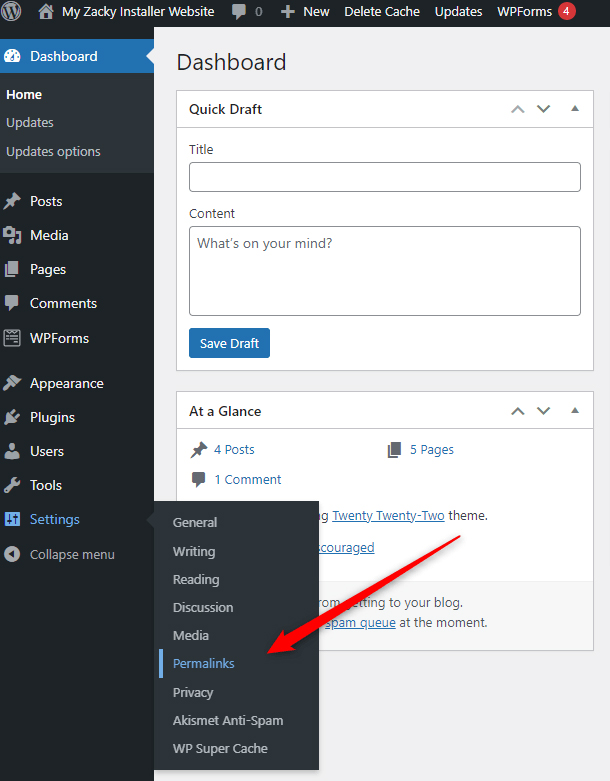
Once you are on the Permalinks page, don’t change anything – simply go to the bottom of the page and click the blue Save Changes button. This will prompt WordPress to generate a new .htaccess file:
Once the saving process is finished, open your website.
If you no longer see the error message, then the problem was caused by the old .htaccess file and now that it is replaced with a new one, you’ve managed to fix the issue.
If you still see the 403 Forbidden, however, then the problem lies elsewhere. If this is the case, then proceed with the next method.
Method 2: Check for a faulty plugin
For this method, we will deactivate all the installed plugins and run the website, so we see whether some active ones are causing the issue.
To do so, once again log in to the hosting panel and again go to File Manager->your website folder->wp-content:
Locate the plugins/ folder and rename it.
To do so, right-click on it and select rename:
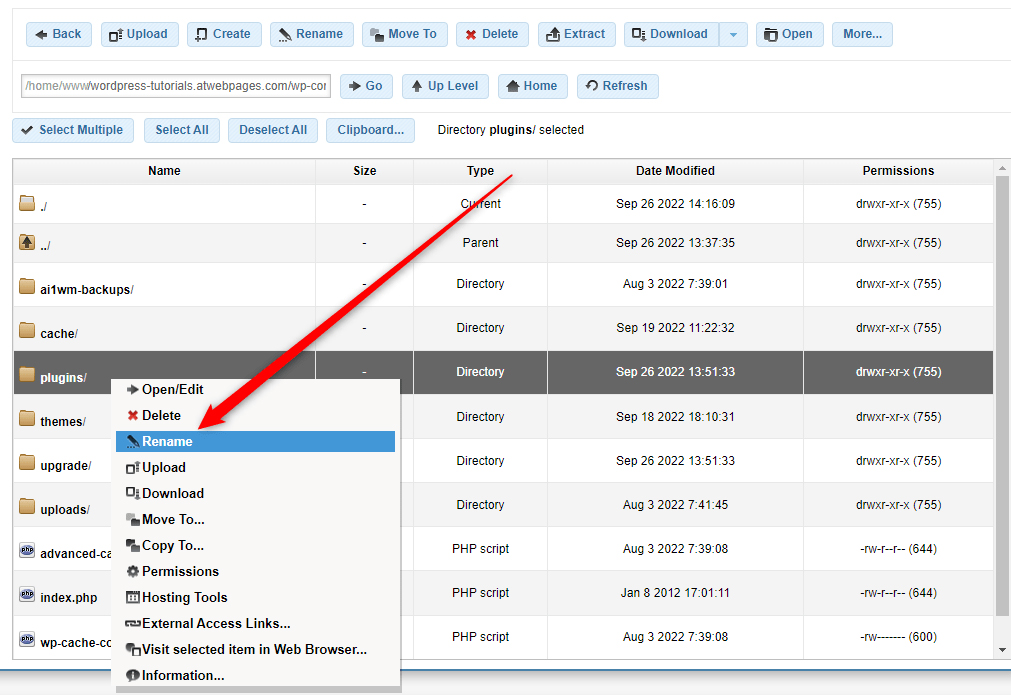
Now, choose a new name for the folder to your liking. For example, Plugins_rename. The new name doesn’t really matter, as we will revert to the original one after a while.
Once you are done, save the settings.
The idea is that WordPress searches precisely for a folder named “plugins” to activate any plugins and when it doesn’t find any – it simply deactivates all installed ones.
Now, when all plugins are deactivated, open your website – if you no longer see the error message, then, some of the deactivated plugins are causing it.
To filter out which one precisely, go back to the hosting panel and rename the plugin’s folder to its original name.
Then, go to your WordPress dashboard and then to Plugins->Installed Plugins:
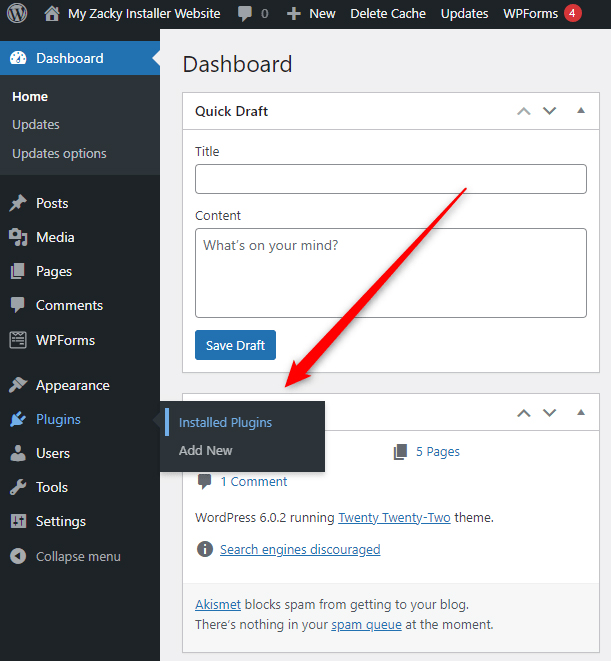
This will open the page with all your installed plugins. Now, after you’ve renamed the plugins folder back to normal, notice that all of them are deactivated:
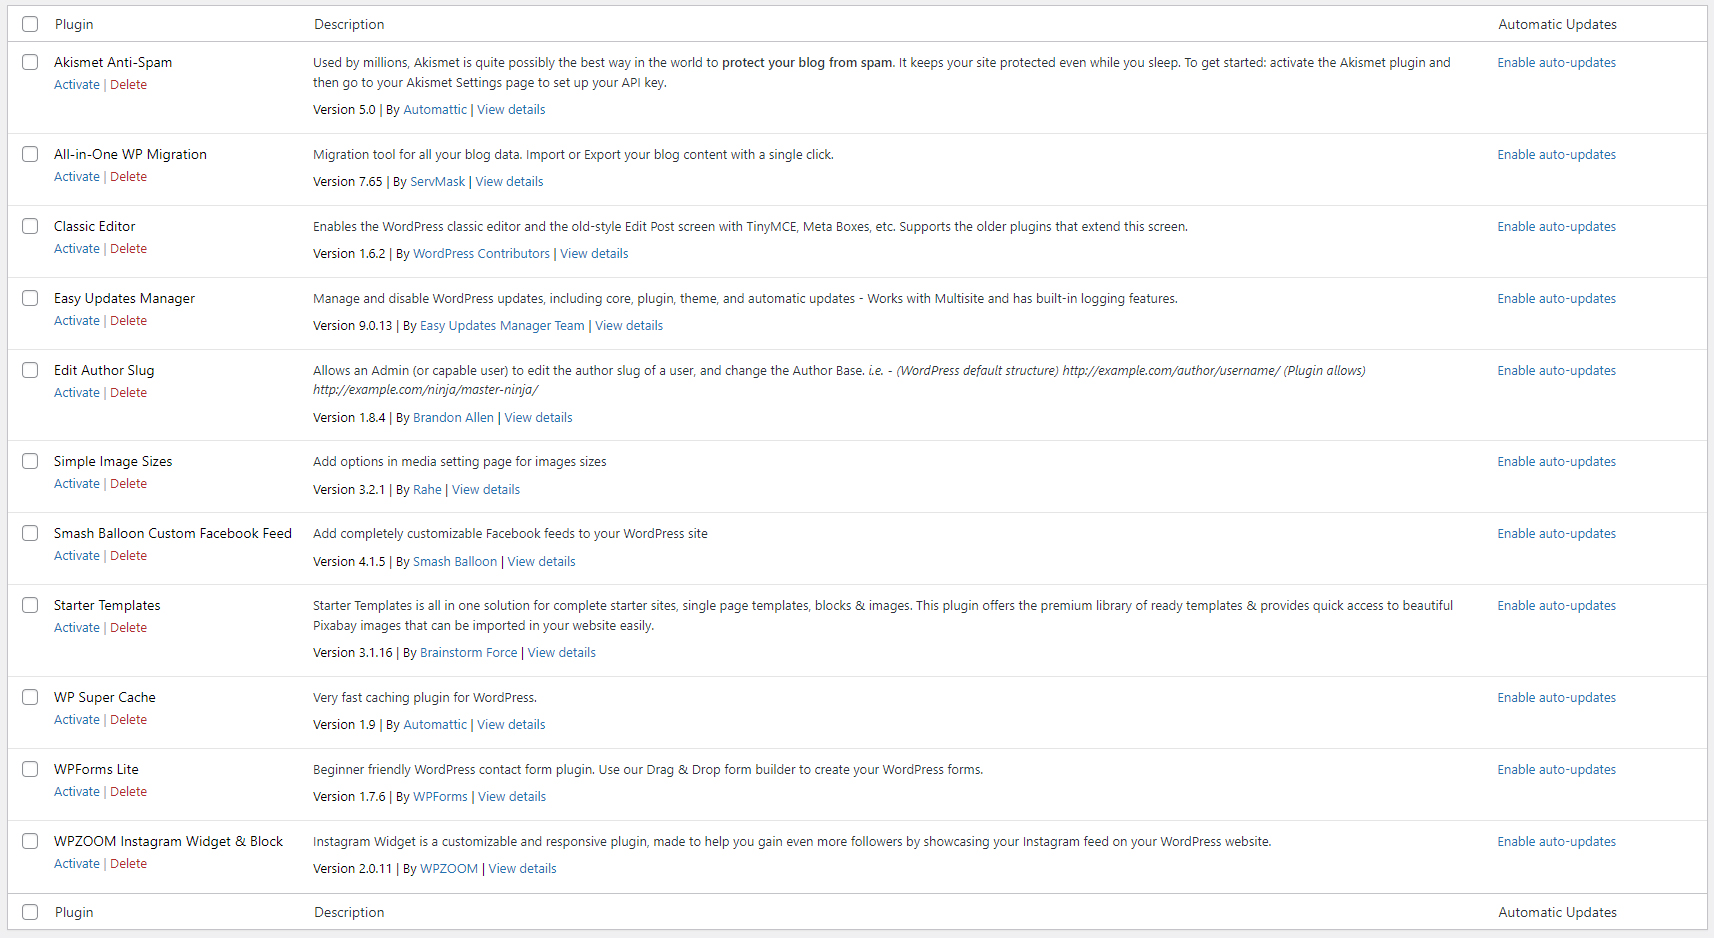
To filter out which plugin is causing the issue, activate the first one and open your website – if the website works just fine, then, deactivate the plugin and activate the next in line. Repeat this process until you find the plugin which prompts the error message.
Once you do, you can simply delete it or troubleshoot developers and see what they can do about the issue.
Method 3: Check your File Permission Settings
The permission settings control who can access and modify your site content. Sometimes these settings can be assigned in such a way that the server blocks you from editing or even browsing your website.
However, there’s a fix to this problem.
Keep in mind that changing your permission settings can cause some unwanted consequences. If you are not feeling confident or comfortable changing them, then you can ask your hosting provider for further support.
Via the ZETTAHOST hosting panel, go to your website’s root directory and right-click on the wp-admin folder, and then select permissions:
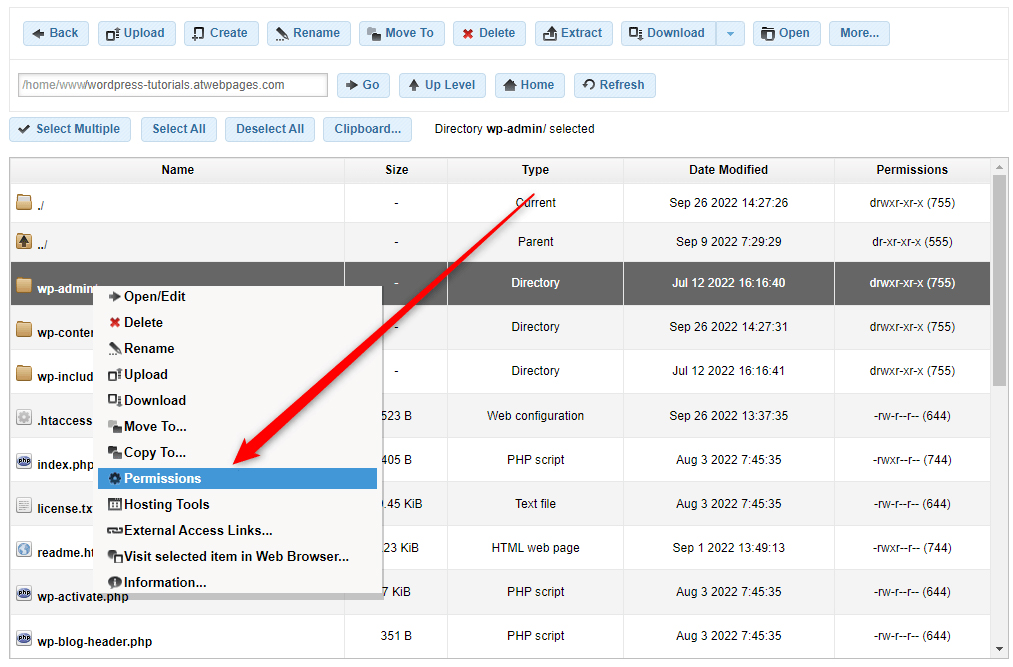
This will open a new window with various settings you can tweak:
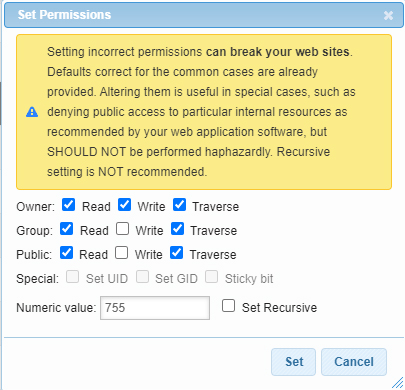
Have a look at the Numeric value field. You should set it to 744 or 755. Also, add a check to the Set Recursive box.
Then save the settings.
Repeat this process for all the folders in your root directory.
Then, do the same with all the files within the root directory. However, when you work with files, set the Numeric value to 644 or 640:
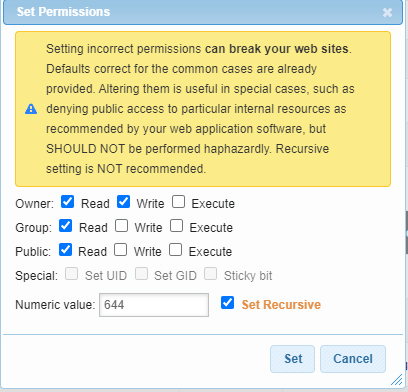
After the process is completed for both files and folders, check whether you can open your website. If you can and there are not any error messages, then you’ve managed to fix the problem.
If you still see the error message, however, proceed with the next method.
Method 4: Contact your hosting provider
If you still see the 403 Forbidden error message across your pages, then it is time to contact your hosting provider. Many providers would be able to help you with fixing the problem right away.
ZETTAHOST is one such provider – with our hosting services you can quickly and easily publish your website on the Internet, while we take care of all the technicalities and maintenance.
We also have qualified tech support available 24/7 and free subscription plans. So, why don’t you give it a try?
Conclusion
403 Forbidden Error is a specific client-side issue with your WordPress site – it indicates that the server doesn’t allow your Internet browser to access the requested resources.
Although this might sound hard to fix, it really isn’t – you only need a few minutes of your time and a few clicks here and there to get your site up and running.
Related: