If you see the Error 401 Unauthorized message on your WordPress website, don’t panic. There are a few quick fixes that can get your pages up and running.
When learning how to build a website, it is highly likely that you will stumble upon various error messages. Fixing these is part of the learning process – it is important to know how to deal with the issues as quickly and efficiently as possible.
This is why in the next paragraphs you will read how to quickly fix Error 401 Unauthorized in your WordPress site.
How to Fix Error 401 Unauthorized in WordPress
Since the error code starts with 4xx, then there’s a problem with the client side in the connection with the server the requested information is stored on.
Error 401 indicates that the browser you are using can’t authenticate itself with the server and therefore is not able to view the server’s data and display what you requested.
There are various reasons why your browser might display the Unauthorized message. Some include:
- There’s a problem with the URL of the page you are trying to reach.
- There are too many cached files that can cause issues across your web pages.
- There can be a problem with the login to the dashboard.
- There can be a problem with a used plugin.
- There can be a problem with a used theme.
- There can be a problem with your hosting provider.
In the following sections, you will read about different methods of fixing the issue.
Before you continue, however, it is advisable to backup your WordPress website, should a technical issue occur.
Method 1: Check for errors in the URL
The simplest fix so far is to check whether you have entered the URL of the web page you want to visit correctly. Also, if you clicked on a permalink, see whether there are some symbols added or removed unintentionally and try to dial in the correct URL.
Although simple, oftentimes this method can resolve the problem with the error message.
Method 2: Clear your Browser Cache
A second easy and useful fix is to clear the browser’s cache – sometimes cached files can result in a series of error messages, so occasionally flushing these files is very beneficial for your website. If you are interested in the topic, read how to clear cache in WordPress.
Depending on the browser you are using, here are the steps to follow:
Google Chrome
Open the browser and go to the three-dot menu on the top right. From there go to More Tools->Clear Browsing Data. Follow the instructions and make sure you delete cached data as well as cookie files.
Mozilla Firefox
In the case of Firefox, open the browser and click on the hamburger menu on the top right. From there select Preferences->Privacy & Security and then select Clear Data. Make sure you delete cached files as well as cookies.
Safari
Open the browser and go to History->Clear History and select “All History”, and follow the instructions.
Microsoft Edge
Open Edge, click the three dots at the top right menu, go to Settings->Clear Browsing Data->Choose What to Clear->select Cookies and Cached files.
After you’ve cleared the files, try opening the website – if you no longer receive the Unauthorized message, then you’ve managed to resolve the issue.
If the message is still on your site, then proceed with the next method.
Method 4: Change your WordPress Password
Sometimes servers can block access to your website, should they notice a brute-force login attack. Should this be the case, change your login password.
To do so, enter the login page (simply add /wp-admin at the end of your website’s domain name) and click on the Lost your password? button:
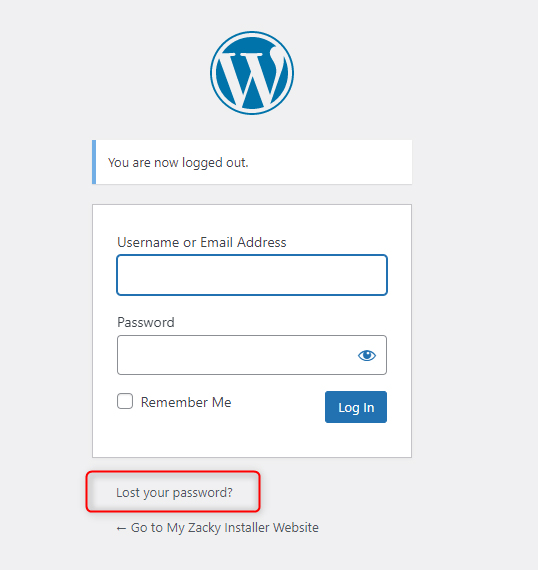
Then, follow the steps – you will receive an email with what you should do next.
If you want to optimize security and avoid issues related to brute-force attacks, then limit login attempts in WordPress. This is an effective way to add one more layer of safety and avoid stumbling upon various issues.
Method 5: Deactivate Your WordPress Plugins
Sometimes the issue can be rooted in some misbehaving plugin you are using on your website.
In the case of Error 401, it is likely that this is a security plugin – especially when one such determines any activity as a suspicious one.
Other times, other types of plugins might simply be incompatible with WordPress. If this is the case, try to update your plugins, update WordPress core as well, and see if this fixes the issue – if not, then proceed with the further steps.
If updating doesn’t do the trick, then the issue might be rooted in a faulty plugin. To see whether this is the case and find the misbehaving one, you should deactivate all your plugins and see whether your pages still display the error message – if they do, then the error is not rooted in your plugins.
If, however, your website functions just fine without displaying any error messages while your plugins are deactivated, then there is a problem with one or several of them.
To see which one precisely is the faulty one, you should deactivate them all and then activate each one individually, launch your site and see whether it prompts WordPress to display the 401 messages. Repeat this step until you activate a plugin that results in your browser displaying Error 401 when opening your WordPress site.
If you can’t do this via the WordPress admin panel, then you should use the ZETTAHOST hosting panel.
To do so, first, log in to your ZETTAHOST hosting panel.
From there go to File Manager->Your Website’s name folder->wp-content and locate the plugins/ folder:
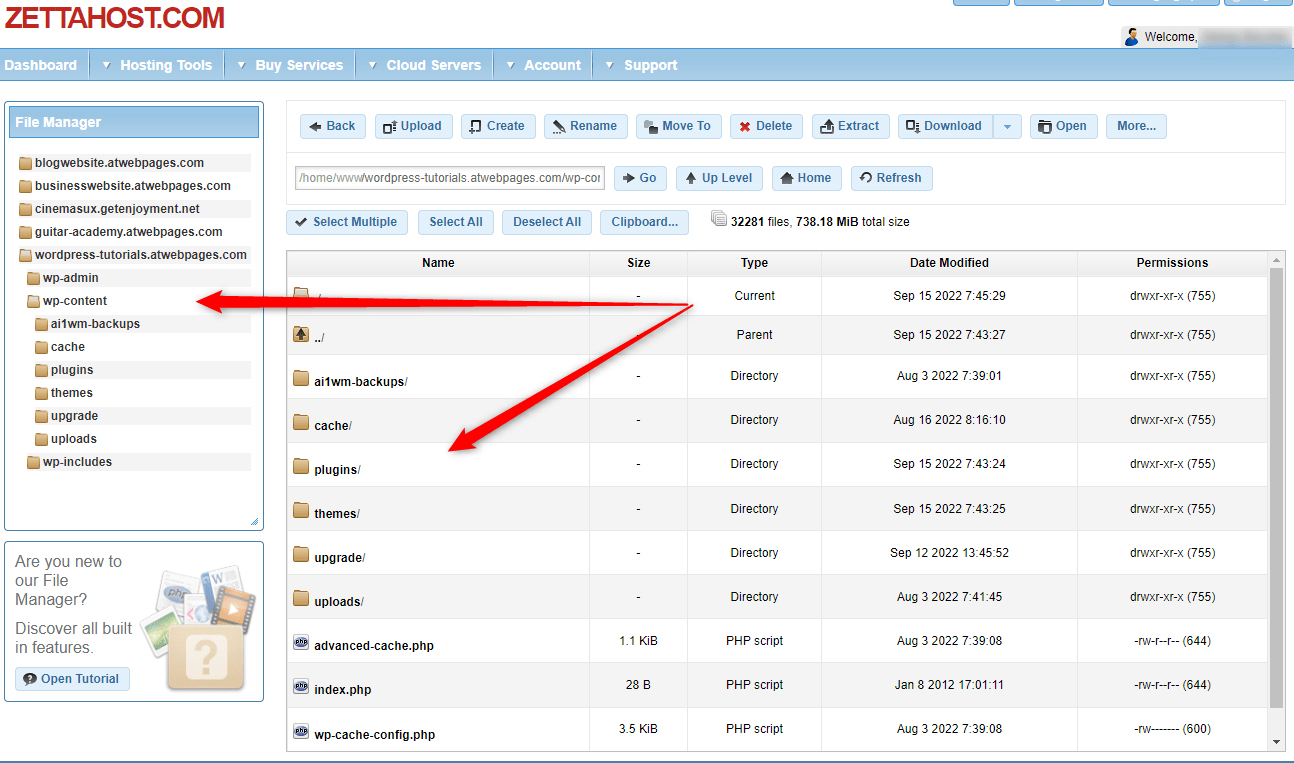
Now, you should rename the folder. The idea is that WordPress looks for this particular folder when loading and activating your plugins, and when doesn’t find a folder with that exact name, it won’t have anything to work with and therefore will deactivate all your plugins.
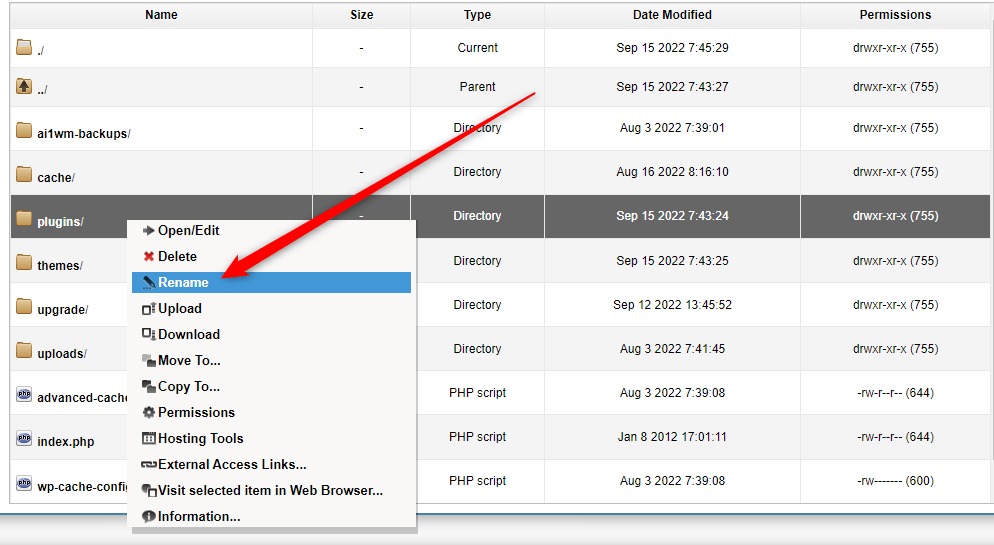
To rename the folder, right-click on it and select Rename. Then, select a new name. For example, Plugins_rename:
Save the changes and try to open your website. If you no longer see the error message appearing on your site, then the issue is rooted in one of the plugins.
If you still see it, proceed with the following steps.
To fix the problem, rename the plugins folder again to its original name and then via your WordPress dashboard activate your plugins one by one and see whether you can open your website – if you can proceed to activate the next one and see again whether WordPress displays the Unauthorized message. Repeat the process until you find the plugin that causes the issue.
Then, delete the plugin. You can also troubleshoot developers and explain the issue.
If the plugins are not the cause of errors, however, proceed with the next suggested method.
Method 6: Switch to a Default WordPress Theme
With this method, it is highly advisable to use a child theme. This will oftentimes save you numerous issues and provide you with a saved copy of your settings and preferences.
Check out how to use child themes in WordPress.
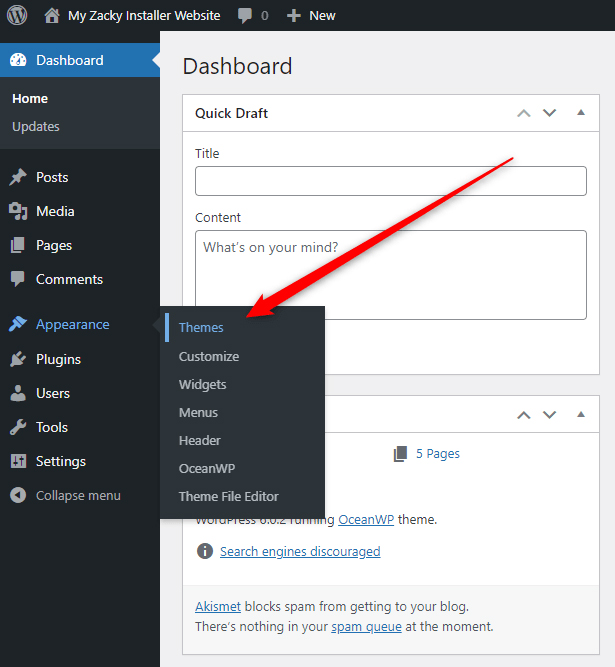
Like the plugins, sometimes your activated theme might be the cause for the error message.
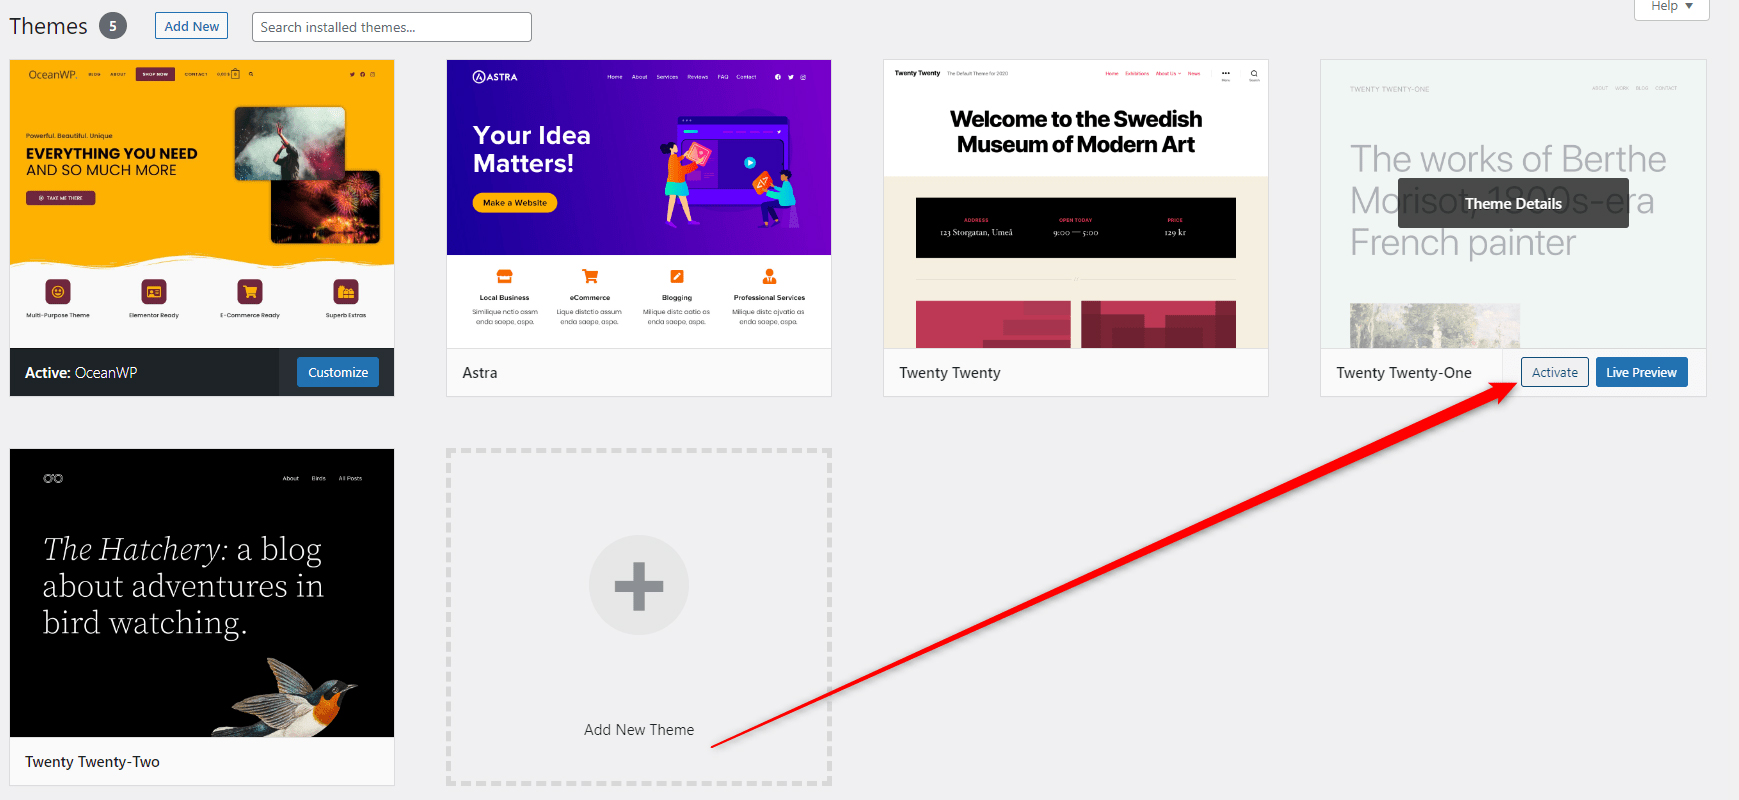
To see whether this is the case, via your WordPress dashboard go to Appearance->Themes:
Then, apply a different theme than the current one, ideally a default one. For example, Twenty Twenty-One:
After that, try to open your website. If you can, then the cause of the issue lies within the previously selected theme.
To fix the issue, you can simply delete the theme and use another one of your choices or troubleshoot developers for further technical support.
Method 7: Change Your Hosting Provider
If you still can’t resolve the issue, then it is time to contact your hosting provider for further details.
There might well be a technical issue that results in WordPress displaying the error code.
If you are not fond of that, however, you should change to a more reliable provider. One such is ZETTAHOST which offers advanced servers with 99.9% uptime, advanced security across all your websites, and 24/7 tech support. Check out our services and don’t hesitate to contact us for more details.
Conclusion
Error 401 Unauthorized can be annoying at first, but luckily, there are a few quick fixes that you can try to resolve the issue.
Usually, all the methods take only a few clicks here and there and no more than a few minutes of your time.
Related: