When learning the WordPress basics, you will eventually create your first web page. This is one of the most exciting moments for any site owner, as it marks the first big step in designing a website. In fact, when learning how to create a WordPress website, you will eventually go through the creation of numerous pages.
When it comes to web pages, There are two main types – static pages and dynamic pages. Static are the ones that display content that is not time-dependent and is not occasionally amended and updated. Examples include your Home Page, About Us, and Contacts. On the other hand, the dynamic pages feature just the opposite –time-bound content that is usually updated with new entries and media content. The blog pages are the perfect example of a dynamic web page.
In the following paragraphs, we will find out how to create pages for both your static and dynamic content.
How to Create a New Page in WordPress
The creation process is straightforward. First, you need to access your Add New Page menu. There are two main ways to do so:
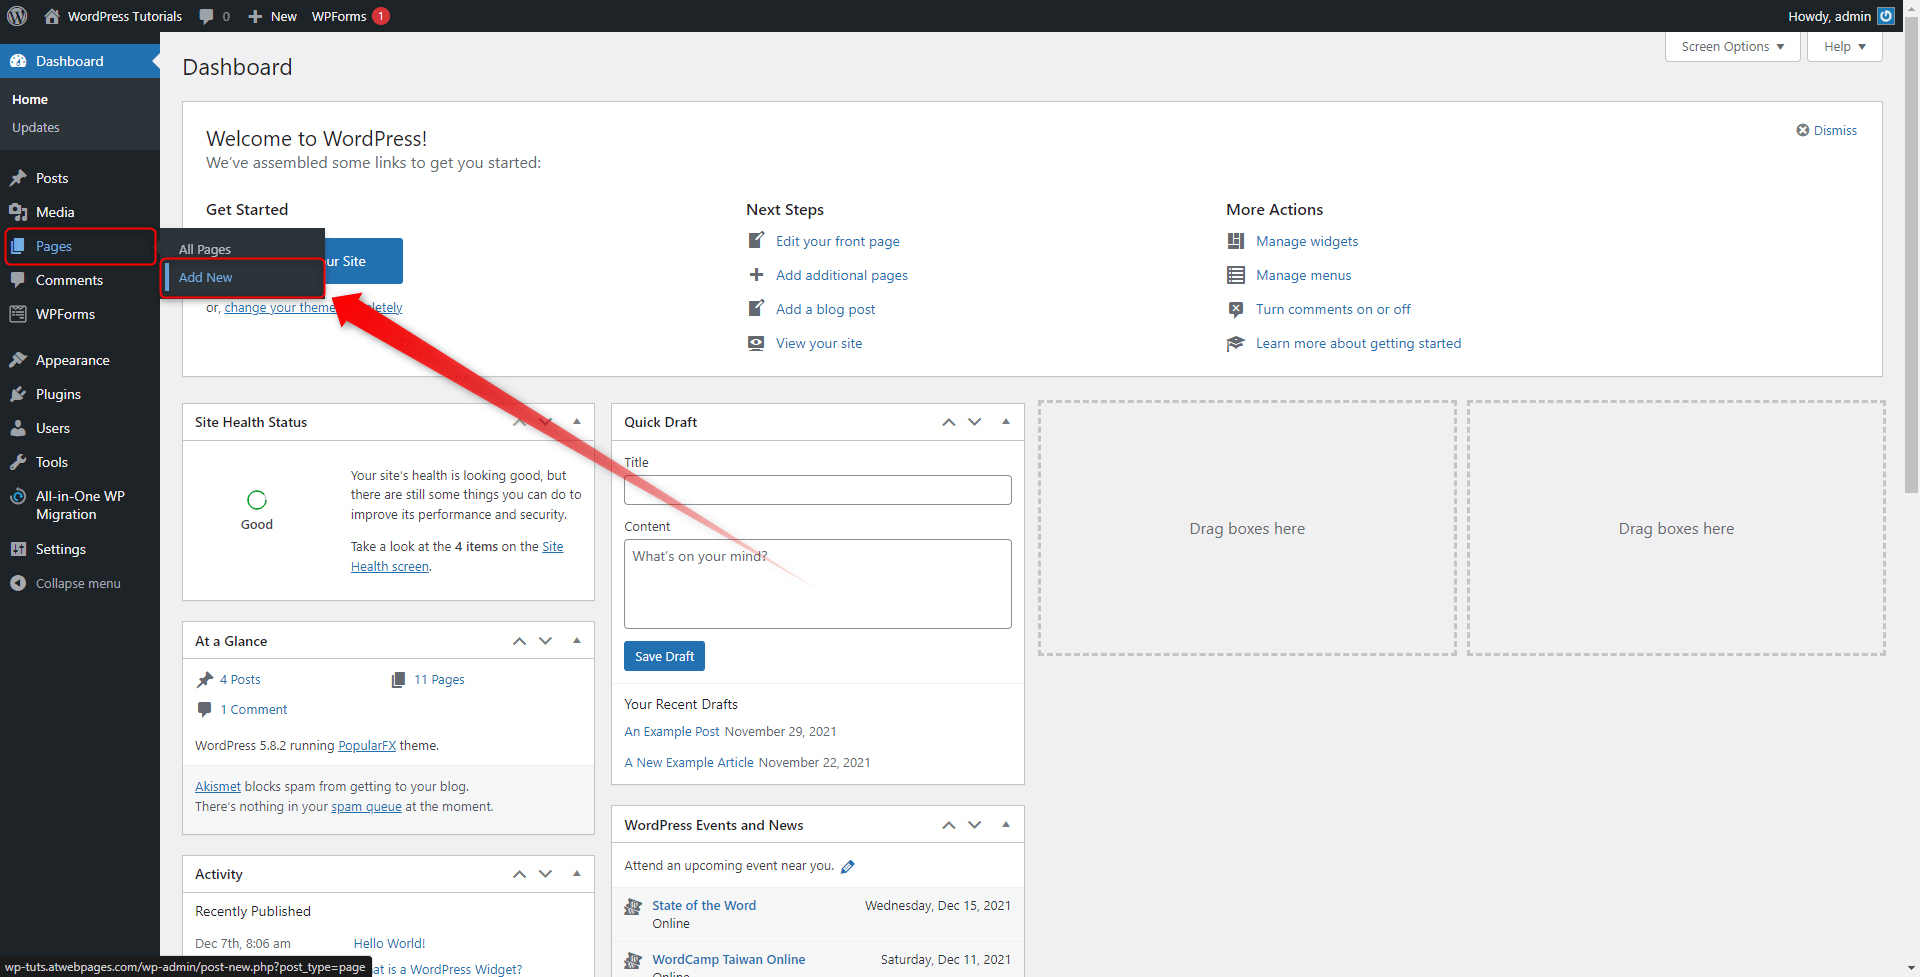
- From the WordPress Admin Panel, head to Pages and click on Add New:
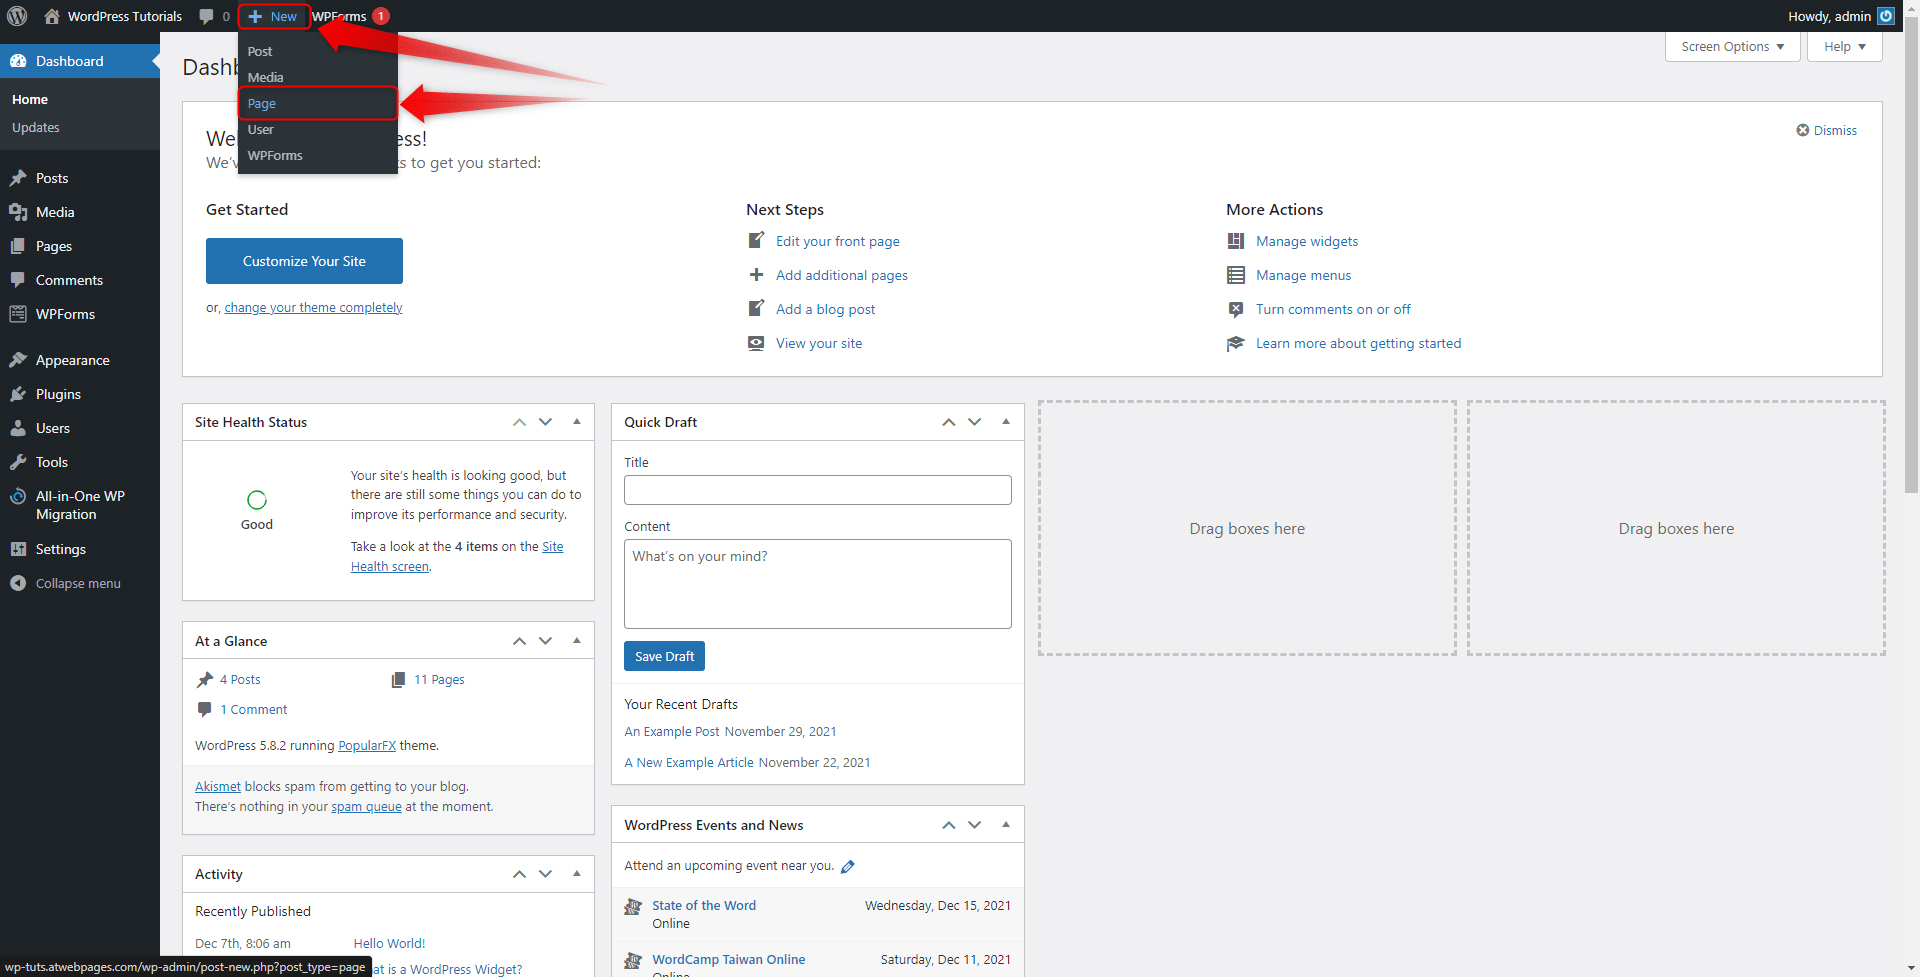
2. You can also access the page by hovering your mouse cursor over the large New button at the top left of the screen and clicking on Page:
Either way will lead you to the New Page creation options:
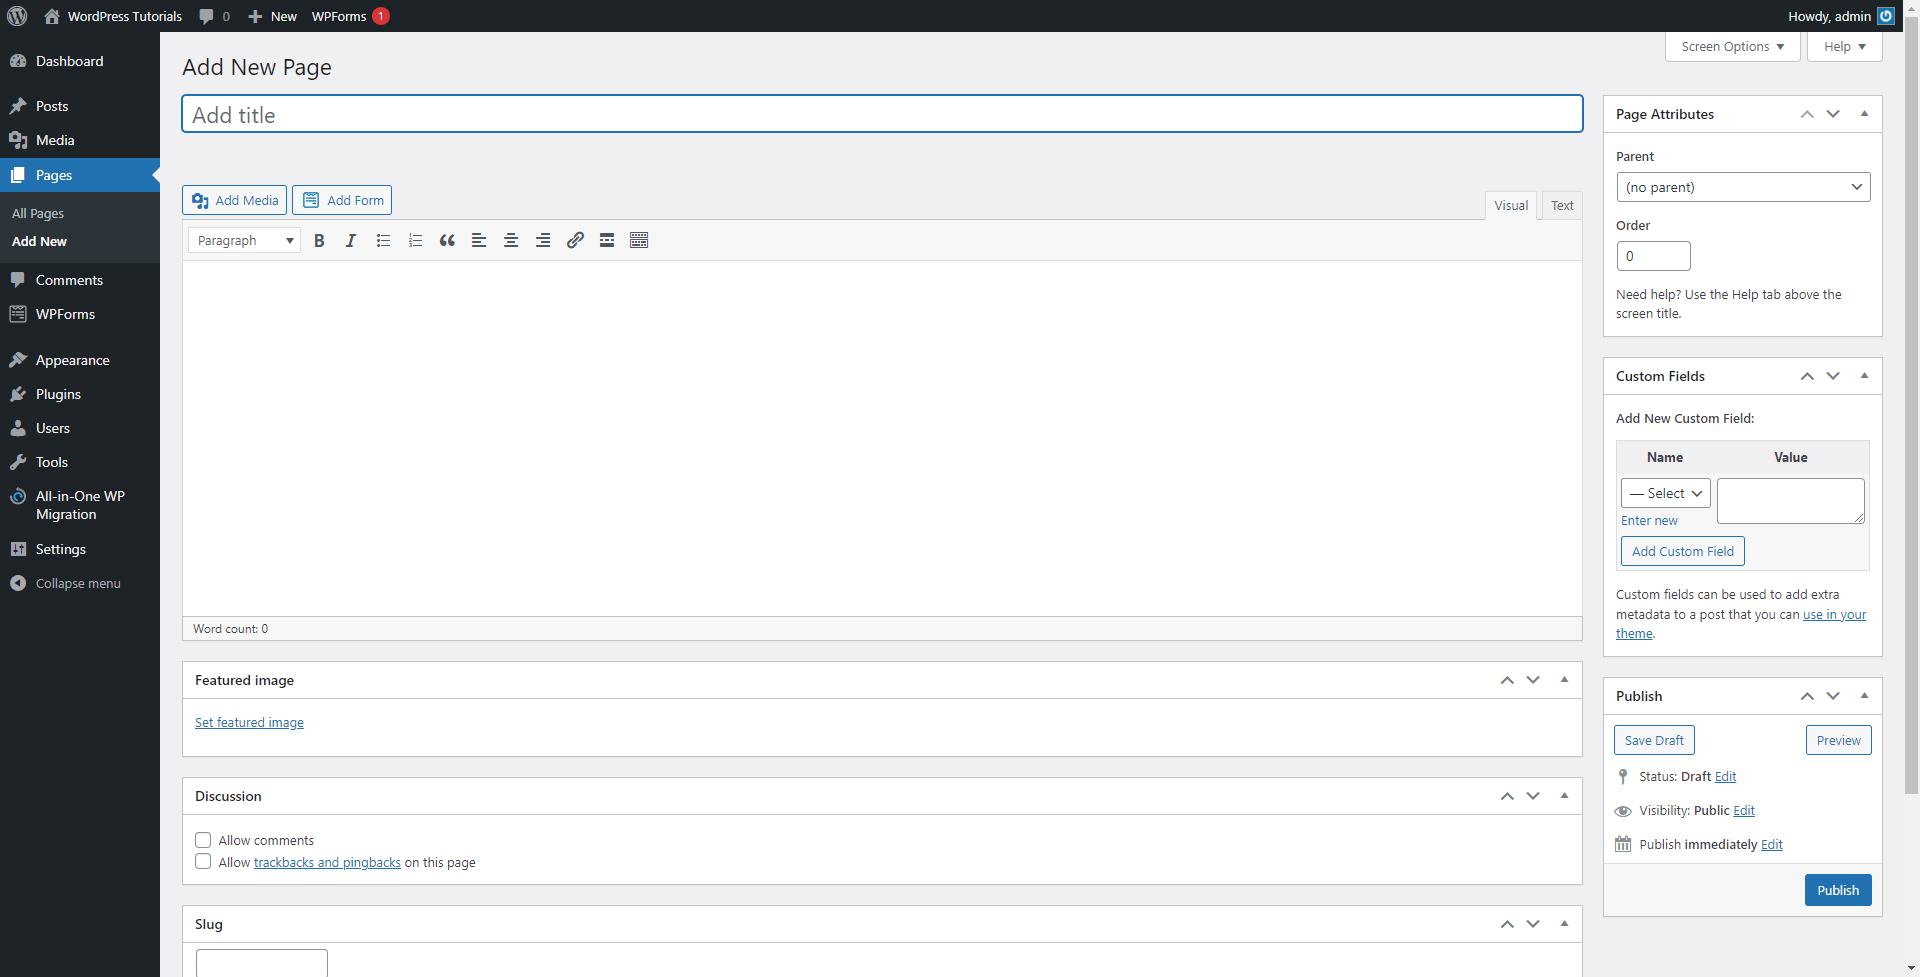
This is the place from which you will add all your new pages. Let’s have a closer look at the page:
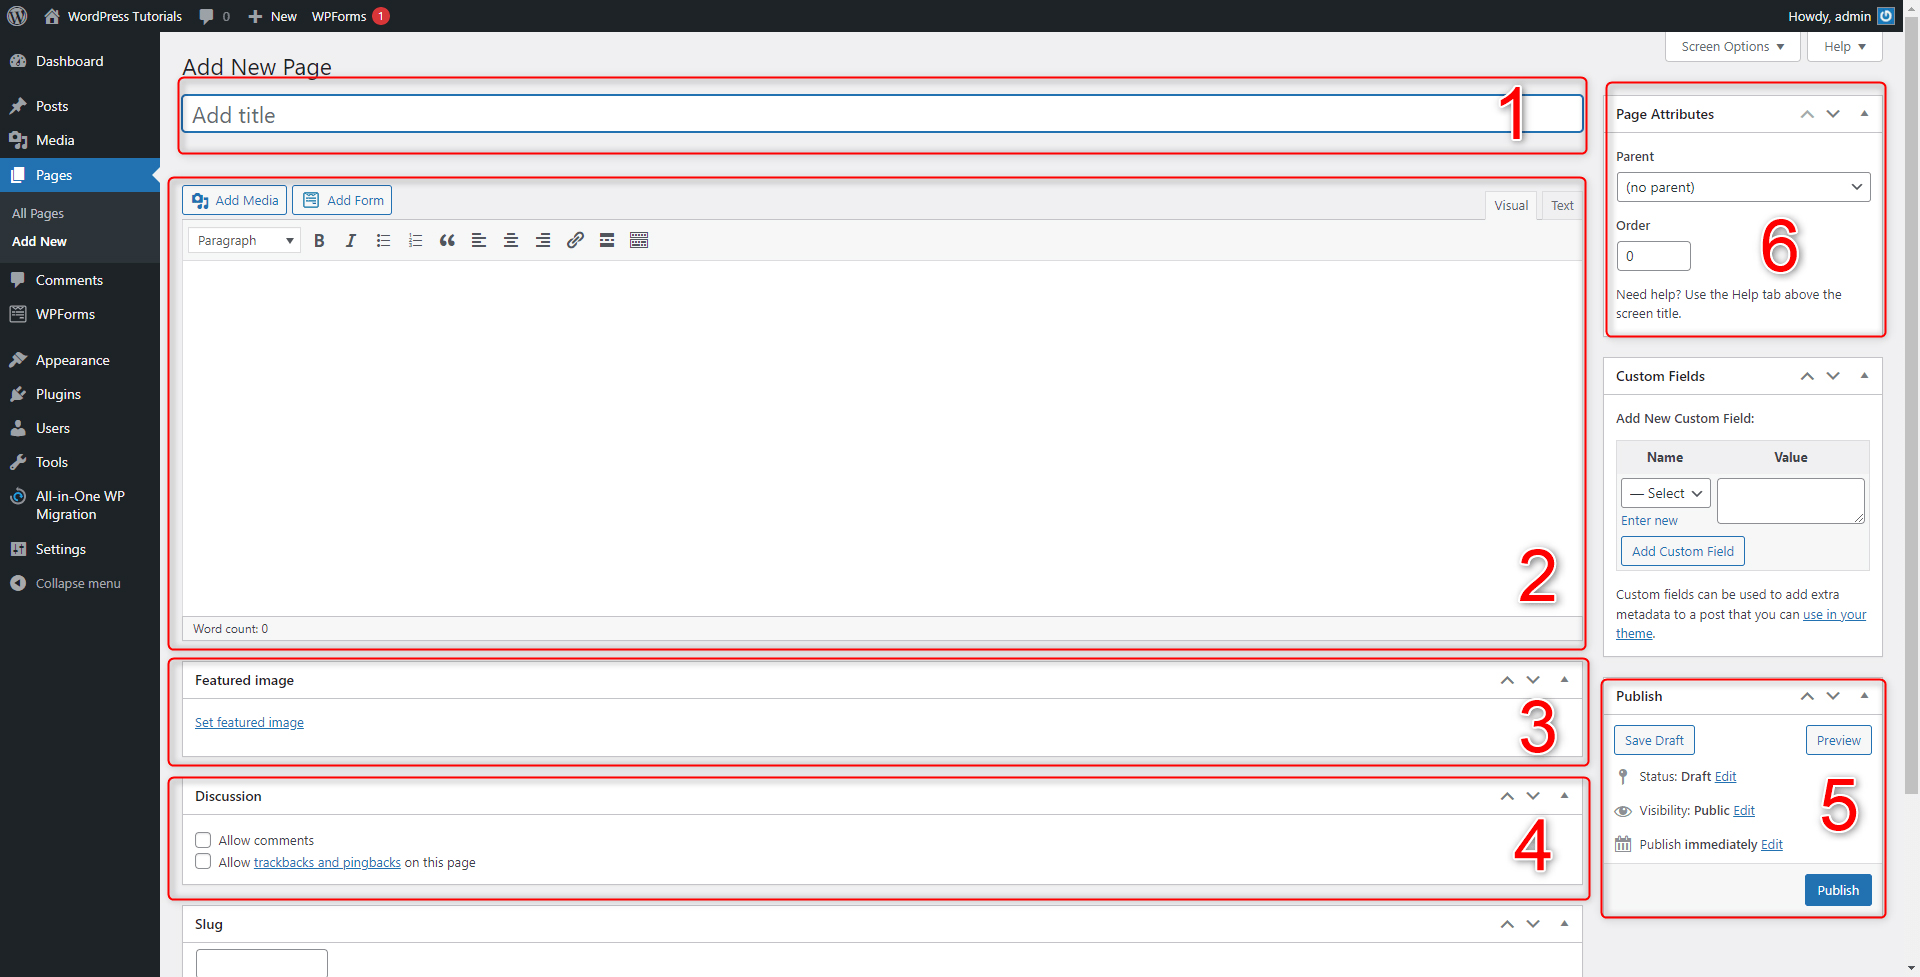
- Page Title – As the name suggests, this is the page’s name. Usually, the title gives a short description of what the content of a certain page is, for example, a Welcome Page, Contacts, Featured Products, Services, Offers, Our Team, and similar.
- Page Body – Here lies the main content of the page. Whether you add text or media, it is always contained in the body area.
- Featured Image – This is a dedicated image that is visible in different situations and gives a visual insight into the page’s content.
- Discussion Tab – this box allows you to make some quick Discussion adjustments – whether the page will support a discussion area and some notification options.
- Publication Options – this box allows you to publish your page or save it as a draft for future editing and publication. The box also contains some handy tools such as scheduling publication and visibility options. For example, WordPress can automatically publish your new page after a given period. Also, you can make it so this page is visible only for other logged-in WordPress users, or exclusively for registered visitors. When you have finished adding and editing your content, don’t forget to click on Save Draft or Publish, as this will also save your changes!
- Page Attributes – the tool allows you to add a new page to an already existing parent page. This means that the parent page contains the child page and reveals it when a visitor opens the parent page. For example, in your “About us” parent page, you can include the “Our Story” subpage and another one named “Our Goals”. This approach is very useful and handy, as it gives one more layer of conveniently distributing your site content.
Take your time and add some content. Here are some tips you can follow:
- Think of the page’s goal and reason to exist – contemplate the idea of why you need a new page and what would its content be like. Avoid creating new pages and additional content for the sole sake of abundance. What makes a website good is that it is effective at what it does without including unnecessary information.
- Your main content should resemble the page’s heading. Although this sounds obvious, it is easy to do the opposite. Do not add text and media that would be better fitting on other pages. Your visitors would use your page names for orientation and would expect to find precisely what you’ve said you would include with your heading and nothing more.
- Don’t add excessive amounts of content. Too much information can be overwhelming and not useful for your potential visitors, so save the bulky texts for dedicated blog posts. When it comes to your static pages, try to include only as much information as needed.
- Don’t add too scarce content – Contrary to the previous point, if you add too few details, your page can become as ineffective as adding way too much. Try to find the sweet spot and find the balance between too much and too scarce text and media for your pages.
- Avoid using stock media – stock media never looks good at all in the eyes of a visitor, so avoid it. On the other hand, using site-exclusive media can drastically enhance its aesthetics and ensure some positive feedback from visitors. This derives from the fact that the majority of people get impressed by exclusive visuals and also get bored by default and basic media.
- Avoid using puzzling terminology – When it comes to text, use straightforward phrases and sentences that are always on point. In the majority of cases, users browse the Internet to find quick and direct answers to what concerns them at each given moment. It is unlikely that they would stay long on your site and try to decipher your convoluted text blocks if you do not answer their questions plainly and directly. If you wish to use terminology, however, keep it for a dedicated article.
If you are interested in the topic of homepages, then definitely check out the rest of our dedicated articles:
- How to Set Up a Homepage in WordPress
- How and Why to Set Up a WordPress Blog Page
- How to Add Your WordPress Homepage to the Main Menu
- How to Use Password Protection for Your WordPress Pages
Conclusion
In most cases, website content is logically distributed among several connected web pages. The number of these pages may vary between several to several hundred. Regardless of how many pages you wish to include on your site, it is important to understand how to create and manage them. In fact, setting up new pages is one of the things you need to do right after you’ve installed WordPress.
Creating new pages is only the beginning of the great journey in the digital world. The next step is to ensure security and safety for your online visitors. To do so, use the ZETTAHOST SSL Certificates and encrypt your data today!
Related: