Error 505 Version Not supported might appear in various situations when working on your WordPress website. This kind of error can be very confusing and can show when least expected. However, the good news is that there are various fixes you can apply right away to get your website up and running in no time.
How to Fix Error 505 Version Not Supported in WordPress
Error 505 Version Not Supported is a type of HTTP status code that indicates a certain problem in the communication between an Internet browser and web servers. Similar issues are HTTP Error 500, Error 501 Not Implemented, Error 503 Service Unavailable, and Error 504 Gateway Timeout.
Usually, status codes beginning with the number 5 indicate that the problem lies somewhere on the server side. In the case of Error 505, we have one more clue what might be wrong – the name of the error code ends in “Version Not Supported”. This means that the client’s request uses an HTTP version that the server doesn’t recognize. In the majority of cases, the problem is that the web server uses an older version of HTTP.
Sometimes, however, the problem might be on the client side – for example, you can use an Internet browser that is not updated to the HTTP version of the server it tries to connect with and therefore displays an error message.
Regardless of where the problem is, in the following paragraphs you will read how to fix it with a few simple clicks here and there.
Method 1: Check the requested URL
This is by far the simplest and easiest to fix the issue. Double-check the URL you are typing in your Internet browser to see whether there are some typos or other errors such as space between symbols. Once you make sure that you have typed in the URL correctly, try to open the webpage it leads to and see whether the error message is still present – if it isn’t then you’ve just managed to fix the problem.
If the error code is still present, despite the fact you’ve entered the URL correctly, then the error lies elsewhere. Continue with the next method.
Method 2: Update your Internet Browser
As mentioned, sometimes, your preferred web browser can use an older version of HTTP, which can lead to many problems, including prompting the 505 Error message.
To find out whether this is the problem, check if you use the latest version of your web browser, and install any new updates if needed. Then try to open the web page one more time.
If you still can’t do so, then, try using a different browser – maybe the problem is somewhere within the core of your preferred one. Try out different browsers and if you can open the web page with any of them – then the problem really lies within the one that can’t open the site.
In this case, you can permanently switch to a better-functioning Internet browser, or you can contact the support team to see whether they can do something about the problematic one.
If no browser can load the requested page and all of them display the Version Not Supported message, then the problem lies elsewhere – continue with the next suggested method.
Method 3: Clean your Browser Cache
Sometimes cached files can cause various problems and make your browser work slowly, or not function at all. To find out whether this is the case, you should clear the cache and try loading the requested page again.
If you are not familiar with the topic, then find out what is WordPress cache and how to clear the cache.
Once you’ve done so, try loading the page one more time. If you still receive the Version Not Supported message, then the problem is not with cached files, but somewhere else. Continue reading.
Method 4: Check for Malfunctioning WordPress Plugin
Sometimes a poorly coded plugin can cause a lot of trouble on your WordPress website. If you have noticed that the Error 505 message appears after a recent plugin installation or update, then chances are that this very same plugin is causing the trouble. Should this be the case, then try out the following solution.
To find out which plugin exactly is causing the trouble, follow these steps:
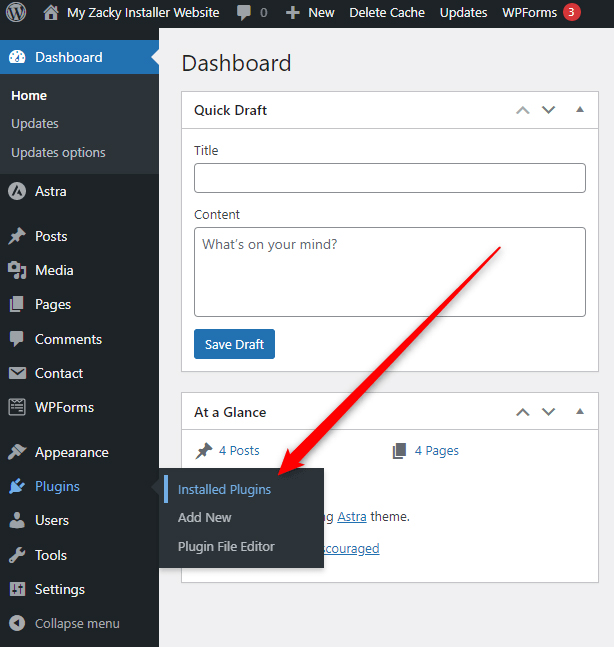
- Open the WordPress Admin Panel and from there head to Plugins->Installed Plugins:
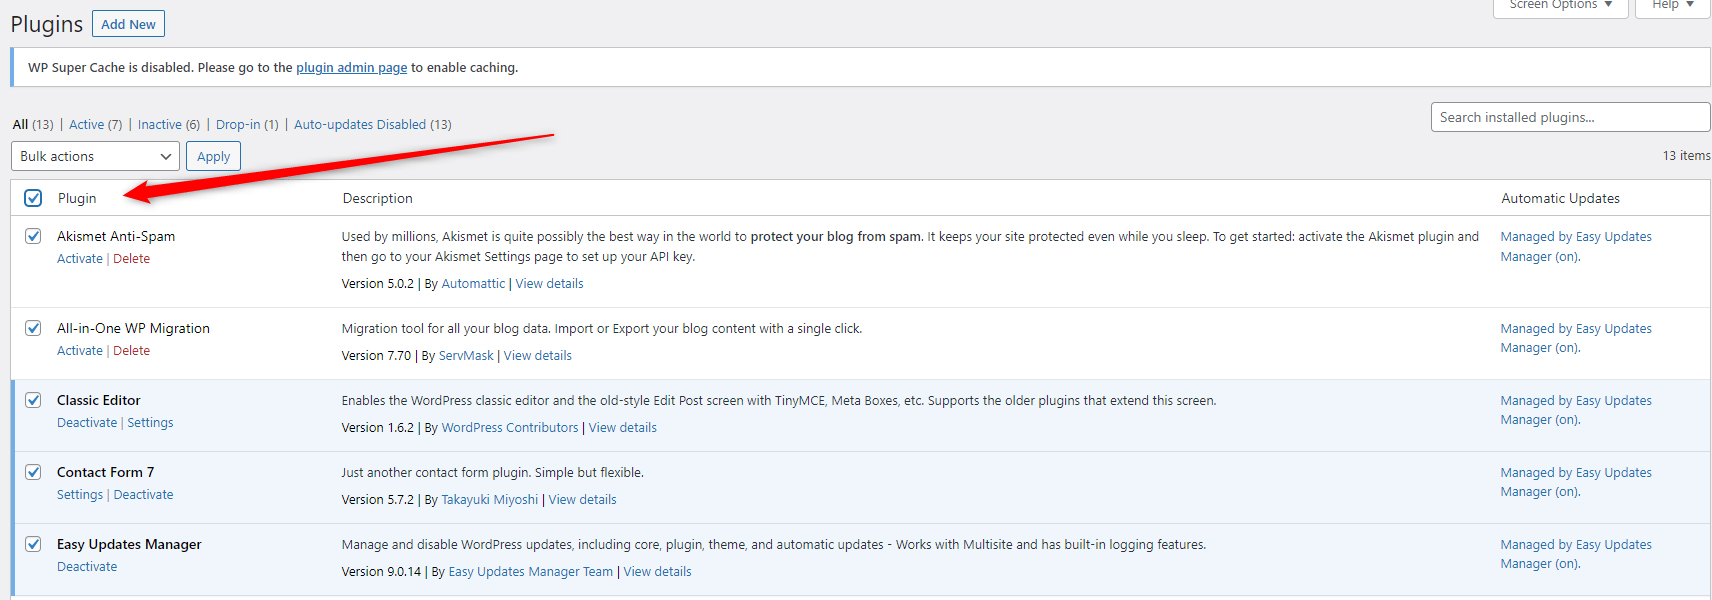
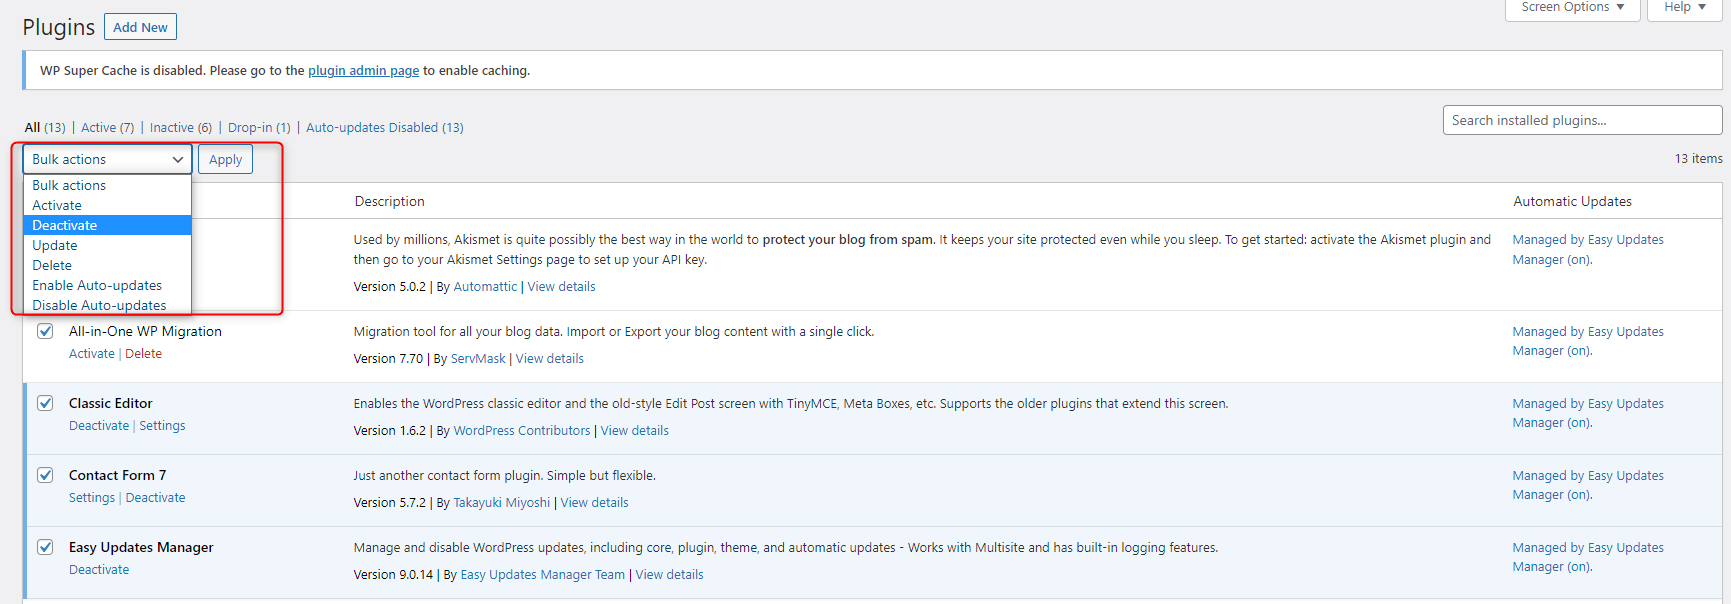
- Then deactivate all your installed plugins. The fastest way so far is by bulk selecting them and then using the Bulk Deactivate button:
- Now that all plugins are deactivated, open your website. If you no longer see the error message, then it is likely that some of the deactivated plugins are causing the issue.
- Via the WordPress dashboard, go back to the list of installed plugins (Plugins->Installed Plugins) and activate the first one, while leaving the rest deactivated. Once you do so, open your website.
- If your website works just fine, and you don’t see the error message, go back to the list of installed plugins, deactivate the first one, activate the second one, and open your website again.
- Repeat this process until you activate a plugin that prompts the Error 505 message when you open your website. Once you locate it, delete it, or contact developers for further assistance.
Method 5: Contact your Hosting Provider
Given the specific nature of Error 505 Version Not Supported, it is a good idea to contact your hosting provider’s technical support team for further assistance, if nothing else works.
Usually, tech support teams are quick to respond and knowledgeable enough to inform you about the nature of each technical problem and fix it in no time.
A provider with a reliable support team is ZETTAHOST. Along with a wide range of hosting services, we offer the help of a skilled team that is always available. If you are still wondering whether our services are the right ones for your case, you can always try our free web hosting and benefit from numerous features for free.
Conclusion
Although Error 505 Version Not Supported looks like a daunting problem, it can quickly be fixed. There are various methods you can use to fix it – each of the 5 methods we shared is easy to apply and can quickly get your WordPress website up and running.
Related:
- What is a WordPress Plugin?
- How To Fix 400 Bad Request Error in WordPress
- How to Fix Error 401 Unauthorized in WordPress
- How to Fix Error 403 Forbidden in WordPress
- How to Fix Error 404 in WordPress
- How to Fix Error 405 Method Not Allowed in WordPress
- How to Fix Error 406 Not Acceptable in WordPress
- How to Fix Error 407 Proxy Authentication Required in WordPress